16
Timer Operations
Setting the Timer
Using Daily Timer, you can wake up with your favorite
music.
• You can store three Daily Timer settings; however, you can
activate only one timer at a time.
• To exit from the timer setting, press TIMER as required.
• To correct a misentry during the process, press CANCEL.
You can return to the previous step.
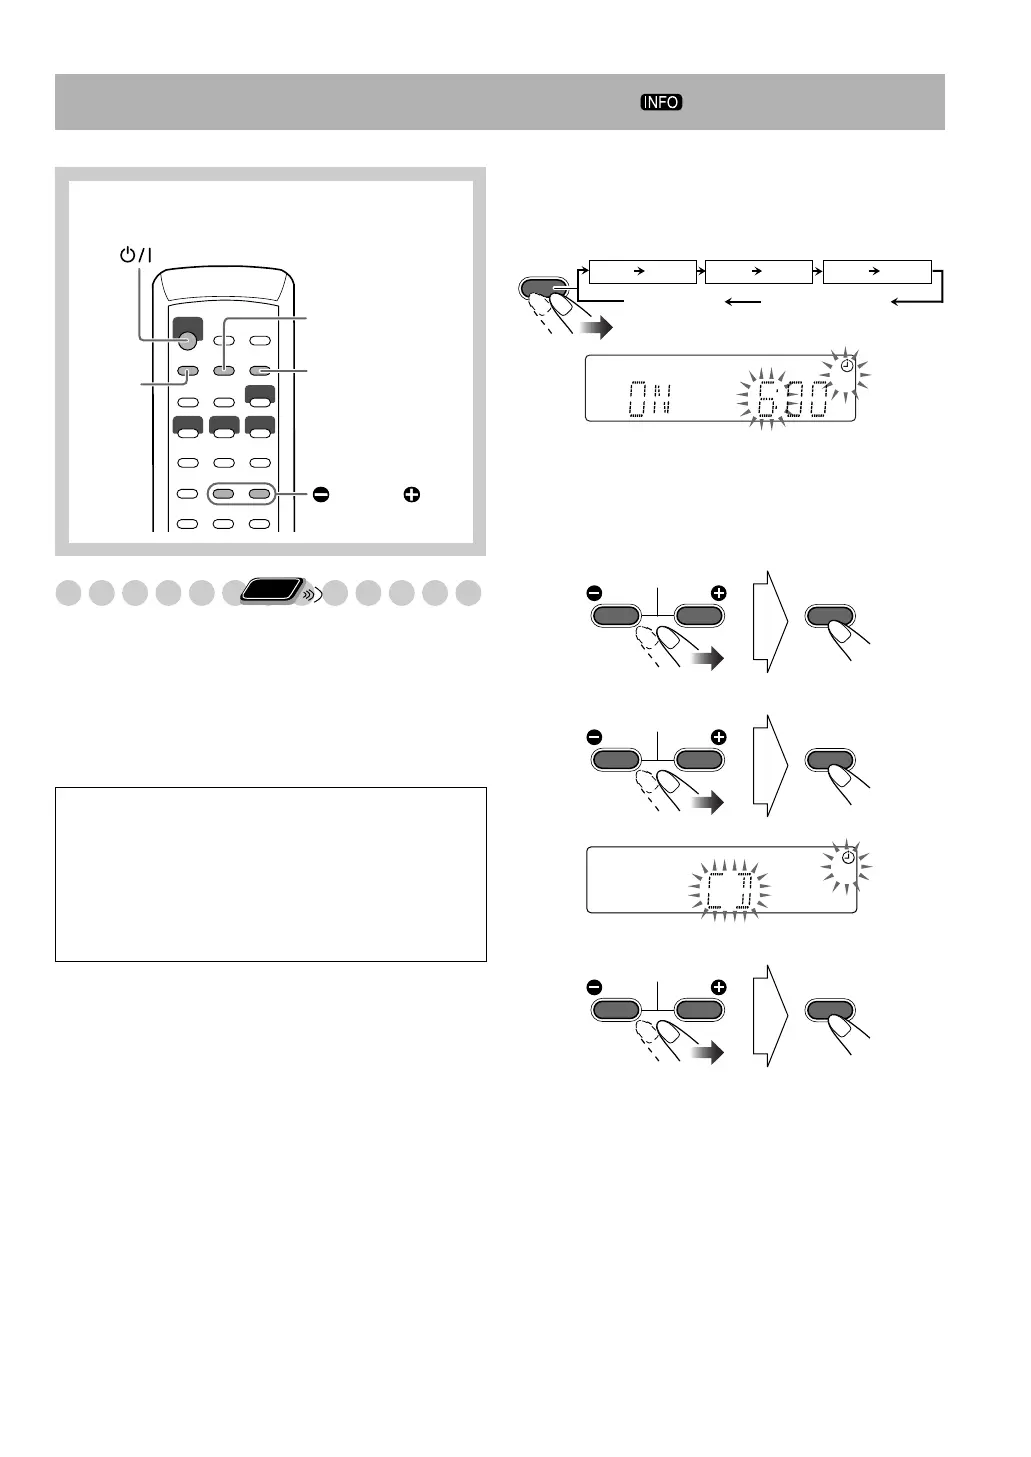
1
Select one of the timer setting modes you want to set—
Daily 1 ON time, Daily 2 ON time, or Daily 3 ON time.
• When the clock has not been adjusted, pressing TIMER
makes the system enter the clock setting mode.
2
Make the Daily timer setting as you want.
1
Set the hour then the minute for on-time.
2
Select the playback source—“TUNER,” or “CD.”
3
Select the volume level.
• You can select the volume level (“VOLUME 1” to
“VOLUME 40” and “VOLUME – –”). If you select
“VOLUME – –,” the volume is set to the last level
when the unit has been turned off.
Daily Timer initial settings when shipped from the factory
• Daily 1: ON Time (6:00)/Source (TUNER)/
Volume level (8)
• Daily 2: ON Time (7:00)/Source (TUNER)/
Volume level (8)
• Daily 3: ON Time (10:00)/Source (TUNER)/
Volume level (8)
CANCEL
SET
STANDBY/ON
CLOCK/
TIMER
PRESET/GROUP/PTY
DOWN,UP
Remote control
Remote
ONLY
CLOCK/
TIMER
QP Link
S.TURBO
1
Ex. When Daily Timer 1 setting mode is selected
Daily Timer 1 Daily Timer 2 Daily Timer 3
Canceled Clock setting
(see page 11)
ON (Time)ON (Time)
DAILY 1
ON (Time)
DAILY 2 DAILY 3
SET
DOWN
PRESET/GROUP/PTY
UP
SET
DOWN
PRESET/GROUP/PTY
UP
QP Link
S.TURBO
1
SET
DOWN
PRESET/GROUP/PTY
UP
Continued on the next page...
UX-G30[B].book Page 16 Wednesday, December 28, 2005 5:04 PM


 To Next Page