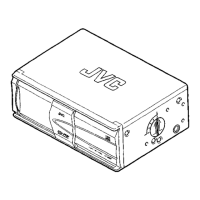
CH-X1500
1-18
2.5.5 Mounting the front slider and rear slider (See fig.45, 46)
(1) Position the unit with the rear side facing down, then rotate
the third gear in the direction of the arrow (clockwise) until
the lift arm comes to the position at which the holes are ex-
posed.
(2) Mount the front slider from the top.
Rotate the third gear counterclockwise until the hole of the
slider is lined up with the right hole of the stud.
(3) Attach the E-washer on the shaft.
(4) Position the unit with the front side facing down, then
mount the rear slider.
Check that the r, s and t positions are correctly mounted
as shown in Fig. 46.
(5) Rotate the third gear in the direction of the arrow (counter-
clockwise) until the lifter unit is at the top position.
Fig.45
Fig.46
Psition so that
the stud and
right hole
are lined up.
Front slider
E-washer
Stud
Lift arm
Rotate until the holes
are lined up.
Set the holes
are exposed.
rst
Lifter unit
Rotate the third gea
to move the slider.
w
w
w
.
x
i
a
o
y
u
1
6
3
.
c
o
m
Q
Q
3
7
6
3
1
5
1
5
0
9
9
2
8
9
4
2
9
8
T
E
L
1
3
9
4
2
2
9
6
5
1
3
9
9
2
8
9
4
2
9
8
0
5
1
5
1
3
6
7
3
Q
Q
TEL 13942296513 QQ 376315150 892498299
TEL 13942296513 QQ 376315150 892498299
http://www.xiaoyu163.com
http://www.xiaoyu163.com

 Loading...