ENGLISH
DEUTSCH
FRANÇAIS
NEDERLANDS
CASTELLANO
ESPAÑOL
ITALIANO
DANSK
SUOMI
SVENSKA
NORSK
ÓÒÔÔËÊÁ
ČEŠTINA
POLSKI
MAGYAR
PORTUGUÊS
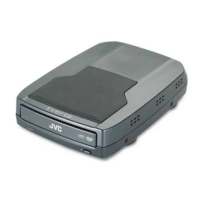
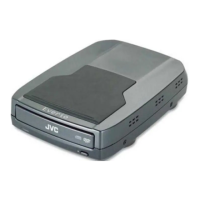
CU-VD10
U/E/ER/EK/AA/AG/AC/AS/KR/TW
LYT1571-001A
For Customer Use:
Enter the Model No. and Serial
No. (located on the bottom of the
burner) below. Retain this
information for future reference.
Model No.
Serial No.
DVD Burner
INSTRUCTIONS
DVD-Brenner
BEDIENUNGSANLEITUNG
Graveur de DVD
MANUEL D’UTILISATION
DVD-brander
GEBRUIKSAANWIJZING
Grabador de DVD
MANUAL DE INSTRUCCIONES
Masterizzatore di DVD
ISTRUZIONI
DVD-brænder
INSTRUKTIONSBOG
DVD-tallennin
KÄYTTÖOHJE
DVD-brännare
BRUKSANVISNING
DVD-brenner
BRUKSANVISNING
²−¦¹ŞŁ˛ćğšš=³¹²×þй²Łþ=
ŠÝČ=Š¦¹ðþŁ=asa
ÊÎÔÒÓ ÒËÙÊ˝=ÌÏ=˚ËÔÌÈÒfiÒfiÙÊÊ
Vypalovací jednotka DVD
PŘÍRUČKA K OBSLUZE
Nagrywarka DVD
INSTRUKCJA OBSŁUGI
DVD-író
HASZNÁLATI UTASĺTÁSA
Gravador de DVD
INSTRUÇÕES
DVD 버너
사용 설명서
DVD 刻录机
使用说明书
DVD 燒錄器
CU-VD10.book Page 1 Thursday, February 9, 2006 6:09 PM