10 (No.PA056<Rev.002>)
2.4 FUNCTIONS
2.4.1 LED INDICATIONS
The LED operations are as follows.
NOTE:
When the unit is on standby in "ECO Mode" (LED: STANDBY/
ON lamp is off), press the "STANDBY/ON" button on the re-
mote control to cancel the standby state (LED: STANDBY/ON
lamp lights up in red). Press "STANDBY/ON" button the sec-
ond time to start up. When the unit is on standby in "ECO
Mode", press the unit power button once to start up.
STAND-BY LED
Light on (Red): Standby mode
Light on (Green): While activating the LD
Blinking (Green): "Hide" on
Blinking (Red): Cool Down mode
Blinking (Red/Green): Adjust mode
All Off: During image projection
LIGHT LED
Light on: Duaring Software update or Light source lifetime over
Extinguished: Warning mode
WARNING LED
Light on: Duaring Software update or WARNING mode
Extinguished: Warning mode
Note:
Please refer to the TROUBLESHOOTING section for the de-
tails of warning indications by LED.
2.4.2 OPERATION BUTTON LOCATION
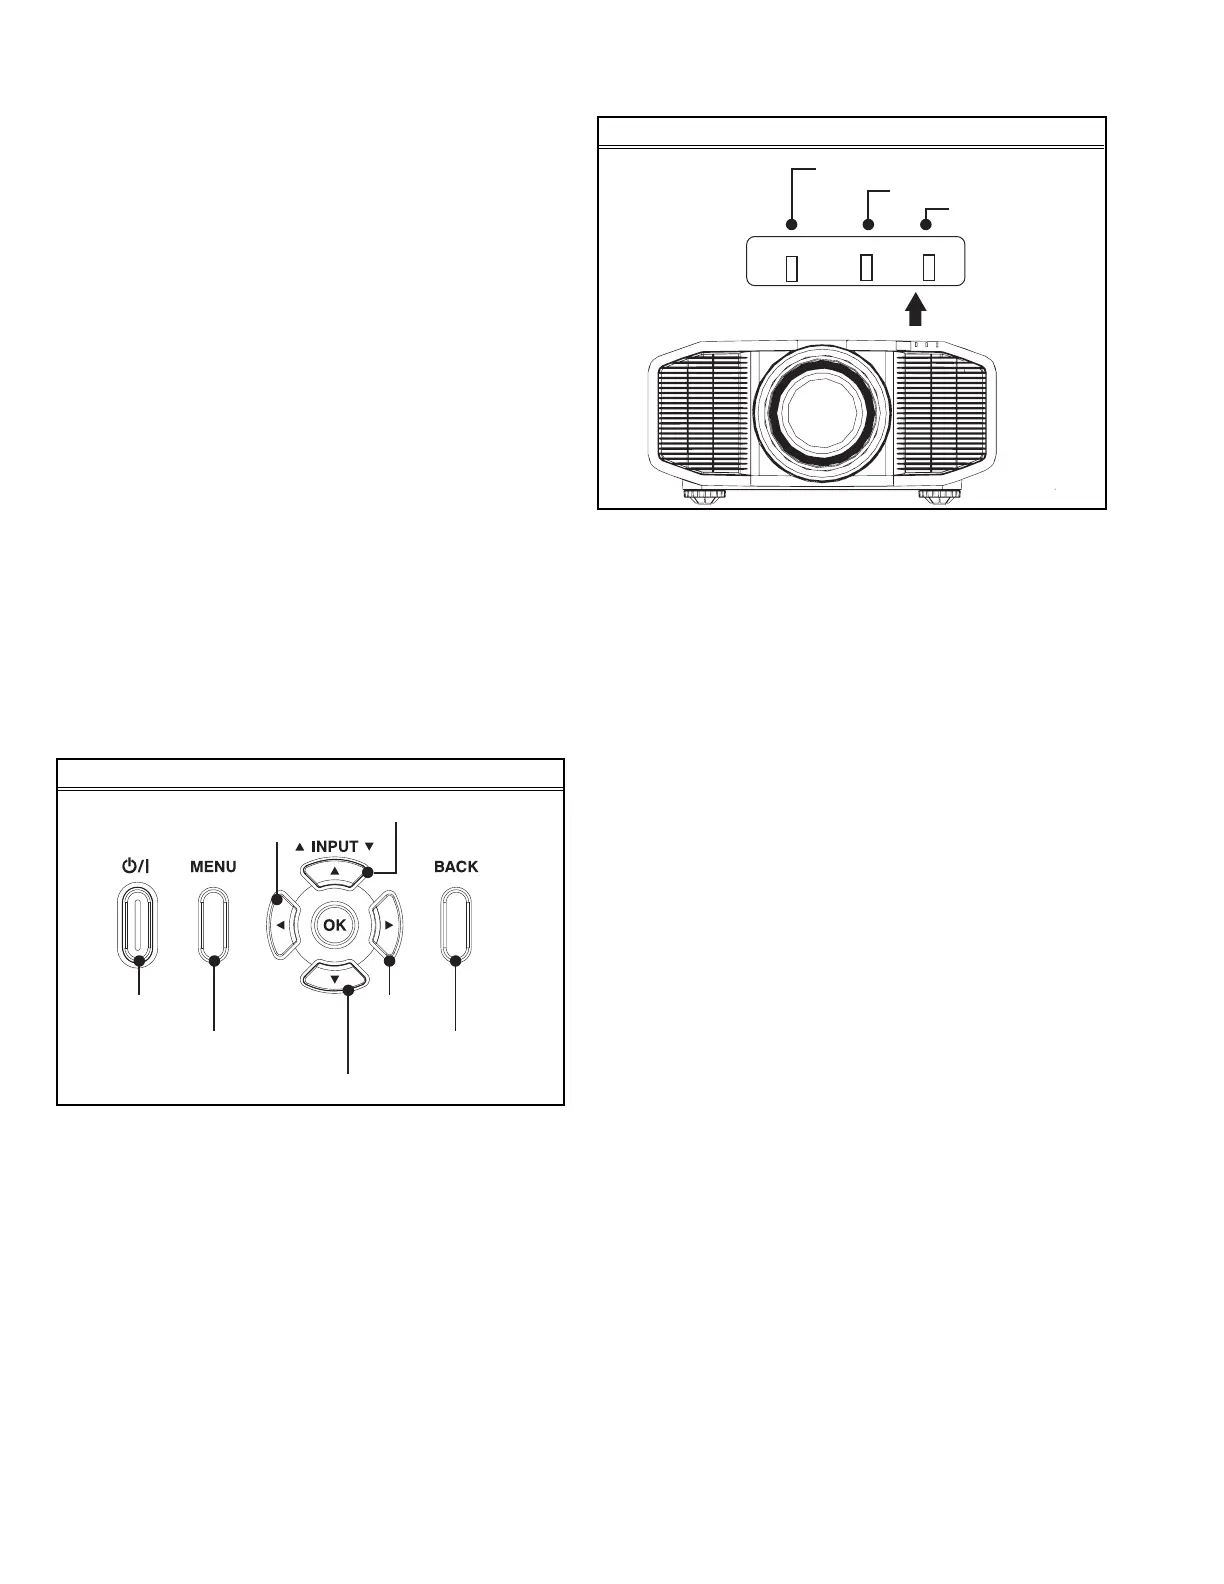
2.4.3 LED LOCATION
2.5 SERVICE MENU
The service menu contains items not ordinarily needed by the us-
er. Use these as necessary during service.
2.5.1 ENTER
(1) No menu shown.
(2) Press the [OK] button.
(3) Within press the [] button.
(4) Within press the [] button.
(5) Within press the [OK] button.
(6) Within press the [BACK] button.
(7) Within press the [OK] button to display the service menu.
NOTE:
When the Service Menu Screen is not displayed, go back to
the beginning. It is recommended that you press the buttons a
little earlier and steadily. (Within about 1 second)
2.5.2 RELEASE
Press the [MENU] button to exit the menu indication.
2.5.3 BASIC OPERATION
(1) Choose the SETTING MENU with the [] or [] button.
(2) When the [] button is pressed after choosing the SET-
TING MENU, the cursor will shift to the SETTING / AD-
JUSTMENT ITEMS of each SETTING MENU.
(3) When the cursor is shifted, choose the SETTING / AD-
JUSTMENT ITEMS with the [] or [] button.
(4) Using the [] or [] button, change the setup values and
adjustment values, respectively.
(5) When the [EXIT] button is pressed, the cursor will return to
the SETTING MENU.
(6) When the [BACK] button is pressed, the SERVICE MENU
will go out of the screen.
REAR VIEW
To turn on/off
the power
To switch input / Up key
To switch input / Down key
Left key
To display the
menu
To return to the
previous menu
Right key
FRONT VIEW
STANDBY/ON
LIGHT
WARNING
STANDBY/ON LIGHT WARNING

 Loading...