(No.MB531)1-15
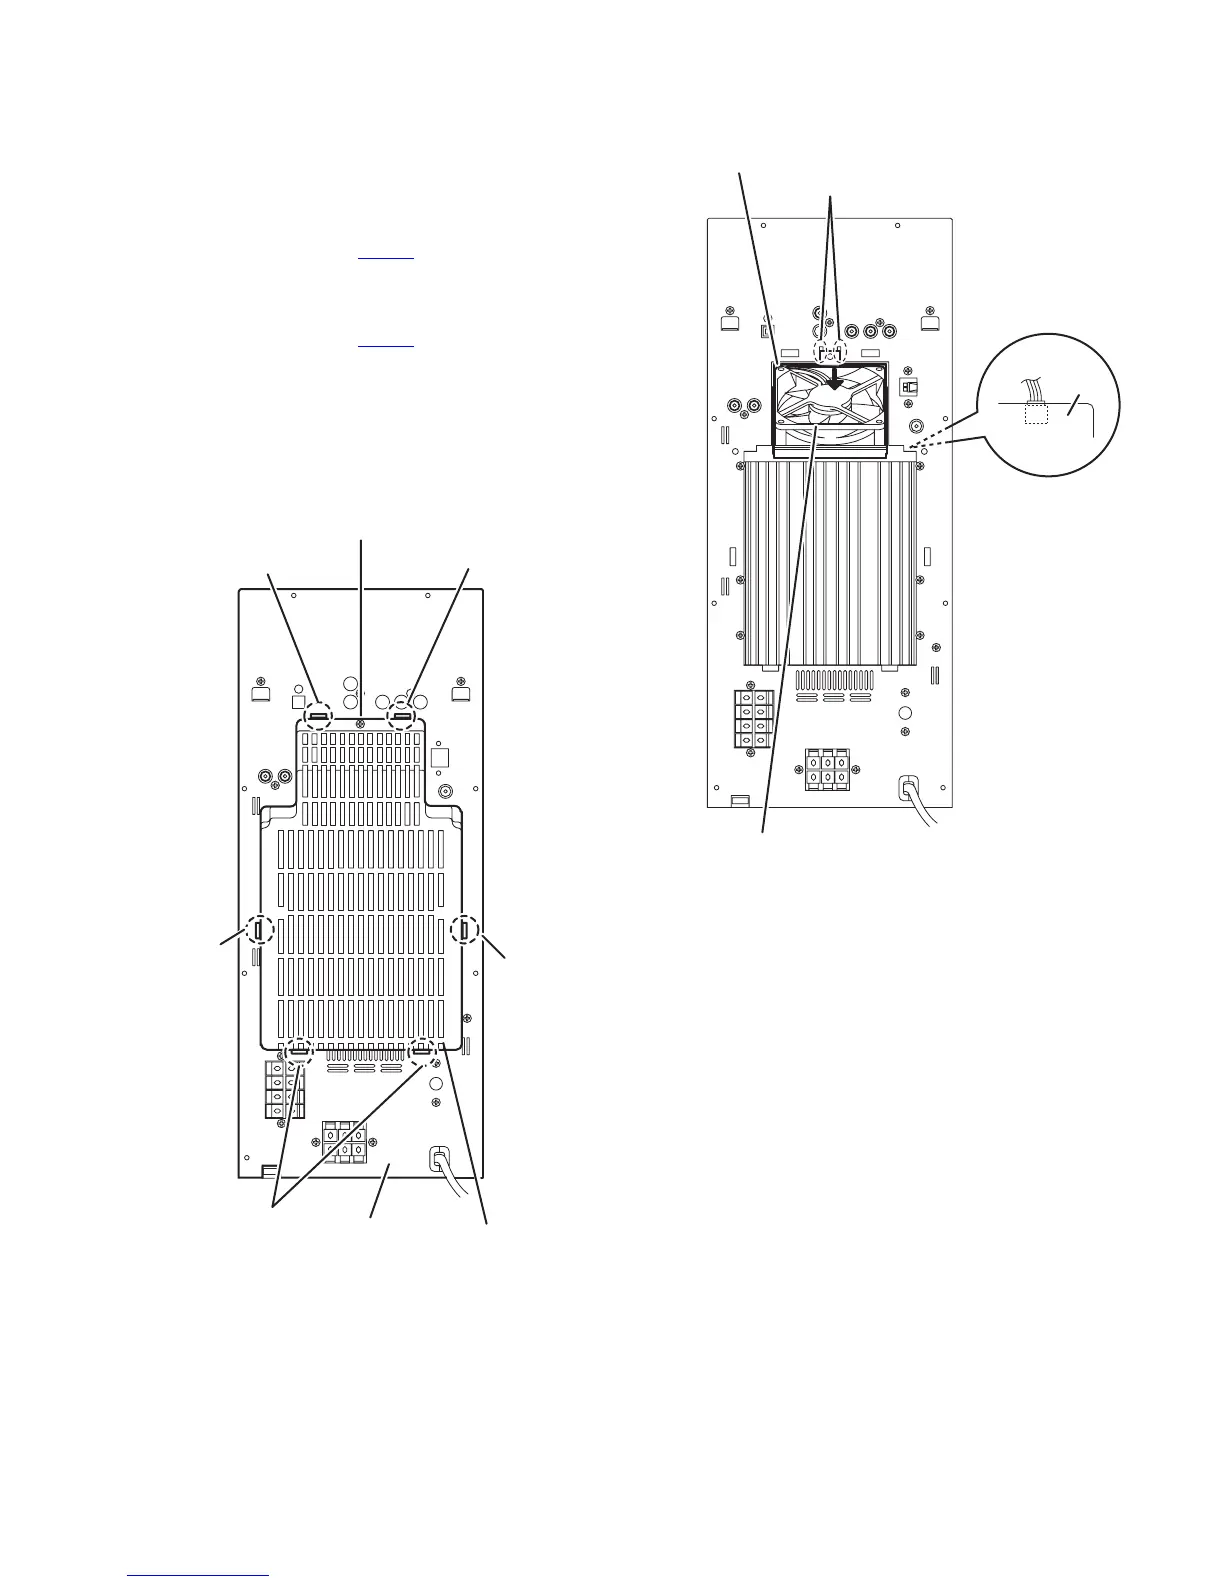
3.1.6 Removing the fan
(See Fig.12, 13)
• Remove the metal cover.
(1) From the back side of the main body, remove the screw H
attaching the rear cover to the rear panel. (See Fig.12)
(2) Remove the joints d and remove the rear cover. (See
Fig.12) From the left side of the main body, disconnect the
wire from the connector CN304
on the amplifier 2 board.
(See Fig.13) [DX-T99]
(3) Remove the joints d and remove the rear cover. (See
Fig.12) From the left side of the main body, disconnect the
wire from the connector CN604
on the amplifier 2 board.
(See Fig.13) [For DX-T66, DX-T77]
(4) Release the two joints e of the fan bracket in the direction
of the arrow and take out the fan with the fan bracket. (See
Fig.13)
Reference:
Remove the fan from the fan bracket as required.
Fig.12
Fig.13
Rear panel Rear cove
dd
d
d
d
d
d
H
Fan
Fan bracket
e
CN304
(CN604)
Amplifier 2
board
 Loading...