2-46
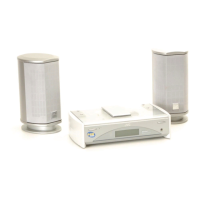
UX-G6/FS-G6
Disassembly method
(SP-UXG6)
Removing the ornament panel assembly
1. Remove the saran board from the speaker box.
(Saran board can be detached by pulling the
side of saran board forward.) (See Fig.1)
2. A minus driver is inserted in the space between
the ornament panel and the cabinet in the
bottom part of the main body little by little. (See
Fig.4) 3.A minus driver is inserted in a surround-
ing round of the ornament panel little by little,
and the ornament panel is removed. (See Fig.2)
*The wound adheres when the driver is moved up
and down with the driver inserted, and inserts in
the direction where the driver was inserted.
*It is easy to remove when the driver is chiefly
inserted in the place because there is a part
which the convex part of the ornament panel
has inserted in the concave part on the cabinet.
*The wound must not adhere by using the cloth etc.
when it is not easy to remove.
Removing the tweeter unit (See Fig.5)
1. The ornament panel is removed 2.T wo plug
wires(black and yellow) connected with the
tweeter unit are pulled out. 3.Remove the two
screws A attaching the tweeter unit.
Removing the woofer unit
1. The ornament panel is removed.
2. Remove the four screws B attaching the woofer
unit. (See Fig.5)
3. Two plug wires(red and black/yellow) connected
with the woofer unit are pulled out.(See Fig.6)
As parts for the repair of this speaker system,it is only
the speaker box assemblies. It is not possible to sup-
ply with each part unit.
Ornament
panel
Joint part
Joint part
Saran net
Ornament
panel
B
B
Woofer unit
Ornament
panel
A
A
Plug wire
(black)
Plug wire
(yellow)
Tweeter unit
Woofer unit
Plug wire
(black/yellow)
Plug wire
(red)
Fig.1
Fig.2
Fig.3
Fig.4
Fig.5
Fig.6
 Loading...