(No.MB004)1-15
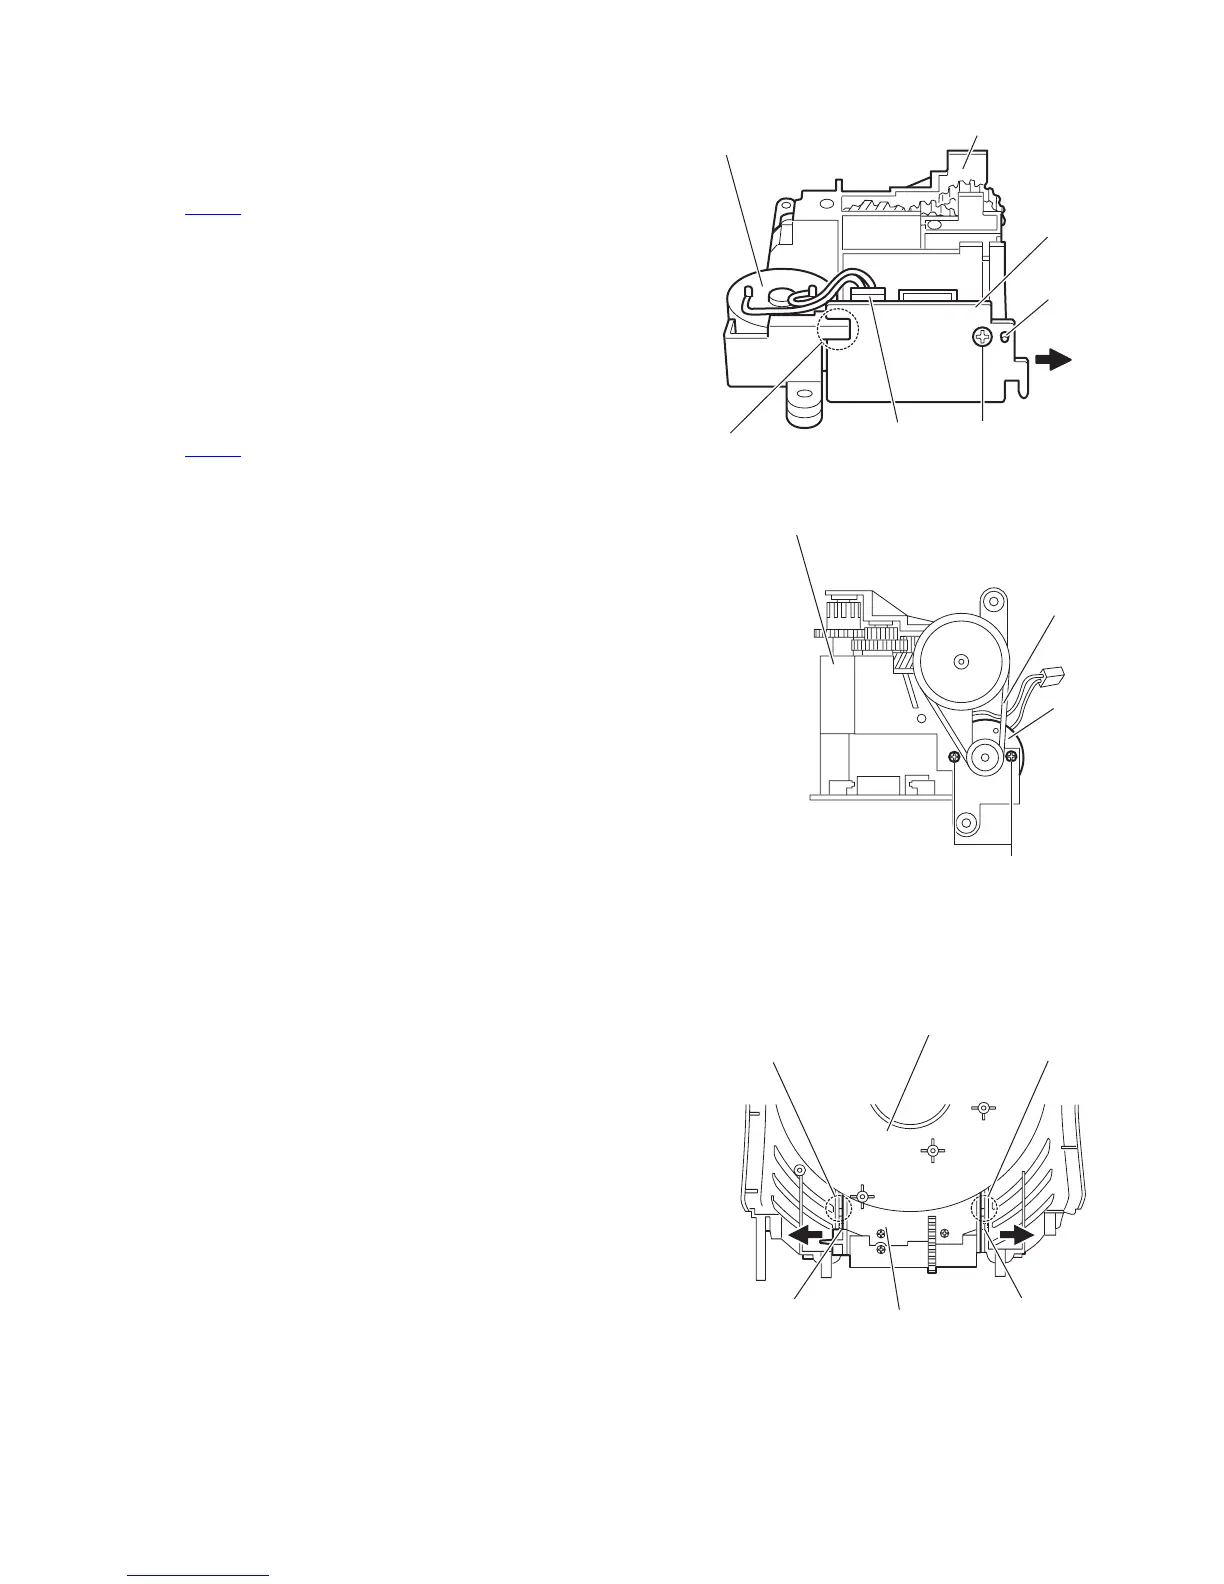
3.2.3 Removing the CD door switch board
(See Fig.19)
• Prior to performing the following procedures, remove the CD
door mechanism assembly.
(1) Disconnect the wire of the CD door motor from the connec-
tor CN452
on the CD door switch board.
(2) Remove the screw V attaching the CD door switch board.
(3) Release the CD door switch board from the projection k
and then remove it from the engagement section m in the
direction of the arrow.
3.2.4 Removing the CD door motor
(See Figs.19 and 20)
• Prior to performing the following procedures, remove the CD
door mechanism assembly.
(1) Disconnect the wire of the CD door motor from the connec-
tor CN452
on the CD door switch board. (See Fig.19.)
(2) Turn over the CD door mechanism assembly and remove
the belt. (See Fig.20.)
(3) Remove the two screws W attaching the CD door motor.
(See Fig.20.)
Note :
Take care not to attach grease of the gears on the belt.
Fig.19
Fig.20
3.2.5 Removing the CD door assembly
(See Fig.21)
• Prior to performing the following procedures, remove the CD
mechanism assembly and CD door mechanism assembly.
(1) From the inside of the top case assembly, remove the boss
p of the CD door assembly while extending the section n of
the top case assembly in the direction of the arrow.
(2) Remove the boss r of the CD door assembly while extend-
ing the section q of the top case assembly in the direction
of the arrow.
Fig.21
V
Projection k
CD door motor
Engagement section m
CN452
CD door
mechanism assembly
CD door
switch board
Belt
CD doo
motor
W
CD door mechanism assembly
Boss r
Section n
Section q
Boss p
CD door assembly
Top case assembly
 Loading...