EasyManua.ls Logo

JVC GR-45

JVC GR-45
35 pages
To Next Page IconTo Next Page
To Previous Page IconTo Previous Page
Loading...
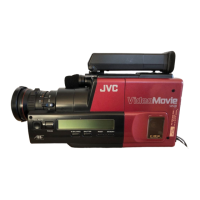
CONTROLS
AND
CONNECTORS
Refer
to
the
diagrams
on
the
fr
0n
7
foldout
page.
x
O
External
microphone
jack
(MIC)
(Page
27)
©
Exclusive
microphone
©6:1
zoom
lens
O
Auto-focus
sensor
window
Allows
light
to
enter
for
measuring
the
camera-to
subject
distance.
6
White
balance
sensor
window
Allows
light
to
enter
for
white
balance
adjustment.
©
Electronic
viewfinder
For
monitoring
scene
being
shot
or
the
playback
picture
after
recording.
Q
Dioptric
adjustment
knob
(Page
6)
©
FULL
AUTO
button
Pressing
this
button
puts
the
focus
and
white
balance
under
automatic
control
and
selects
the
^
standard
shutter
speed.
©
FOCUS
select
button
Switch
to
AUTO
for
automatic
focus,
and
switch
to
MANUAL
to
focus
manually.
©
LCD
display
SP/LP
recording
mode
indicator
Symbolic
mode
indicators
Battery
warning
FOCUS
mode
indicator
Memory
mark
Tape
counter
'FOCUS:
HCRI
MANUAL
M
W.BAL
:
tSHUTTER:
U
250
500
2225
I
mmm
Condensation
warning
SHUTTER
mode
indicator
MONITOR
indicator
White
balance
(W.BAL)
mode
indicator
Symbolic
mode
indicator
STOP:
|
REWIND:
PLAY:
FAST
FORWARD
PAUSE:
||
(STILL)
■■
REVERSE
^
SHUTTLE
^
SEARCH:
RECORD:
^
FORWARD
.
SHUTTLE
SEARCH:
RECORD
||A
PAUSE:
W
MASTER
EDIT
C0NTR0L:
Stinking
QUICK
-IIO
REVIEW
,g
lin
U^
TAPE
END
WARNING
SfSg
©
W.BALANCE
select
button
(Page
9)
The
white
balance
is
manually
selectable
Us
ing
this
button.
$
:
Halogen
or
tungsten
lighting.
0
:
Fluorescent
lighting.
$
:
Daylight.
©
SHUTTER
select
button
(Page
19)
©
Counter
RESET
button
(Page
14)
©
Counter
MEMORY
button
(Page
14)
©
Cassette
holder
Insert
a
VHS-C
video
cassette
for
recording
or
playback.
©
POWER
switch
(Page
9)
Slide
to
turn
the
power
on.
The
Stop
indicator
ap.
pears
on
the
LCD
display.
Slide
again
to
switch
off
power.
©
REC
standby
button
Press
to
engage
the
Recording
standby
mode.
To
start
recording,
press
the
recording
start/stop
but¬
ton
©
.
©
MONITOR
button
(Page
11)
©
QUICK
REVIEW/EDIT
button
(Page
10)
©
REW/SHUTTLE
SEARCH
button
Pressing
this
button
in
the
Stop
mode
rewinds
the
tape;
pressing
it
in
the
Play
mode
allows
fast
play¬
back
in
reverse.
©
PLAY
button
Press
to
start
playback.
©
FF/SHUTTLE
SEARCH
button
Pressing
this
button
in
the
Stop
mode
fast-forwards
the
tape;
pressing
it
in
the
Play
mode
allows
fast
playback.
©
PAUSE/STILL
button
Press
to
view
a
still
picture
during
playback
or
pause
playback.
©
STOP
button
Press
to
engage
the
Stop
mode.
©
EJECT
switch
To
open
the
cassette
holder.
©
SP/LP
recording
mode
select
switch
Set
to
SP
to
record
at
standard
tape
speed.
Set
to
LP
to
record
at
a
slower
tape
speed,
allowing
an
extended
recording
time
of
up
to
one
hour
with
a
single
cassette.
©
DUBBING
ON/OFF
switch
Normally,
set
to
OFF.
For
best
picture
quality
when
dubbing,
set
it
to
the
ON
position.
©
REMOTE
control
jack
For
connection
of
the
optional
RM-P1U
pause
re¬
mote
control
unit.
©
Earphone
jack
(PHONE)
©
AV
OUT
connector
Both
audio
and
video
signals
may
be
delivered
from
this
connector.

Related product manuals