(No.YF123)1-19
4.3 MECHANISM COMPATIBILITY ADJUSTMENT
4.3.1 Tape pattern adjustment
NOTE:
Prior to the adjustment, remove the COVER (ADJ).
(1) Play back the compatibility adjustment tape.
(2) While triggering the HID, observe the waveform of
ENV_OUT.
(3) Set the manual tracking mode (ATF OFF).
(4) Confirm that the waveform is entirely parallel and straight,
and free from remarkable level-down, through the tracking
operation.
Make the confirmation as follows if necessary.
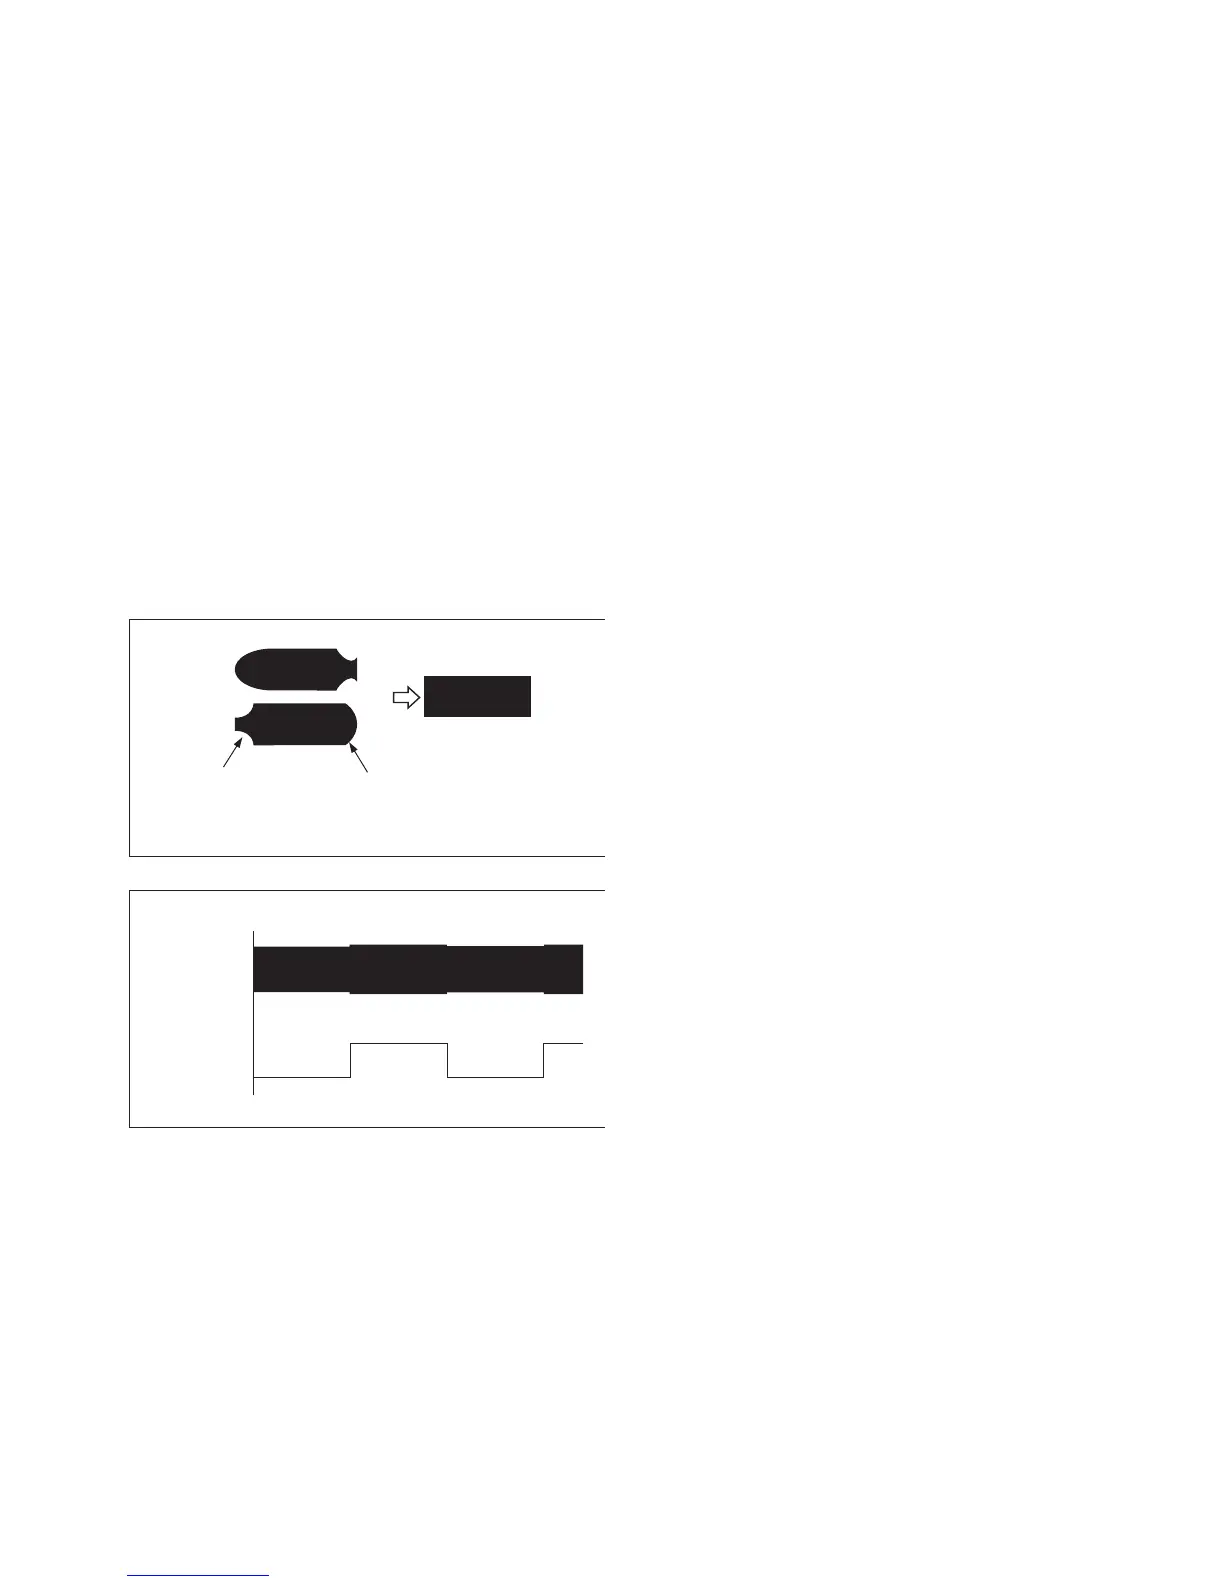
(5) If level-down is observed on the left hand side of the
waveform, straighten the level by turning the GUIDE
ROLLER (SUP).
If level-down is observed on the right hand side of the
waveform, straighten the
level by turning the GUIDE ROLLER (TU).
(6) After the adjustment, try the unloading motion once, and
confirm that the waveform is flat when the tape has been
played back again.
(7) Play back the self-recording.
(8) Confirm that the waveform is flat.
Fig.4-3-1
Fig.4-3-2
4.4 ELECTRICAL ADJUSTMENT
Electrical adjustment is performed by using a personal computer
and software for SERVICE SUPPORT SYSTEM. Read
README.TXT file to use the software properly.
As for the connection of cables, see "4.2 JIG CONNECTOR
CABLE CONNECTION".
Flatten the waveform.
Misalignment of guide roller
height on the take-up side
Misalignment of guide
roller height on the
supply side
ENV_OUT
HID
 Loading...