20 EN
1
D
T
W
W
C
R
I
E
I
I
A
E
S
L
D
N
M
M
T
E
E
D
A
U
R
N
R
M
M
C
E
U
N
A
O
U
S
A
C
D
T
E
L
R
E
T
O
ME
O
O
N
N
F
U
F
P
L
A
Y
O
F
F
END
1
O
D
T
C
R
N
A
I
L
D
E
T
M
O
I
T
S
E
E
C
S
U
C
/
K
P
R
R
T
C
L
N
E
I
O
A
A
E
M
D
D
Y
N
E
E
MEN
1
U
.
1
1
2
.
:
0
0
0
0
J.
4
FAD
W
W
R
O
F
F
F
E
I
I
A
F
A
A
A
R
P
P
N
F
D
D
D
/
E
E
D
E
E
E
W
–
–
O
R
R
R
I
S
S
M
–
–
–
P
C
H
W
B
M
E
R
U
H
L
O
O
T
I
A
S
L
T
T
C
A
L
E
E
K
I
R
C
1
R
S
Z
G
T
I
D
S
R
E
O
O
A
A
D
E
I
E
C
U
O
I
L
M
D
C
T
N
M
N
L
N
O
E
A
U
M
D
Y
U
.
M
R
O
U
M
M
L
E
N
D
M
P
B
O
E
R
E
O
E
D
D
A
D
R
E
E
MEN
S
L
U
P
P
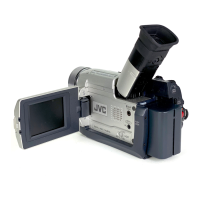
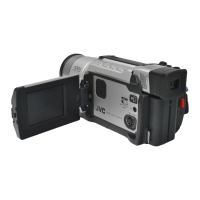
Display
Menu Screen
MENU/BRIGHT Wheel
Lock Button
Power Switch
RECORDING
Advanced Features (cont.)
Using Menus For Detailed Adjustment
This camcorder is equipped with an easy-to-use,
on-screen menu system that simplifies many of the more
detailed camcorder settings (墌 pg. 21 – 23).
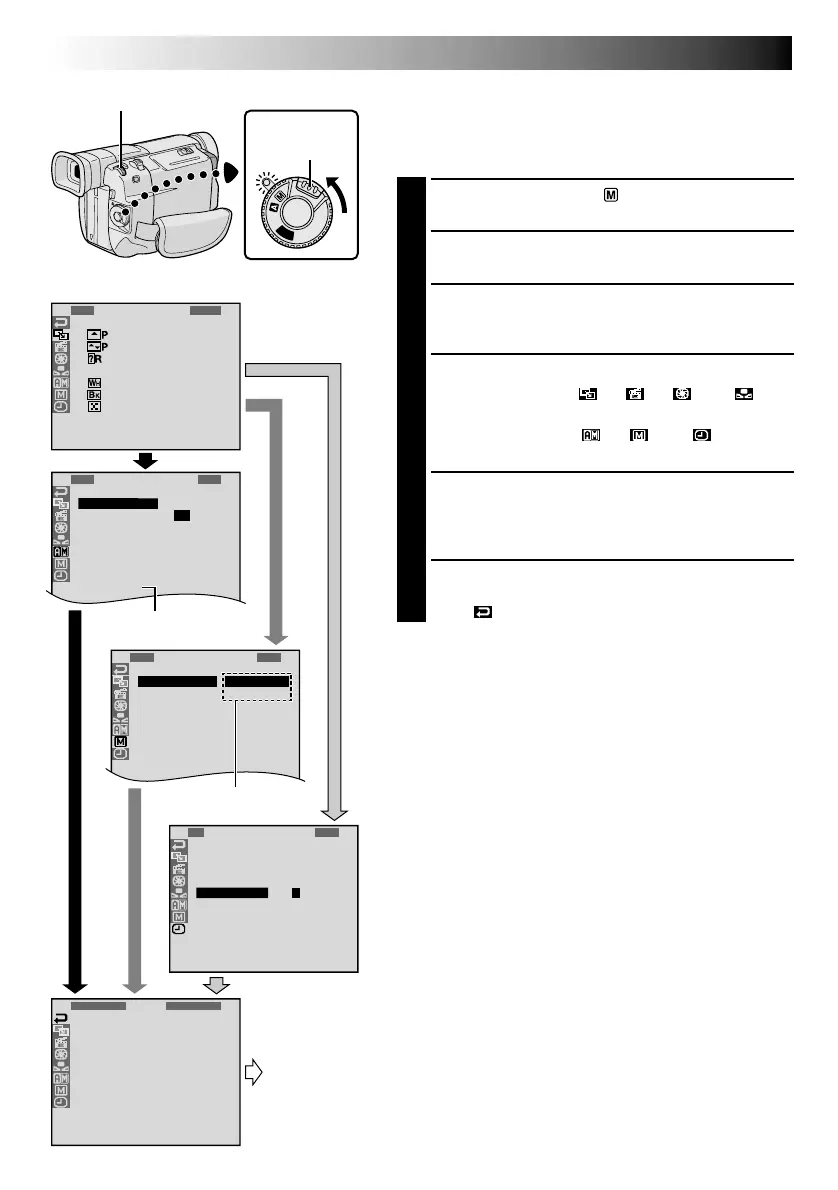
1
Set the Power Switch to “ ” while pressing down
the Lock Button located on the switch.
2
Press MENU/BRIGHT. The Menu Screen appears.
3
Rotate MENU/BRIGHT to select the desired function
icon, and press it. The selected function menu
appears.
4
Function menu setting depends on the function.
If you have selected “ ”, “ ”, “ ” or “ ” . . .
.... see pg. 21.
If you have selected “ ”, “ ” or “ ” . . .
.... go to step 5.
5
Rotate MENU/BRIGHT to select the desired function
and press it. The Sub Menu appears.
Then, rotate MENU/BRIGHT to select the parameter,
and press it. Selection is complete.
6
Rotate MENU/BRIGHT to select “
1
RETURN” and
press it twice. The Menu Screen closes.
•The icon represents “END”.
Sub Menu
Normal Screen
GR-DVL600/DVL500/
DVL400 only
Downloaded from: https://www.usersmanualguide.com/
 Loading...