Do you have a question about the JVC GR-DVX4 and is the answer not in the manual?
Guidance on how to use the manual for better understanding.
Important warnings and cautions for safe operation and handling.
Essential do's and don'ts for safe operation and handling of electronic equipment.
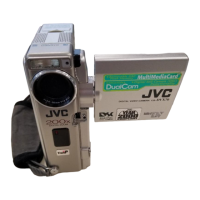
List of accessories included with the camcorder for various functions.
Explanation of how the camcorder records audio and video signals digitally.
Information on the camcorder's dual power supply system for flexibility.
Step-by-step guide for charging the camcorder's battery pack.
Instructions for installing and removing the battery pack correctly.
How to connect and use the AC power adapter for continuous operation.
Procedure for inputting and setting the current date and time for recording.
Steps for inserting and removing cassettes, including protection and timing.
Guide to choosing between Standard Play (SP) and Long Play (LP) recording modes.
Instructions for adjusting grip strap and viewfinder focus for comfortable use.
Instructions for mounting the camcorder securely on a tripod for stable shooting.
Overview of different modes (CAMERA, PLAY, OFF, Auto, Manual) for operation.
Step-by-step guide to recording using the viewfinder.
How to stop recording and understand tape remaining time indicators.
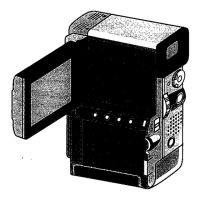
Guide to recording operations using the LCD monitor.
Methods for shooting from different angles and self-recording.
Adjusting the display brightness for optimal viewing.
How to operate the zoom for magnification and image framing.
Managing time codes and preventing gaps for editing.
Setting the camcorder to display date/time during recording.
Options to show or hide various indicators on the LCD monitor/viewfinder.
Technique for recording short clips to capture action dynamically.
How to set up and use the self-timer for capturing yourself in the scene.
Guide to selecting and taking snapshots with various modes.
How to divide the screen into 9 quadrangles for recording.
Using the automatic flash and its red-eye reduction feature.
How to manually adjust flash brightness for optimal exposure.
General procedure for accessing and using the camcorder's menu system.
Detailed explanations of recording and mode menu options.
Explanations for Date/Time and System menu settings.
Using fade and wipe effects for professional scene transitions.
How to combine picture wipe and dissolve for advanced transitions.
A list and description of available fade and wipe transition effects.
Guide to using Programme AE with various creative effects.
How the auto-focus system works and its limitations.
Step-by-step instructions for using and adjusting manual focus.
How to manually adjust exposure for optimal picture brightness.
Using iris lock to maintain stable brightness levels during shooting.
How to adjust white balance for accurate color reproduction.
Detailed steps for performing manual white balance adjustments.
How to load a cassette and control playback functions.
Controlling the audio output volume via the zoom lever.
Using playback features like pausing, fast searching, and slow motion.
How to access and adjust settings in the playback menu.
Options for playback sound output, time code, and date display.
Instructions for connecting to TVs/VCRs with SCART connectors.
How to connect to TVs/VCRs using S-Video and RCA connectors.
Steps for connecting to a PC to transfer still images.
How to connect to other video units for digital dubbing.
Guide to connecting camcorder to VCR for tape dubbing.
How to copy recorded scenes using a digital signal for quality preservation.
Instructions for inserting the battery into the remote control.
Mapping of remote control buttons to camcorder functions.
Using remote for advanced playback search and zoom.
Adding creative effects like Classic Film or Sepia during playback.
How to configure the remote control to operate a VCR for editing.
Making connections and selecting scenes for automated editing.
Defining edit-in/out points and applying scene transitions.
Steps for starting and stopping the automatic editing process to the VCR.
Checking and comparing camcorder and VCR timing for precise editing.
Adjusting camcorder speed to match VCR timing for better edits.
How to add narration or new sound tracks to recordings.
Solutions for power supply, date/time errors, and recording failures.
Addressing problems with snapshot modes, flash, and image quality.
Solutions for issues with special effects and scene transitions.
Solutions for display anomalies, image quality, and indicator errors.
Addressing LCD monitor heat, no sound, and tape playback errors.
Solutions for monitor jitter, error codes, and DV connection issues.
Steps for cleaning the camcorder's exterior, monitor, and lens.
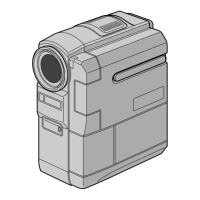
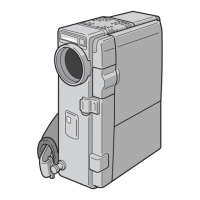
Diagram and list of camcorder controls, connectors, and indicators.
Specific details and page references for controls, connectors, and parts.
Explanations for various icons and messages displayed during recording.
Explanations for playback indicators and warning messages.
Details about the Docking Station's connectors and their functions.
An alphabetical list of terms and their corresponding page references.
Cautions for safe use, handling, and storage of battery packs and cassettes.
Precautions for LCD monitor care and avoiding environmental damage.
Technical specifications for the camcorder's general features and connectors.
Specifications and dimensions for the docking station.
| Optical Zoom | 10x |
|---|---|
| Digital Zoom | 700x |
| Image Sensor | CCD |
| Video Resolution | 720 x 480 |
| Display Type | LCD |
| Viewfinder | Color |
| Image Stabilizer | Electronic |
| Image Stabilization (alternative) | Electronic |
| Minimum Illumination | 2 lux |
| Recording Media | MiniDV Tape |
| Zoom | 10x Optical, 700x Digital |
| Type | MiniDV |
| Optical Sensor Size | 1/4 inch |
| Optical Sensor Resolution | 680, 000 pixels |
| LCD Screen | 2.5 inch |
| Focus Adjustment | Automatic, manual |
| Shooting Modes | Auto, Manual |
| White Balance | Auto, Manual |
| Microphone | Built-in |
| Microphone Operation Mode | Stereo |
| Connector Type | IEEE 1394 (FireWire), USB |
| Included Accessories | AC Adapter, A/V Cable |
| Video Format | DV |
| Interface | IEEE 1394, USB |