Do you have a question about the JVC GR-DVX4EA and is the answer not in the manual?
Important safety information regarding mains supply connection and fuse replacement in the UK.
Warning to prevent fire or shock hazard, and precautions for lithium cell battery.
Cautions regarding electrical shock prevention and disconnecting power.
Guidelines for safe operation and handling of the camcorder and its accessories.
List of items included with the camcorder for setup and operation.
Information on the camcorder's 2-way power supply system.
Step-by-step instructions for charging the battery pack.
Instructions for attaching and detaching the battery pack.
Instructions for connecting and using the AC power adapter.
Procedure for setting the camcorder's date and time.
Steps for inserting and removing a video cassette.
How to select between SP and LP recording modes.
Instructions for adjusting the camcorder's grip strap.
Steps for adjusting the viewfinder focus and position.
Guidance on how to securely mount the camcorder on a tripod.
Explanation of different operation modes and their functions.
Fundamental steps for recording video and audio.
Instructions for loading a cassette into the camcorder.
Guide to recording using the camcorder's viewfinder.
How to stop recording and return to standby mode.
Guide to recording using the camcorder's LCD monitor.
Techniques for shooting from different angles for dramatic effect.
How to shoot yourself or view yourself while recording.
Adjusting the brightness of the LCD display.
Explanation of how to use the optical and digital zoom functions.
Procedure for resuming recording from a specific point on the tape.
Detailed explanations of advanced recording functions.
How to display date and time information during recording.
How to control the visibility of on-screen indications.
Recording events in short 5-second clips for dynamic effect.
Using the self-timer to include the operator in the scene.
Taking still photos or multiple snapshots in succession.
Dividing the screen into 9 quadrangles for recording.
Using the auto flash function for snapshots.
Manually adjusting the brightness of the flash.
Navigating the on-screen menu system for detailed settings.
Detailed explanation of functions available in the Recording Menu.
Explanation of settings within the Mode Menu.
Explanation of settings within the Date/Time Menu.
Explanation of settings within the System Menu.
Using fade and wipe effects for scene transitions.
Combining picture wipe and dissolve functions for transitions.
Applying special effects to automatic exposure modes.
Adjusting shutter speed for capturing fast or slow motion.
Information on auto and manual focus capabilities.
Explanation of the camcorder's full-range auto focus system.
Step-by-step guide for manual focus adjustment.
How to manually adjust exposure for optimal picture quality.
Function to lock the iris for consistent brightness.
Explanation of white balance and automatic adjustment.
Procedure for manually setting white balance under various lighting.
Fundamental steps for playing back recorded tapes.
Instructions for loading a cassette for playback.
How to adjust the audio volume during playback.
Pausing playback to view a still image.
High-speed search function for locating scenes.
Detailed explanations of advanced playback functions.
Accessing and navigating the playback menu system.
Selecting the desired audio output for playback.
How to display the time code for editing purposes.
How to display or hide recorded date information.
Controlling the visibility of playback sound, time code, and date indications.
Basic connection types to TVs and VCRs.
Connecting to SCART TVs/VCRs using a regular video signal.
Connecting to SCART TVs/VCRs using Y/C signal via Docking Station.
Advanced connection methods for TVs, VCRs, and computers.
Connecting to TVs/VCRs with S-Video or A/V inputs.
Transferring still images to a personal computer.
Copying scenes to other video units via DV connector (Digital Dubbing).
Process of copying video content from one tape to another.
Steps for connecting equipment and performing tape dubbing.
Connecting the camcorder and VCR for dubbing.
Setting up the camcorder and VCR for the dubbing process.
Engaging the VCR's AUX and Record-Pause modes.
Locating the starting point for editing.
Initiating the recording process on the VCR.
Pausing the dubbing process.
Repeating the editing process for multiple segments.
Copying scenes with minimal image/sound deterioration using DV connector.
Procedure for inserting the CR2025 lithium battery into the remote.
Creating edited videos using the camcorder as a source player.
Setting the remote control to operate the VCR by selecting a code.
Using the remote control to operate basic VCR functions.
Selecting scenes and starting playback for editing.
Initiating playback of the source tape for editing.
Applying fade or wipe effects to scene transitions.
Marking the beginning of a scene for editing.
Marking the end of a scene for editing.
Applying transition effects between edited scenes.
Applying special effects during playback.
Adding more scenes to the editing sequence.
Performing automatic editing of recorded scenes to a VCR.
Preparing the source tape for automatic editing.
Setting the VCR to record-pause mode.
Beginning the automatic editing process.
Stopping the automatic editing process.
Tips for achieving cleaner edits by adjusting timing.
Checking and comparing VCR and camcorder timing for accuracy.
Preparing the remote control for R.A.Edit.
Selecting a scene for timing checks.
Reviewing the result of a timed dubbing operation.
Adjusting VCR speed to match camcorder timing.
Accessing the playback menu to select synchronization functions.
Selecting the 'SYNCHRO' function.
Inputting timing correction data for the VCR.
Exiting the menu system.
Customizing the audio track by adding narration or sound.
Common symptoms, possible causes, and corrective actions for malfunctions.
Steps to take after finishing use, including cassette removal.
Instructions for cleaning the exterior, LCD monitor, and lens.
Description and location of various input/output connectors.
Explanation of the camcorder's tally and power lamps.
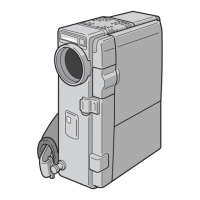
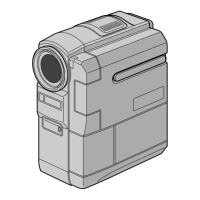
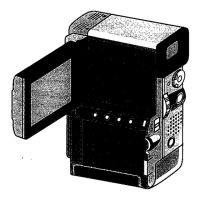
Identification of other functional parts of the camcorder.
Precautions for safe use, handling, and storage of battery packs.
Guidelines for proper use and storage of video cassettes.
Cautions to prevent damage and prolong the life of the LCD monitor.
Safety precautions for handling the main camcorder unit.
Instructions for handling and storing the included CD-ROM.
What to do if serious malfunctions occur.
General technical specifications for the camcorder.
Technical specifications for the AC power adapter/charger.
Technical specifications for the camcorder docking station.
| Type | Camcorder |
|---|---|
| Recording Media | Mini DV |
| Optical Zoom | 10x |
| Digital Zoom | 200x |
| Image Stabilizer | Electronic |
| Display Type | LCD |
| Sensor | CCD |
| Video Resolution | 720 x 576 |
| LCD Screen Size | 2.5" |
| Focus Adjustment | Automatic, Manual |
| White Balance | Automatic, Presets |
| White Balance Presets | Indoor, Outdoor |
| Connector Type | IEEE 1394 (FireWire) |
| Included Accessories | AC Adapter |
| Zoom | 10 x optical zoom |
| Viewfinder | Color |
| Video Format | Mini DV |
| Interface | IEEE 1394 (FireWire) |
| Battery | Lithium-Ion |