EasyManua.ls Logo

JVC GR-SXM280A User Manual

JVC GR-SXM280A
32 pages
To Next Page IconTo Next Page
Page #1 background imageLoading...
Page #1 background image
1
INSTRUCTIONS
ENGLISH LYT0868-001B
AUTOMATIC DEMONSTRATION
Automatic Demonstration takes place when “DEMO MODE” is set to “ON”
(factory-preset).
Available when the Power Switch
@
is set to or ”.
Performing any operation during the demonstration stops the demonstration temporarily. If no operation
is performed for more than 1 minute after that, the demonstration will resume.
“DEMO MODE” remains “ON” even if the camcorder power is turned off.
To cancel Automatic Demonstration, set the Power Switch
@
to and press the MENU Wheel
1
in
while the demo is in progress. This takes you directly to the demo mode’s Setting Menu (so you will not
have to go through the main Menu Screen). Rotate the MENU Wheel
1
to select “OFF” and press it.
NOTES:
When a tape whose Erase Protection tab is in the position that allows recording is loaded in the
camcorder, demonstration is not available.
If you do not detach the Lens Cap, you cannot see the actual changes of the Automatic Demonstration
activated on the LCD monitor* or viewfinder.
* Applicable models only.
Dear Customer,
Thank you for purchasing the JVC Compact VHS camcorder. Before use, please read
“PRECAUTIONS” (
pg. 3, 4) to ensure safe use of this product.
A/EA
Printed in Japan
1001MKV
*
UN
*
SN
®Registered Trademark owned by VICTOR COMPANY OF JAPAN, LTD.
COPYRIGHT© 2001 VICTOR COMPANY OF JAPAN, LTD.
COMPACT VHS CAMCORDER
GR-SXM78EA
GR-SXM48EA
GR-SXM780A
GR-SXM480A
GR-SXM280A
GR-SXM180A
GR-SX140A
VHS
PAL
625
Question and Answer IconNeed help?

Do you have a question about the JVC GR-SXM280A and is the answer not in the manual?

JVC GR-SXM280A Specifications

General IconGeneral
BrandJVC
ModelGR-SXM280A
CategoryCamcorder
LanguageEnglish

Summary

AUTOMATIC DEMONSTRATION

PROVIDED ACCESSORIES

SAFETY PRECAUTIONS

GETTING STARTED

USING THE BATTERY PACK AND AC POWER

Instructions for charging and using the camcorder battery pack and AC adapter.

BASIC OPERATIONS

Grip, Viewfinder, and Strap Adjustments

Adjustments for grip comfort, viewfinder clarity, and strap securement.

Tripod Mounting and Cassette Handling

Procedures for tripod use and handling video cassettes.

CONTROLS AND INDICATORS

Controls and Connectors Overview

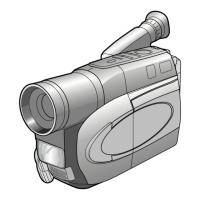
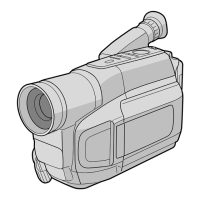
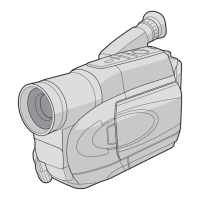
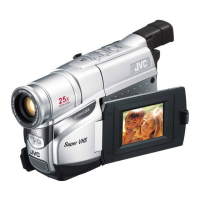
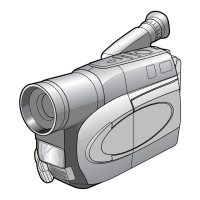
Identification of camcorder buttons, ports, and indicators for operation.

LCD Monitor/Viewfinder Indications

Explains the symbols displayed on the camcorder's screens.

RECORDING

Recording Procedures

Steps for recording, covering viewfinder/LCD usage and brightness adjustment.

PLAYBACK

BASIC FEATURES

Snapshot, Picture Stabiliser, and 5Sec. Rec

Explanation of key features like still image capture and video stabilization.

ZOOMING, VIDEO LIGHT, QUICK REVIEW, AND RETAKE

Zooming and Video Light Operation

Operation of zoom function and video light for enhanced capture.

Quick Review and Retake Functionality

Guides on reviewing recordings and re-recording segments.

TRACKING, TBC, COUNTER MEMORY, AND PLAYBACK EFFECTS

Tracking, TBC, and Counter Memory

Adjusting video signal quality and utilizing tape counter memory.

Playback Special Effects

Details on applying creative effects during playback.

CONNECTIONS AND TAPE DUBBING

TV/VCR Connections and Tape Dubbing

Connecting to external devices and transferring video content between devices.

CASSETTE ADAPTER AND PC CONNECTION

Cassette Adapter and PC Data Transfer

Utilizing the cassette adapter and connecting to a PC for data transfer.

MENU SETTINGS

CAMERA MENU Settings

Configuration options for camera functions like focus, exposure, and white balance.

SYSTEM MENU Settings

Configuration options for camcorder system functions like recording modes and display.

ADVANCED FEATURES

Night-Scope and Fade/Wipe Effects

Using low-light enhancement and applying fade/wipe transition effects.

PROGRAMME AE AND DIGITAL EFFECTS

Programme AE and Digital Effects

Applying automatic exposure and various digital image enhancements.

REMOTE CONTROL UNIT OPERATION

PLAYBACK ZOOM AND EDITING FUNCTIONS

Playback Zoom and Time-Lapse Recording

Magnifying playback images and recording time-lapse sequences.

Insert Editing and Audio Dubbing

Techniques for editing recorded tapes and adding new soundtracks.

RANDOM ASSEMBLE EDITING

Random Assemble Editing Setup

Setting up the camcorder and remote for automated video editing.

MAKE CONNECTIONS FOR EDITING

VCR Connection Types for Editing

Details on connecting the camcorder to various VCR types for editing.

SELECT SCENES AND AUTOMATIC EDITING

Selecting Scenes for Editing

Marking in/out points for specific scenes during the editing process.

Automatic Editing to VCR

Steps for transferring selected scenes from camcorder to VCR.

TROUBLESHOOTING AND WARNINGS

Troubleshooting Common Issues

Solutions for common operational problems encountered with the camcorder.

Warning Indications and Error Messages

Explanation of warning lights, indicators, and error codes.

VIDEO LIGHT AND BATTERY PRECAUTIONS

Video Light Dangers and Precautions

Safety warnings and handling instructions for the camcorder's video light.

Battery and Cassette Handling Precautions

Precautions for using batteries, battery packs, and video cassettes.

LCD MONITOR, CD-ROM, AND MAINTENANCE

LCD Monitor and CD-ROM Handling

Guidelines for protecting the LCD monitor and handling the CD-ROM.

Moisture Condensation, Malfunctioning, and Maintenance

Information on condensation, malfunctions, and camcorder cleaning procedures.

SPECIFICATIONS

Related product manuals