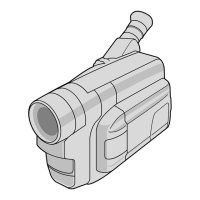
Do you have a question about the JVC GR-SXM750 and is the answer not in the manual?
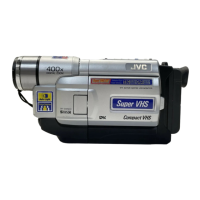
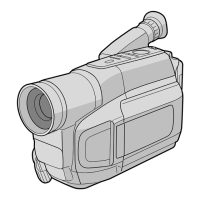
| Recording Media | Mini DV |
|---|---|
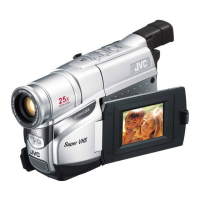
| LCD Screen Size | 2.5 inches |
| Focus | Auto/Manual |
| Image Sensor | 1/4" CCD |
| Viewfinder | Color |
Important warnings for safe operation and potential hazards.
Critical safety advice regarding fire, electric shock, and material disposal.
Instructions for using and charging the camcorder's battery pack.
Guide for connecting and using the AC adapter for power.
Step-by-step process for charging the battery.
Procedure to discharge and recharge battery for performance.
Guidelines for storing battery packs to maintain performance.
How to set the camcorder's date and time.
Adjusting the grip for comfortable operation.
Instructions for securely attaching the camcorder to a tripod.
Adjusting the viewfinder for clear viewing.
Steps for inserting and removing video cassettes.
How to attach the shoulder strap to the camcorder.
Explains the symbols and data displayed on the screen.
Process for starting, stopping, and managing video recording.
Steps for loading tape and playing back recorded video.
Feature for recording short 5-second transitions.
Adjusting brightness for subjects against bright backgrounds.
How to use and switch between auto and manual focus.
Using the camcorder's built-in video light.
How to use optical and digital zoom functions.
Checking the end of the last recorded segment.
Function to re-record specific segments.
Eliminating noise bars during playback.
Stabilizing video signals for better playback quality.
Marking and locating specific tape segments.
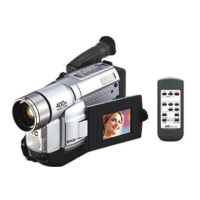
How to connect the camcorder to external devices.
Guide for transferring recordings to another tape.
Adjusting exposure manually for different shooting conditions.
Compensating for camera shake to stabilize images.
Setting white balance manually for accurate color reproduction.
Options for adding and customizing preset titles.
Setting recording modes like EP for extended play.
Adjusting digital zoom and its limitations.
Optimizing picture brightness for various lighting conditions.
Enabling a cinema-like wide-screen format.
Using S-VHS and S-VHS ET for higher quality recording.
Setting tape length for accurate remaining time display.
Controlling on-screen indications during recording/playback.
Using REC TIME and INT. TIME for special recording effects.
Enabling close-up shooting at a specific distance.
Automatic demonstration of camcorder functions.
Adjusting the brightness of the LCD monitor.
Allows setting the current date and time.
Applying fade-in/out and wipe effects during recording.
Using preset AE modes like Sports, ND, FG, Twilight.
Applying Sepia or Black/White effects to footage.
Applying blue or reddish tints to recorded scenes.
Applying painting or mosaic style effects to footage.
Doubling the picture width horizontally.
Solutions for issues like white lines, spots, or unavailable features.
Troubleshooting blurred playback, tape stopping, or tape eject problems.
Explains battery, tape, condensation, and error messages.
Precautions for using the AC adapter, especially outside the USA.
Warnings and safety advice regarding the hot video light.
Rules for battery use, handling, and disposal to prevent hazards.
Information on battery types, charging, and temperature ranges.
Guidelines for proper use and storage of video cassettes.
Crucial safety instructions for the camcorder itself.
Avoiding unsuitable environments like high humidity or extreme temperatures.
How to prevent damage and prolong the life of the LCD monitor.
Explanation and precautions for moisture condensation.
Instructions for gently cleaning the camcorder's exterior and lens.
Technical details about the camcorder's format, power, and dimensions.
Details on video, audio, and S-Video connector outputs.
Voltage and current specifications for the AC adapter.
List of available accessories for the camcorder.