J
Jessica MossSep 23, 2025
Why does 'NO IPOD' appear on my JVC KD-DV5505 display?
- Aamanda48Sep 23, 2025
Check the connecting cable and its connection. Charge the battery. Update the firmware version of the iPod nano.
Why does 'NO IPOD' appear on my JVC KD-DV5505 display?
Check the connecting cable and its connection. Charge the battery. Update the firmware version of the iPod nano.
Why doesn't my JVC KD-DV5505 Car Receiver CD changer work?
Reset the unit.
Why is phone sound quality poor on my JVC KD-DV5505?
If the phone sound quality is poor on your JVC Car Receiver, try reducing the distance between the unit and the Bluetooth cellular phone. Alternatively, move the car to a location with better signal reception.
Why won't my JVC Car Receiver detect my Bluetooth device?
If your JVC Car Receiver does not detect the Bluetooth device: 1. Check the Bluetooth setting of the device. 2. Search from the Bluetooth device. After the device detects the unit, select “OPEN” on the unit to connect the device.
Why is Bluetooth audio skipping on my JVC Car Receiver?
If the sound is interrupted or skipped during playback of a Bluetooth audio player on your JVC Car Receiver: 1. Reduce the distance between the unit and the Bluetooth audio player. 2. Disconnect the device connected for “BT-PHONE.” 3. Turn off, then turn on the unit. 4. Connect the player again, when the sound is not yet restored.
Why won't my JVC Car Receiver pair with my Bluetooth device?
If your JVC Car Receiver does not pair with the target Bluetooth device: 1. Enter the same PIN code for both the unit and target device. 2. Select the device name from “SPECIAL,” then try to connect again. 3. Try to pair/connect from the Bluetooth device.
Why is there static noise on my JVC KD-DV5505 radio?
If you are experiencing static noise while listening to the radio on your JVC Car Receiver, make sure the antenna is firmly connected.
What to do if my JVC KD-DV5505 does not work?
If your JVC Car Receiver is not working, try resetting the unit.
Why no picture on monitor with JVC KD-DV5505 Car Receiver?
If no picture appears on the monitor connected to your JVC Car Receiver, ensure that the video cord is correctly connected. Also, verify that you have selected the correct input on the monitor.
Why is my iPod not working with my JVC KD-DV5505?
If your iPod does not turn on or work with your JVC Car Receiver, consider the following: 1. Check the connecting cable and its connection. 2. Update the firmware version of the iPod/iPhone. 3. Charge the battery of the iPod/iPhone. 4. Reset the iPod/iPhone. 5. Check whether the setting is appropriate.
Details regarding the unit's classification as a Class 1 laser product.
Important cautions for safe operation and handling of laser components.
Safety advice for operating the unit, including volume and car temperature considerations.
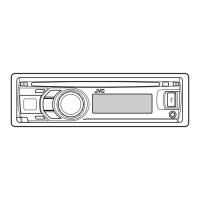
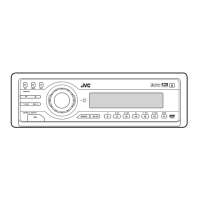
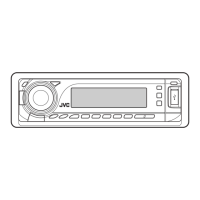
Instructions for removing and reinstalling the detachable control panel.
Procedures for resetting the unit and forcibly ejecting a disc.
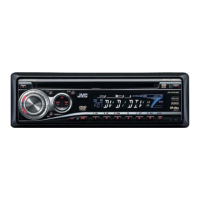
Overview of disc formats supported by the unit.
Summary of main operational sections including basic, USB, and external devices.
Introduction to connecting and operating external components like Bluetooth and iPod.
Guide on how to insert batteries into the remote controller correctly.
Detailed explanation of each button's function on the remote controller.
Steps to disable the display demonstration and set the unit's clock.
How to search for radio stations using auto and manual methods.
Tips for improving FM stereo broadcast reception.
Procedure for automatically and manually storing radio stations.
How to manually assign radio stations to preset numbers.
Important notes before starting disc playback operations.
Instructions for correctly inserting a disc into the unit.
How to stop playback and eject a disc from the unit.
Method to prevent accidental disc ejection.
How to cycle through different display modes for disc playback.
Procedure for selecting tracks or folders for MP3/WMA/WAV/CD discs.
How to use menu-driven features for DVD playback.
Procedure to cancel playback control (PBC) for VCDs.
Method for inputting time or numerical values on screen.
Instructions for hiding the on-screen display bar.
How to select repeat or random playback modes via the control screen.
Navigating and selecting items from the DVD-VR list screen.
Using the list screen for DivX, MPEG, MP3, WMA, and WAV files.
Steps for connecting USB mass storage devices.
Safe procedure for removing a USB device from the unit.
Overview of methods for pairing Bluetooth devices with the unit.
Step-by-step guide to pairing a new Bluetooth device using the OPEN method.
Procedure for searching, selecting, and connecting available Bluetooth devices.
How to connect, disconnect, or delete previously registered Bluetooth devices.
How the unit responds to incoming calls and text messages.
Methods for making calls using the phone book, call history, or dialing.
Procedure for dialing phone numbers directly.
Using voice commands to make phone calls.
Settings required before using the CD changer.
How to select repeat or random play for CD changer content.
Details on controlling iPod/iPhone via USB cable, including control modes.
How to navigate menus and select tracks for iPod/iPhone playback.
How to cycle through display modes for iPod/iPhone playback.
Choosing repeat or random playback modes for iPod/iPhone content.
How to use search mode to find and select tracks on iPod/iPhone.
Choosing playback modes and adjusting speed for audiobooks.
Instructions for connecting iPod/iPhone using an interface adapter.
How to cycle through display modes when using the interface adapter.
Navigating menus to select tracks via the interface adapter.
Choosing playback modes for iPod/iPhone via the interface adapter.
Steps for connecting external audio/video components to the AV-IN jack.
Table showing preset EQ values for different sound modes.
Choosing from predefined button and display color schemes.
Steps to create and save personalized button and display colors.
Details on turning the unit on/off, source selection, and disc handling.
Information on storing radio stations and tuner behavior.
Notes on playing recordable discs, DVD-VR files, and general disc handling.
Specifications and limitations for playing MP3, WMA, and WAV files.
Information on playing DivX video files, including format and registration.
Details on playing MPEG video files, including format and bit rate.
Specifics on USB device compatibility, file systems, and playback.
Advanced Bluetooth operations, warnings, and troubleshooting.
List of supported iPod/iPhone models and connection types.
Specific notes on menu settings like DIMMER and AMP GAIN.
Information regarding limitations on assigning station titles.
Caveats regarding language settings and aspect ratio conversion.
Details on audio signals emitted from analog and digital terminals.
Explanation of icons that may appear during playback.
Table detailing output signals based on disc type and DIGITAL OUT setting.
Procedures for cleaning connectors and keeping discs clean and in good condition.
Addressing moisture buildup issues and handling new discs.
Critical safety warnings related to unit installation.
List of components included for installation.
Guides for installing the unit using optional stays or without a sleeve.
Step-by-step instructions for removing the unit from the dashboard.
Essential precautions for connecting power and speakers to prevent damage.
Diagrams and instructions for standard electrical wiring.
Common electrical problems and their solutions.
Guide for connecting the parking brake wire for safety features.
Instructions for connecting the crimp connector for specific wiring.
Required connections for enabling video playback functionality.
Steps for connecting an external amplifier to enhance audio output.
Information on connecting specific JVC components via CD changer jack.
Guidance on connecting multiple components sequentially.
| Type | DVD Receiver |
|---|---|
| Max Power Output | 50 W x 4 |
| Tuner | AM/FM |
| Bluetooth | No |
| USB Port | Yes |
| Form Factor | Single DIN |
| Equalizer | Yes |
| Playback Formats | CD, MP3, WMA |
| Preamp Outputs | 3 (Front, Rear, Subwoofer) |
| Media Type | CD, USB |
| Supported Digital Audio Standards | MP3, WMA |
| Supported Digital Video Standards | MPEG 1/MPEG 2 |
| Source | DVD/USB/AUX |