S
Sherri RogersSep 23, 2025
What does 'NO SKIPS' mean again on my JVC KD-R681 Car Receiver?
- Ddarren33Sep 23, 2025
If “NO SKIPS” appears again on your JVC Car Receiver, the skip limit has been reached. Retry later.
What does 'NO SKIPS' mean again on my JVC KD-R681 Car Receiver?
If “NO SKIPS” appears again on your JVC Car Receiver, the skip limit has been reached. Retry later.
What does 'NO STATIONS' mean again on my JVC Car Receiver?
If “NO STATIONS” appears again on your JVC Car Receiver, no stations are found.
What does 'NOT CONNCTD' mean on my JVC Car Receiver?
If “NOT CONNCTD” appears on your JVC Car Receiver, link to the application is impossible.
Why are the characters displayed incorrectly on my JVC KD-R681?
If correct characters are not displayed on the JVC Car Receiver, note that this unit can only display uppercase letters, numbers, and a limited number of symbols. Depending on the display language selected, some characters may not be displayed correctly.
What to do if “PLEASE EJECT” appears on JVC Car Receiver?
If the JVC Car Receiver displays “PLEASE EJECT”, press the eject button and then correctly insert the disc.
How to eject a disc from JVC KD-R681 when it's stuck?
To forcibly eject a disc from the JVC Car Receiver, press and hold the eject button. Exercise caution to prevent the disc from falling when it ejects.
How to fix “CANNOT PLAY” error on JVC KD-R681?
To resolve the “CANNOT PLAY” error on your JVC Car Receiver, make sure the Android device contains playable audio files. Try reconnecting the Android device or restarting it.
What to do if sound cannot be heard during playback on JVC KD-R681?
If you cannot hear sound during playback on your JVC Car Receiver, try the following: 1. Reconnect the Android device. 2. If in [AUDIO MODE], launch any media player application on the Android device and start playback. 3. If in [AUDIO MODE], relaunch the current media player application or use another media player application. 4. Restart the Android device.
How to eject a disc from JVC KD-R681 Car Receiver if it's stuck?
If a disc cannot be ejected from your JVC Car Receiver, press and hold the eject button to forcibly eject the disc. Be careful not to drop the disc when it is ejected.
What does 'UPDATE APP' mean on my JVC KD-R681 Car Receiver?
If “UPDATE APP” appears on your JVC Car Receiver, make sure you have installed the latest version of the iHeart Link for JVC application on your device.
| CD Playback | Yes |
|---|---|
| USB Input | Yes |
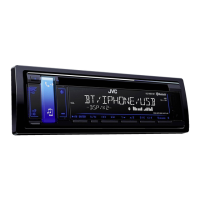
| Bluetooth | Yes |
| Pre-Output Voltage | 2.5V |
| Frequency Response | 20Hz - 20kHz |
| USB Standard | USB 2.0 |
| USB Current Supply | 1A |
| File System | FAT16, FAT32 |
| MP3 Decoding | Yes |
| WMA Decoding | Yes |
| AM Frequency Range | 530 - 1710 kHz |
| AUX Input | Yes |
| MP3 Playback | Yes |
| WMA Playback | Yes |
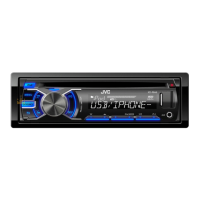
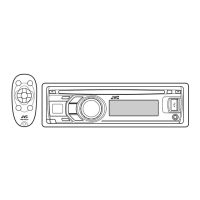
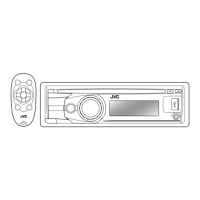
| Remote Control | Yes |
| Detachable Faceplate | Yes |
| Steering Wheel Control Compatible | Yes |
| Channels | 4 |
| Power Output | 4 x 50W |
| RMS Power | 22W x 4 |
| Tuner | FM/AM |
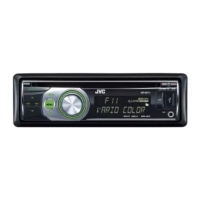
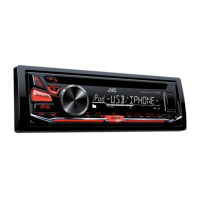
| Display | LCD |
| Pre-Output Impedance | 10 k ohms |
| MP3 Bit Rate | 32 - 320kbps |
| WMA Bit Rate | 32 - 192kbps |
| FM Frequency Range | 87.5 - 108.0MHz |
Key information to ensure proper use and safety, including warnings and cautions.
Procedure for setting the unit's clock and date.
How to configure essential system and source settings.
Instructions for searching and tuning radio stations.
How to save favorite stations and recall them.
Configuration for radio timer, auto-station memory, and local seek.
How to begin playback from various connected media sources.
Operations for playback, track skipping, repeat, and random play.
Methods for selecting files from folders or using quick/alphabetical search.
Selecting preset EQs or customizing sound with EASY EQ and PRO EQ.
Configuring subwoofer levels, LPF, phase, and speaker output.
Selecting speaker output based on connection type (lineout or speaker leads).
Common issues and solutions for audio, reception, and static noise.
Fixes for playback, connection, and detection problems with media devices.
Important safety warnings and precautions before installation.
Diagram and instructions for connecting the unit's wiring harness.