KD-S36
Installation/Connection Manual
Manual de instalación/conexión
GET0643-002A
[J]
PREPARATIONS /
PREPARATIVOS
You need the installation kits which corresponds to your car. / Utilice los kits de instalación que correspondan a su vehículo.
• Mark all the check boxes (
) to make sure you have follow the instructions and the listed parts. / Marque todas las casillas ( ) para cerciorarse de que se han seguido las instrucciones, y de tener
las piezas mencionadas.
Check the battery system in your car /
Verifique el sistema de batería de su vehículo
1
0709DTSMDTJEIN
EN, SP
© 2009 Victor Company of Japan, Limited
ENGLISH ESPAÑOL
12 V DC, NEGATIVE ground / 12 V CC, NEGATIVO a masa
TROUBLESHOOTING /
LOCALIZACIÓN DE AVERIAS
Parts list for installation and connection /
Lista de piezas para instalación y conexión
INSTALLATION /
INSTALACION
The following illustration shows a typical installation. If you have any questions or require information regarding installation kits, consult your JVC car audio dealer or a company supplying
kits. / La siguiente ilustración muestra una instalación típica. Si tiene alguna pregunta o necesita información acerca de las herramientas para instalación, consulte con su concesionario de JVC
de equipos de audio para automóviles o a una compañía que suministra tales herramientas.
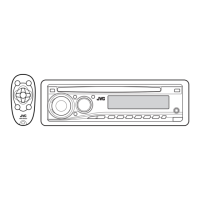
A/B
Hard case/Control panel
Estuche duro/Panel de
control
C
Sleeve / Cubierta
D
Trim plate / Placa
de guarnición
F
Handles / Manijas
G
Remote controller / Control remoto
E
Power cord / Cordón
de alimentación
H
Battery / Pila
Bracket / Ménsula
*
2
Pocket /
Compartimiento
Flat head screws / Tornillos tipo plano—
M5 × 8 mm (3/8" / 3/8 pulgada)
*
2
When installing the unit without using the sleeve / Instalación de la unidad sin utilizar la
cubierta
In a Toyota car for example, first remove the car radio and install the unit in its place.
En un automóvil Toyota, por ejemplo, en primer lugar desmonte el autorradio e instale la unidad
en su lugar.
See “ELECTRICAL CONNCECTIONS” on page 2.
/ Véase “CONEXIONES ELÉCTRICAS” en la
página 2.
*
1
When you stand the unit, be careful not to damage the fuse on the rear.
*
2
Not supplied for this unit.
Removing the unit / Extracción de la unidad
Release the rear section first... / Primero libere la
sección trasera...
PRECAUTIONS on power supply and speaker connections / PRECAUCIONES
sobre las conexiones de la fuente de alimentación y de los altavoces
Prepare this before installation /
Prepare esto antes de la instalación
8 mm (3/8" / 3/8 pulgada)
In-dash mounting / Montaje en el tablero de instrumentos
*
1
Al poner la unidad vertical, tenga cuidado de no dañar el fusible provisto en la parte posterior.
*
2
No suministrado con esta unidad.
• The fuse blows. ] Are the red and black leads connected correctly?
• Power cannot be turned on. ] Is the yellow lead connected?
• No sound from the speakers. ] Is the speaker output lead short-circuited?
• Sound is distorted. ] Is the speaker output lead grounded? ; Are the “–” terminals of L and R
speakers grounded in common?
• Noise interfere with sounds. ] Is the rear ground terminal connected to the car’s chassis
using shorter and thicker cords?
• This unit becomes hot. ] Is the speaker output lead grounded? ; Are the “–” terminals of L
and R speakers grounded in common?
• This unit does not work at all. ] Have you reset your unit?
• El fusible se quema. ] ¿Están los conductores rojo y negro correctamente conectados?
• No es posible conectar la alimentación. ] ¿Está el cable amarillo conectado?
• No sale sonido de los altavoces. ] ¿Está el cable de salida del altavoz cortocircuitado?
• El sonido presenta distorsión. ] ¿Está el cable de salida del altavoz conectado a masa? / ¿Están
los terminales “–” de los altavoces L y R conectados a una masa común?
• Perturbación de ruido. ] ¿El terminal de tierra trasero está conectado al chasis del automóvil
utilizando los cordones más corto y más grueso?
• La unidad se calienta. ] ¿Está el cable de salida del altavoz conectado a masa? / ¿Están los
terminales “–” de los altavoces L y R conectados a una masa común?
• Este receptor no funciona en absoluto. ] ¿Reinicializó el receptor?
Install_KD-S36[J]1.indd 1Install_KD-S36[J]1.indd 1 8/7/09 9:58:37 AM8/7/09 9:58:37 AM