ENGLISH
37
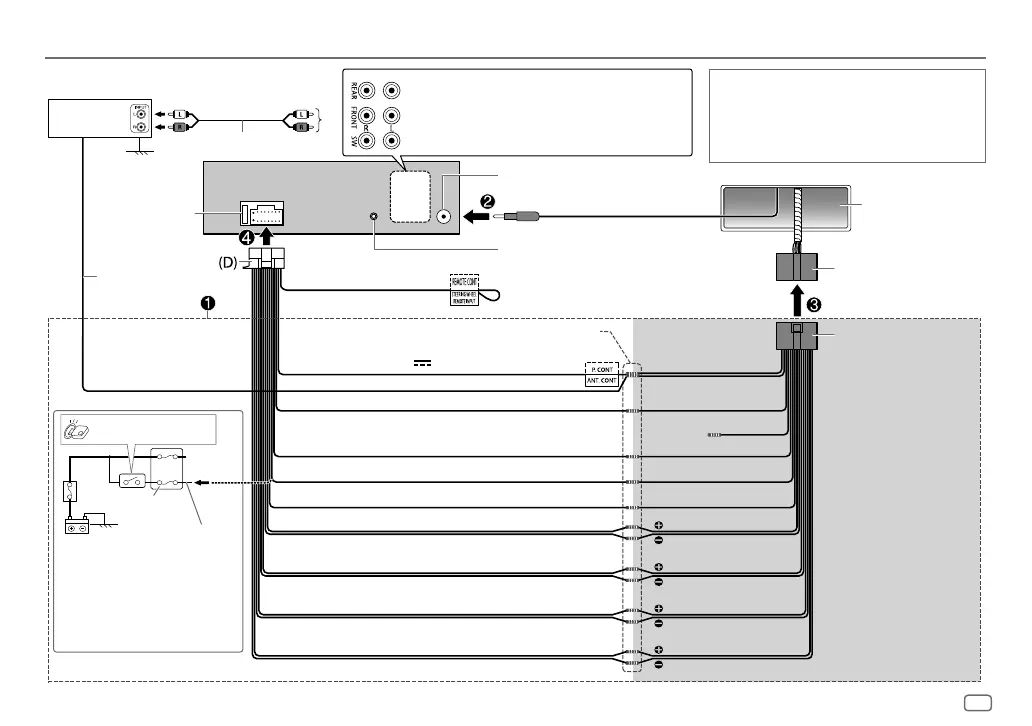
INSTALLATION/CONNECTION
Wiring connection
*1 You can also connect a
subwoofer speaker directly
using this lead without an
external subwoofer amplifier.
For setting, see page 23.
*2 Firmly connect the ground
wire of the amplifier to
the car’s chassis to avoid
damaging the unit.
Car fuse block
Ignition switch
Blue/white: To amplifier
Blue: To power antenna
Make this connection if your vehicle
factory wiring harness does not have
“12 V ignition switch” wire.
Separate red wire
Fuse (10 A)
Antenna terminal
Factory wiring
harness (vehicle)
Vehicle
dashboard
Black: Ground
White: Front speaker/For 3-way crossover: Mid range speaker (left)
White/black
Gray: Front speaker/For 3-way crossover: Mid range speaker (right)
Gray/black
Green: Rear speaker *1/For 3-way crossover: Tweeter (left)
Green/black *1
Purple: Rear speaker/For 3-way crossover: Tweeter (right)
Purple/black
Join the same color wires together.
Red: Ignition 12 V
Orange/white: Illumination
Blue/white: Remote (12 V
350 mA)
Light blue/yellow
To the steering wheel
remote control adapter
Custom wiring harness
(separately purchased)
Recommended connection
IMPORTANT
We recommend installing the unit with a commercially
available custom wiring harness specific for your car and
leave this job to professionals for your safety. Consult
your car audio dealer.
(Not used)
Brown
Yellow: Battery 12 V
Rear output/3-way crossover: Tweeter output
Front output/3-way crossover: Mid range output
Subwoofer output/3-way crossover: Woofer output
Microphone input jack (page 13)
Signal cord (not supplied)
Remote wire
(not supplied)
JVC Amplifier*2
 Loading...