8
Replacing the Blades
WARNING–Bladesaresharp!Useleathergloveswhenhandlingblades.
1) Set the drill to neutral or remove the battery from the drill for your own safety.
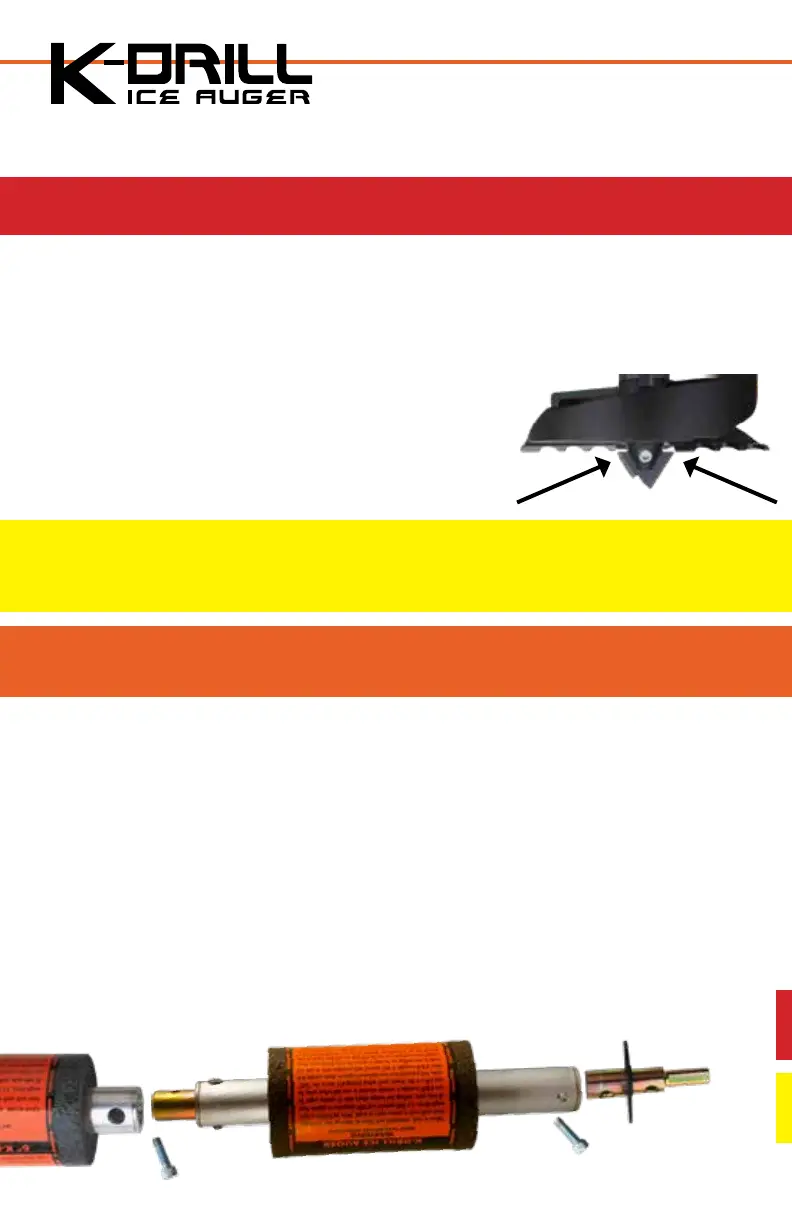
2) Remove the center tip blade with 3/16” Allen wrench.
3) Remove the outside chipper blades with 7/16” open end wrench.
4) Replace the outside chipper blades and snug the bolts into
position.Thentorqueanadditional1⁄4turnandSTOP!
(If possible torque to 115 in/lbs)
5) Replace the center tip. Adjust the blade so it is equally
spaced side-to-side from the chipper blades installed in
the previous step.
IMPORTANT - The center point blade when being re-installed needs to be
centered between the two main chipper blades. The unique two stage point may look like
a broken tip but it is designed this way.
CAUTION - DO NOT OVER TIGHTEN as it will strip the threads and this will
not be covered under warranty.
6) Torque bolt of center tip to 115 in/lbs.
K-Drill Extension Installation
The standard K-Drill can drill through up to 36” of ice. The K-Drill extension can
be added for thicker ice conditions. Extensions can be “stacked” if needed to create
a very long ice auger.
1)Slidethedownoat,exposingtheAllenbolt.
2) Remove the bolt and remove the drive adapter with washer.
3) Install the stem of extension. Replace and tighten bolt removed in step #2.
4) Install the driver adapter with washer into top of extension. Secure it with the
bolt provided.
#IDRLEXT - 12 “ Auger Extension
 Loading...