EasyManua.ls Logo

Kaboodle 900mm Slimline Cabinet W-51631 User Manual

Kaboodle 900mm Slimline Cabinet W-51631
3 pages
To Next Page IconTo Next Page
Page #1 background imageLoading...
Page #1 background image
Wall fixing
(If necessary)
Tools you will need
To put your kaboodle kitchen cabinets together you will need the following tools.
Hardware included
Things you need to know
Cordless drill with:
Number 2 screw tip
4mm drill bit
Number 12
countersinking drill bit
Tape
measure
Adjustable
square
65mm
wood screw
Clamps
(quick release)
Safety
gearPencil
Wall fixing
(If necessary)
CBA
step 1
All cabinets will need to be attached to the wall using a
minimum of 8 gauge 65mm screws if you have a stud wall.
If your wall is concrete, brick or another surface ask your
hardware specialist for advice on the right fixing method.
Make sure you leave plumbing and electrical work
to qualified trades people. Never try this yourself.
For extra strength use exterior woodworking glue
when assembling cabinets.
To help identify panels, counter sunk holes always
face outwards.
All holes that aren’t already pre-drilled should be drilled prior
to screwing using a No 12 countersinking drill bit.
Make sure you always use safety gear like a mask, ear muffs
and glasses when using tools.
If you have any questions, contact us on:
Australia: 1800 666 078 Monday to Friday between
8:00am and 6:00pm AEST, New Zealand: 0800 522 663
Monday to Friday between 8:00am and 5:00pm NZST
or email: info@kaboodlegroup.com.au.
Follow these
instructions to
build and attach
your cabinet.
p. 1Ver. 9
W-51631
Spirit level
(900mm recommended)
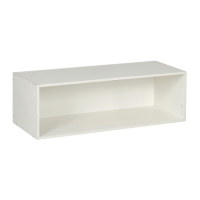
900mm slimline cabinet
50mm
wood screws x 20
28mm
wood screws x 8
stick on end
caps x 12
door
buffer x 2
D
Cabinet
stand
Question and Answer IconNeed help?

Do you have a question about the Kaboodle 900mm Slimline Cabinet W-51631 and is the answer not in the manual?

Kaboodle 900mm Slimline Cabinet W-51631 Specifications

General IconGeneral
BrandKaboodle
Model900mm Slimline Cabinet W-51631
CategoryIndoor Furnishing
LanguageEnglish

Summary

Hardware Included

50mm Wood Screws

50mm wood screws included for cabinet assembly.

28mm Wood Screws

28mm wood screws included for cabinet assembly.

Stick-on End Caps

End caps provided for finishing cabinet edges.

Door Buffers

Buffers included to cushion door closures.

Tools Needed for Assembly

Cordless Drill

Cordless drill with specific screw tips and drill bits required.

Spirit Level

Spirit level recommended for ensuring accurate alignment.

Tape Measure

Tape measure for accurate measurements during installation.

Pencil

Pencil for marking points during installation.

Clamps

Clamps for holding components during assembly.

Safety Gear

Essential safety gear like mask, ear muffs, and glasses.

Adjustable Square

Adjustable square for checking cabinet angles.

Wall Fixing

Appropriate wall fixings needed for secure mounting.

Cabinet Stand

Cabinet stand to support during assembly or fixing.

Cabinet Assembly and Joining

Assembling the Cabinet

Step-by-step instructions for assembling the cabinet structure.

Joining Cabinets Together

Guidance on how to join multiple cabinets securely.

Fixing Cabinets to the Wall

General Wall Fixing

Instructions for fixing cabinets to standard stud walls.

Wall Fixing Details

Specifics on fixing cabinets to pantry end panels or timber rails.

Creating Overhead Fridge Cabinets

Overhead Fridge Cabinet Installation

Steps to create an overhead fridge cabinet using slimline units.

Cabinet Care and Maintenance

Cleaning and Maintenance

Advice on how to clean and care for Kaboodle cabinets.

Repairing Surface Damage

Tips for covering minor damage to the melamine surface.

Related product manuals