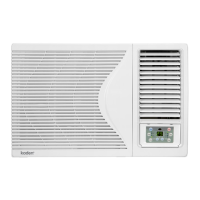
This document is an owner's manual for the Kaden R32 Window Air Conditioner, specifically covering the KW Series (KW09, KW12, KW18, KW21) models. It provides comprehensive information on safety precautions, unit specifications, remote control functions, manual operation, Wi-Fi setup, operation tips, care and maintenance, warranty information, troubleshooting, installation, and an installation record form.
Function Description
The Kaden R32 Window Air Conditioner is designed to regulate room temperature and humidity, offering cooling in summer, dehumidifying in rainy or humid seasons, and heating in winter (for reverse cycle models). It also provides a fan-only mode for air circulation without cooling or heating. The unit features an "Exchange fresh air" function, which opens the storm door to keep the room air fresh.
Important Technical Specifications
- Refrigerant: R32 (difluoromethane), a flammable gas class 2.2 according to AS 1677. Handling requires a refrigeration technician with an appropriate Australian Refrigerant Handling License.
- Power Requirements: Rated voltage 220 – 240V ~ 50Hz.
- Temperature Setting Range: 16 to 30°C (or °F).
- Timer Setting Range: 0.5 to 24 hours.
- Filter Cleaning Reminder: LED light illuminates after 250 hours of operation.
- Electrical Wiring: Requires an exclusive fixed power circuit as per AS/NZS 3000:2018. Must be connected to ground. A fixed circuit must include an RCD or RCBO with a maximum rated residual current of 30mA as per AS/NZS 3000:2018 (Clause 2.6.3.2.2). An all-pole circuit breaker with at least 3mm contact separation in all poles should be connected in fixed wiring.
- Minimum Installation Height: 1 meter.
- Minimum Room Area: The minimum room area is shown on the nameplate or following table.
- KW09: 4.0 m² (Window mounted), 5.2 m² (Non-human comfort applications and portables)
- KW12: 6.1 m² (Window mounted), 7.0 m² (Non-human comfort applications and portables)
- KW18: 7.9 m² (Window mounted), 8.9 m² (Non-human comfort applications and portables)
- KW21: 10.0 m² (Window mounted), 11.2 m² (Non-human comfort applications and portables)
- Refrigerant Charge (Pre-charged / Max):
- KW09: 0.60kg / 0.60kg
- KW12: 0.86kg / 0.86kg
- KW18: 1.05kg / 1.05kg
- KW21: 1.05kg / 1.05kg
Usage Features
- Remote Control: The unit is primarily operated via a wireless remote controller.
- On/Off Button: Powers the unit on or off.
- Mode Button: Cycles through operating modes: Auto, Cool, Dry, Fan only, Heat.
- Auto Mode: Operates automatically based on factory settings; temperature cannot be adjusted.
- Cool Mode: Cooling operation; fan speed adjustable.
- Dry Mode: Dehumidification at low fan speed; fan speed not adjustable.
- Fan Only Mode: Air circulation without cooling/heating; fan speed adjustable.
- Heat Mode: Heating operation; fan speed adjustable.
- +/- Buttons: Adjusts set temperature (1°C/°F increments) or timer settings (0.5-hour increments, or 1-hour increments for 10-24 hour range). Holding the button changes values more quickly.
- Swing Button: Activates or deactivates automatic louvre swing.
- Fan Button: Sets fan speed in sequence: Auto, Speed 1, Speed 2, Speed 3, then back to Auto.
- Sleep Button: Activates/deactivates Sleep operation mode.
- Timer Button: Sets timer On or Off. Allows adjustment of time from 0.5 to 24 hours.
- Health Button: (Note: The KW range does not support this feature, though the button is present on the standard remote).
- Wi-Fi Button: Turns Wi-Fi function on/off. Holding for five seconds turns off Wi-Fi. Pressing Mode and Wi-Fi simultaneously for one second restores factory settings for the Wi-Fi module.
- Temperature Display Switch: Under Off status, pressing "-" and "Mode" simultaneously switches temperature display between °C and °F.
- Light Function: Under Switch-on or Switch-off state, holding "+" and "Fan" simultaneously sets the lamp on or off.
- Manual Operation (without remote): A control panel on the unit allows basic operation if the remote is lost.
- ON/OFF Button: Starts/stops operation.
- SWING Button: Activates automatic louvre swing.
- FAN SPEED Button: Selects fan speed (LOW, MID, HIGH, AUTO).
- TIME/TEMP Button: Increases/decreases set temperature (16-30°C) or timer settings (0-24 hours).
- MODE Button: Selects operation mode (AUTO, COOL, DRY, FAN, HEAT).
- FILTER Button: Resets the filter cleaning reminder.
- Ventilation Lever: Allows opening (OPEN) to expel air, smoke, or odors, or closing (CLOSE) for internal air circulation.
- Wi-Fi Functionality: The unit can be controlled via a smartphone app (Kaden Smart).
- Setup Process: Involves scanning a QR code or searching "Ewpe Smart" in app market, registering an account, adding the device, and connecting to the home Wi-Fi network.
- Main Function Settings: Device list, device operation interface, temperature and fan speed control.
- Advanced Settings: FUNC (lower left corner) for advanced settings.
- Swing Settings: Control up/down swing and left/right swing.
- Preset Setting: Sets timer.
- Other Function Settings: Homepage menu, scene creation, home management, help.
- Operation Tips:
- Avoid over-cooling/heating.
- Keep curtains closed during operation.
- Maintain uniform room temperature by adjusting vertical and horizontal airflow.
- Ensure doors and windows are tightly closed.
- Clean air filter regularly (every two weeks).
- Ventilate the room occasionally.
- Avoid direct exposure to cool air for prolonged periods.
- Do not use near combustible gases or in wet rooms.
- Do not insert objects into air inlet/outlet.
- Do not block air intake/outlet.
- Do not use heating apparatuses in the vicinity.
Maintenance Features
- Cleaning the Unit:
- Turn off and unplug the unit before cleaning.
- Wipe the cabinet with a soft, dry cloth or a damp cloth (below 40°C) if very dirty.
- Do not use gas, benzene, solvent, wax, chemical solvent, etc., for cleaning.
- Do not splash water directly onto the unit.
- Air Filter Cleaning:
- The air filter should be washed at least once every two weeks or as often as needed.
- Turn off and unplug the unit.
- Vacuum dust from the filter or gently flush with water.
- If very dirty, use a mild household detergent in wash water.
- Dry thoroughly before reinstalling.
- Remote Controller Battery Replacement:
- Press the back of the remote controller marked "OPEN" and push out the cover.
- Replace two 7# (AAA 1.5V) dry batteries, ensuring correct polarity.
- Reinstall the cover.
- Remove batteries if not in use for a long time.
- Drain Water System:
- Install drain pan and drain hose (not included) before use.
- Slide out chassis, install drain pan with screws, connect drain hose to outlet, then slide chassis back.
- The unit is designed to splash condensation water on the condenser coil for maximum cooling efficiency. If splashing sound is excessive, the rubber plug can be removed from the chassis to reduce noise, though this may slightly reduce performance on hot days.
- Service Maintenance:
- Regular maintenance is crucial for prolonged useful life and efficient operation.
- Service is not covered under warranty and is a chargeable service.
- All units must have safe and reasonable access and be installed in compliance with installation conditions supplied with the unit.
- Installations may require two service personnel to attend in accordance with health and safety requirements.
- Air filters require regular inspection and cleaning.
- Decommissioning:
- Requires a qualified technician following specific procedures for refrigerant recovery, electrical disconnection, and component removal.
- Refrigerant must be recovered into appropriate cylinders.
- Equipment must be labeled to indicate it contains flammable refrigerant.
- Ensure proper ventilation during the process.
- All components must be handled to prevent environmental contamination.