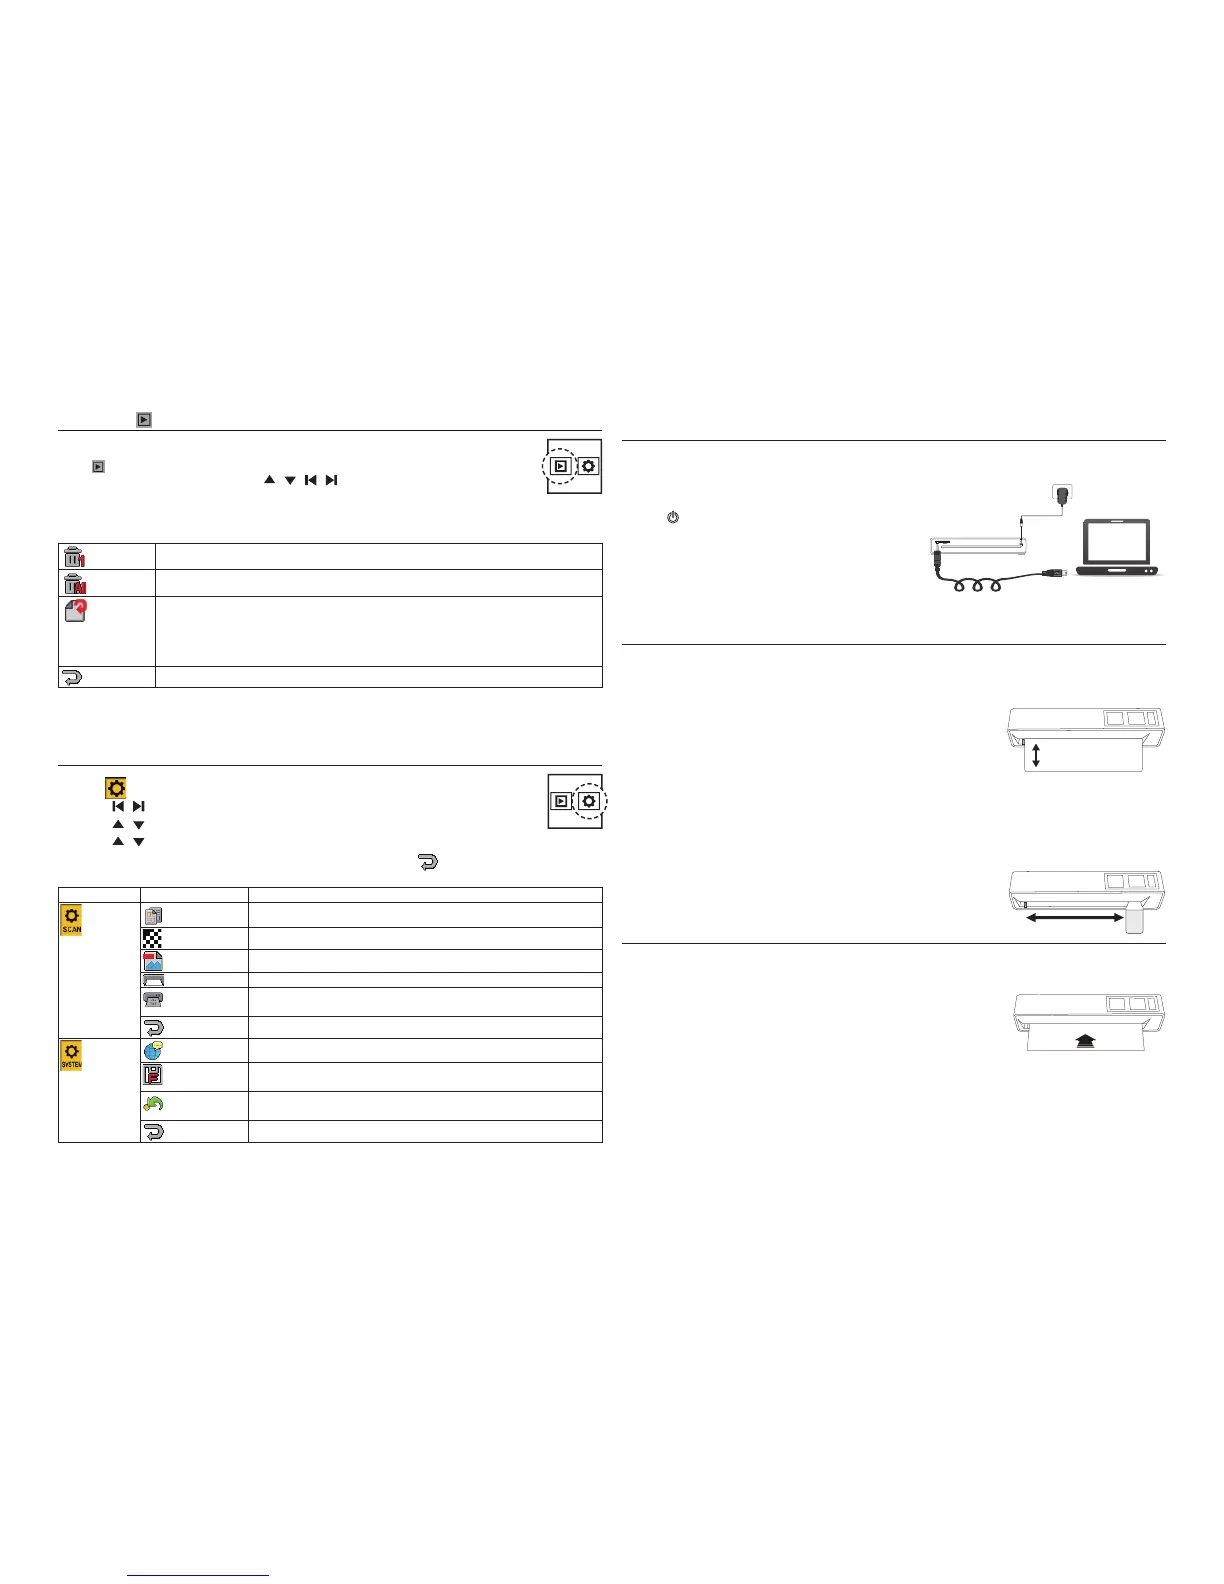
Connecting to a PC
Note: Please power off the scanner before connecting to a PC.
1. With the MMC/SD card inserted into the scanner, connect
the mini USB cable to the Scanner and then to a USB 2.0
port on your computer.
2. Press
button to turn on the scanner.
3. A “Removable Disk” window will appear on the PC. Drag
and drop the scanned images to your PC.
Disconnecting the Scanner from PC
Double click the "Safely Remove Hardware" icon in Windows
to remove the scanner.
Cleaning the scanner
• Be sure to power off the scanner before cleaning.
• To get high image quality, please clean your scanner from time to time.
• Make sure the roller cleaner and lens cleaner are clean without any dust before use.
Use a roller cleaner
1. Hold the grip handle of the roller cleaner with the sponge side facing
down.
2. Insert the roller cleaner into the front side of the feed slot.
3. Select Clean by following the steps below: Setting > Scan Setting > Clean.
4. The clean starts. After few seconds, it will stop and fi nish. Remove the roller cleaner.
Use a lens cleaner
1. Hold the grip handle of the lens cleaner wth the sponge side facing down.
2. Insert fi rmly the lens cleaner with the fabric side facing up into the front
side of the feed slot.
3. Move the lens cleaner from one side to the other slightly a few times, then
remove it.
Calibrating the Scanner
• To get high image quality and good recognition results, please perform the steps below from time to time.
• Make sure the calibration paper is clean without any dust before use.
1. Insert the calibration paper with the printing side UP into the feed slot.
2. Select Calibration by following the steps below: Setting > Scan Setting >
Calibration > Yes.
When the calibration is done, the scanner will power itself off automatically.
Playback
Playback
View and Zoom the Images
Under
(Playback) mode, press OK/ZOOM button repeatedly to zoom in the
scanned image
until the desired size is displayed. Press / / / buttons to move around the image.
Playback Menu
Note: You can not view the fi les that are not scanned by this scanner on the LCD screen.
Delete One Delete the current displayed image. Select Yes to proceed or No to cancel.
Delete All Delete all the images stored in the memory card.
Rotate
Options: 0°/90°/180°/270°.
Each time you perform the rotation, the image will be rotated based on its original
scanned orientation. To undo the rotation, select 0° from the menu.
Note: The orientation of the scanned images remain unchanged when transferring
images to PC, although they have been rotated with this setting.
Exit To exit from the current menu.
Setting
1. Select (Setting), then press OK/ZOOM button to enter the Setting Menu.
2. Use the / buttons to select a menu and press OK/ZOOM button.
3. Use the / buttons to select a sub-menu and press OK/ZOOM button.
4. Use the / buttons to select an option and press OK/ZOOM button to confi rm the selection.
To exit from the current menu and return to the Setting Menu, select
.
Menu Sub-menu Descriptions
Scan Setting
Color Mode Select Color or Gray mode for the scanning.
Resolution Select 150 dpi, 300 dpi or 600 dpi for the scanning.
File Type Select JPG or PDF fi le format for the scanning.
Clean Select to start roller cleaning.
Calibration
Calibrates the scanner. Refer to “Calibrating the scanner” for
details.
Exit To exit from the current menu.
System Setting
Language Select a screen display language.
Format
Formats all the data stored in the memory card. Select Yes to proceed
or No to cancel.
Factory Default
Restores the current settings to the factory presets. Select Yes to
proceed or No to cancel.
Exit To exit from the current menu.
Setting
 Loading...