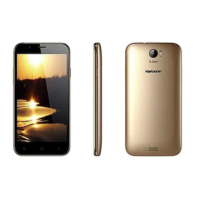
This document serves as the user manual for the Karbonn AURA, a touch screen smartphone running on Android 5.1 (Lollipop). It provides comprehensive instructions on how to operate and maintain the device, covering everything from basic setup to advanced application usage.
Device Overview and Basic Functionality
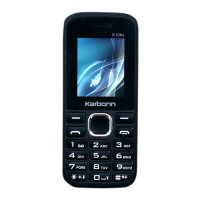
The Karbonn AURA is designed for ease of use, featuring a standard smartphone layout. The front of the device includes a front camera, a receiver for calls, and a display screen. The right side houses the volume up/down buttons and the power key. The bottom of the device features a menu button, a home button, and a back button, along with a speaker. The top of the device includes a USB jack, a headset port, and a flash light, which also serves the back camera.
Initial Setup and Power Management
Before using the phone, it's crucial to understand battery installation and charging. The manual details how to remove and insert the battery by gently lifting the battery cover from the bottom left corner and pushing the battery forward. When inserting, ensure the battery's metal contacts align with the phone's compartment. For charging, simply connect the charger to the phone and an electrical outlet. A flashing icon on the screen indicates charging, and a steady icon signifies a full charge. It's important to charge the device in a well-ventilated area between -10°C and +45°C, using only the factory-supplied charger to avoid damage and voiding the warranty.
Network Connectivity
The Karbonn AURA requires a valid and active SIM card for network functionality. The manual provides clear steps for SIM card insertion: turn off the phone, remove the battery, and then insert the SIM card into its designated slot. The phone will not function with an invalid SIM. Similarly, for expanded storage, the device supports a T-FLASH (memory) card. The insertion process is similar to the SIM card, requiring the phone to be off and the battery removed. To power the phone on or off, simply hold down the Power key for a few seconds. Upon startup, if a SIM card is inserted, the phone will automatically check for network activation and guide the user through a boot wizard to reach the home screen.
Home Screen and Navigation
The home screen is the primary interface after unlocking the device. Users can customize it by adding or deleting folders, shortcuts, or widgets. Swiping horizontally allows access to extension interfaces for adding desired content.
Function Menu and Applications
The function menu provides access to various features and applications.
- USB Mass Storage: The phone can be connected to a computer via a USB cable to function as a mass storage device. The status bar will show a notification icon, and users can enable or disable USB storage from the notification panel.
- WLAN (Wi-Fi): The device supports WLAN for connecting to wireless networks. To enable Wi-Fi, navigate to Settings > Wi-Fi. The phone will scan for available networks, displaying their names and security settings. For secured networks (WEP, WPA/WPA2), a password is required. A WLAN icon in the status bar indicates a successful connection and signal strength.
- Bluetooth: Bluetooth can be enabled via Settings > BT. The phone will scan for nearby Bluetooth devices, which will be listed for pairing. The default password for matching and connecting a Bluetooth headset is XXXX.
- Backup and Restore: This feature allows users to back up personal data and applications to an SD card and restore them to the phone.
- Browser: The web browser enables internet access, with default settings often configured for the MTN SIM card. Users can open web pages by typing URLs in the address bar or by selecting bookmarks or history records.
- Calculator: A basic four-function calculator is included for simple mathematical calculations, with the ability to separate thousands with commas.
- Calendar: The calendar displays on the screen, highlighting the current date.
- Camera: The phone features a dual camera for taking pictures and recording videos. Users can switch between camera and video modes, and also access a panoramic photo mode. To take a photo, frame the subject in the viewfinder and press the capture button. Photos are automatically saved. For video recording, press the record button to start and stop. Recorded videos can be deleted, shared via messaging, email, or Bluetooth, or viewed directly.
- Clock: The clock function allows users to set alarms. Alarms can be added, edited, or deleted, with options for setting time, repeat patterns, and other details.
- Contacts: This menu provides quick access to phone numbers stored on the device or imported from the SIM card. Users can view and create contacts.
- Downloads: This section displays all content downloaded from the browser, allowing users to view, delete, or clear selected downloads.
- Email: Users can set up email accounts by entering their address, password, and selecting communication protocols. Settings for receiving and sending servers, usernames, and checking frequency can be configured.
- File Explorer: The file manager allows users to browse files on the memory card, create new folders, copy, view, cut, delete, rename, share, and view details of files and folders.
- FM Radio: To use the FM radio, headphones must be inserted. Users can search for channels, open the speaker, and record FM broadcasts.
- Gallery: The gallery displays all pictures and videos stored on the T-card. Video files can be played using the integrated video player.
- Call History: The device lists all calls in reverse chronological order, categorized as all, answered, dialed, or missed calls.
- Messaging: This function allows sending and receiving SMS and MMS messages. To send an SMS, compose a new message, enter the recipient's number (or select from contacts), type the message content, and send. For MMS, users can add pictures, videos, audio, or calendar files, and even capture new media directly into the attachment.
- Music: To play music, files must be copied to the memory card. The music player allows users to browse by artist, album, or song. Playlists can be created, managed, and added to. Music files can also be set as phone ringtones. Sound effects can be enabled and adjusted.
- Phone: This menu is used to make calls.
- Settings: The settings menu offers extensive customization and control over the device.
- Wi-Fi: Manage Wi-Fi connections, including access points, Wi-Fi Direct, tethering, and VPN settings.
- Bluetooth: Turn Bluetooth on/off and manage settings.
- Data Usage: Monitor data consumption.
- More: Access airplane mode, additional VPN settings, tethering options, Wi-Fi Direct, mobile network settings, and GPRS transfer preferences.
- Audio Profiles: Select from general, silent, vibration, or outdoor audio profiles.
- Display: Adjust screen brightness, set wallpapers, choose themes, enable auto-rotate, set sleep duration, and adjust font size.
- Storage: View SD card and internal storage details, mount/unmount SD card, and erase SD card data.
- Battery: View battery condition and power consumption.
- Apps: Manage applications, including unknown sources, installed apps, running services, and storage usage.
- Location: Configure location services using wireless networks and GPS satellites, with options for GPS EPO assistance and A-GPS settings.
- Security: Configure settings to secure the phone and its data.
- Language & Input: Select language, manage user dictionary, choose keyboard settings (Android, Sogou, Google Pinyin), and select input methods.
- Backup & Reset: Options for automatic restore, DRM reset, and factory data reset.
- Scheduled Power On & Off: Set timed power on/off actions.
- Date & Time: Configure automatic date/time from networks, manually set date/time, select time zone, and choose 24-hour format.
- Accessibility: Enable/disable accessibility features, set power button to end calls, and quick boot options.
- About Phone: View system updates, status, battery information, legal information, and device model.
- Sound Recorder: A simple tool for recording voice files. Users can start, pause, and save recordings.
- Video Player: Play video files stored on the device. Users can select videos from folders and control playback (play, pause).
Maintenance Features
The manual emphasizes several maintenance guidelines to ensure the longevity and safe operation of the Karbonn AURA.
- Safety Precautions: Users are warned to switch off the device in restricted areas (e.g., near fuel tanks, aircraft) and to prioritize road safety while driving.
- Accessory Use: Only original accessories and components are covered by the repair warranty.
- Self-Repair: Users are advised not to disassemble the phone themselves; any issues should be addressed by the supplier.
- Battery Handling: Do not charge the phone before the battery is installed, and avoid short-circuiting the battery. Always charge in a well-ventilated, cool environment, away from flammable materials.
- Demagnetization: Keep the phone away from magnetic materials like disks and credit cards.
- Environmental Conditions: Keep the device dry, as moisture can corrode electronic circuits. If wet, remove the battery and contact the supplier. Avoid using the phone in extremely high or low temperatures or exposing it to strong sunlight.
- Cleaning: Do not use liquid or wet cloths with strong detergents to clean the device.
- Legal Compliance: When using camera, video, and sound recording functions, adhere to relevant laws and regulations, as unauthorized recording may be illegal.
- Network Usage: Avoid downloading files with viruses or installing damaged photos and ringtones, as this may void the warranty.
- Battery Disposal: Dispose of batteries according to local regulations and recycle when possible, rather than as household waste.
The company reserves the right to revise the manual content without prior notice, indicating that information may be updated over time.