English 13
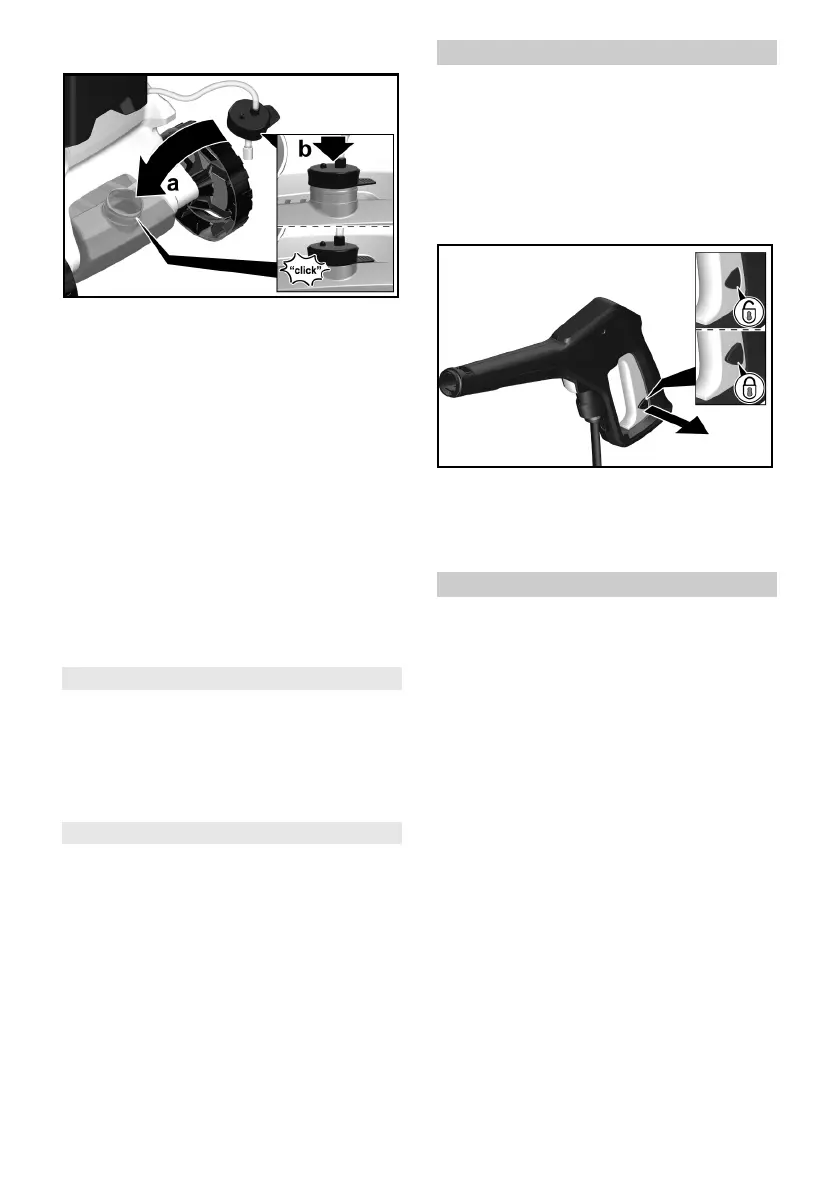
2. Close the detergent tank with the lid.
3. Insert the detergent tank in the de-
vice.
4. Use the Vario Power spray lance.
5. Turn the spray lance in the direction
of “MIX” until “MIX” is displayed on
the high-pressure gun.
During operation, the detergent
solution is mixed into the water
stream.
6. Optionally use the foam nozzle.
a Connect the foam nozzle to the
detergent tank.
b Insert the foam nozzle into the
high-pressure gun and secure it in
place by turning it 90°.
Recommended cleaning method
1. Spray the detergent sparingly on the
dry surface and let it work for a while
(do not let it dry).
2. Rinse off the loosened dirt with the
high-pressure jet.
After operation with detergent
1. Rinse the device with clear water for
approx. 30 seconds.
Interrupting operation
1. Release the trigger of the high-pres-
sure gun.
When the trigger is released, the de-
vice switches off. The high pressure
in the system is maintained.
2. Lock the trigger of the high-pressure
gun.
3. Set the high-pressure gun with the
spray lance in the parking position.
4. For work breaks longer than 5 min-
utes, switch off the device “0/OFF”.
Finishing operation
몇 CAUTION
Pressure in the system
Injuries due to uncontrolled water es-
caping under high-pressure.
Only disconnect the high-pressure hose
from the high-pressure gun or the device
if there is no pressure in the system.
1. Release the trigger of the high-pres-
sure gun.
2. Close the water tap.
3. Press the trigger of the high-pres-
sure gun for 30 seconds.
The pressure still remaining in the
system is released.
4. Release the trigger of the high-pres-
sure gun.
5. Lock the trigger of the high-pressure
gun.
6. Disconnect the device from the wa-
ter supply.
7. Switch off the device “0/OFF”.
8. Pull the GFCI plug out of the outlet.








 To Next Page