Button Functions
2
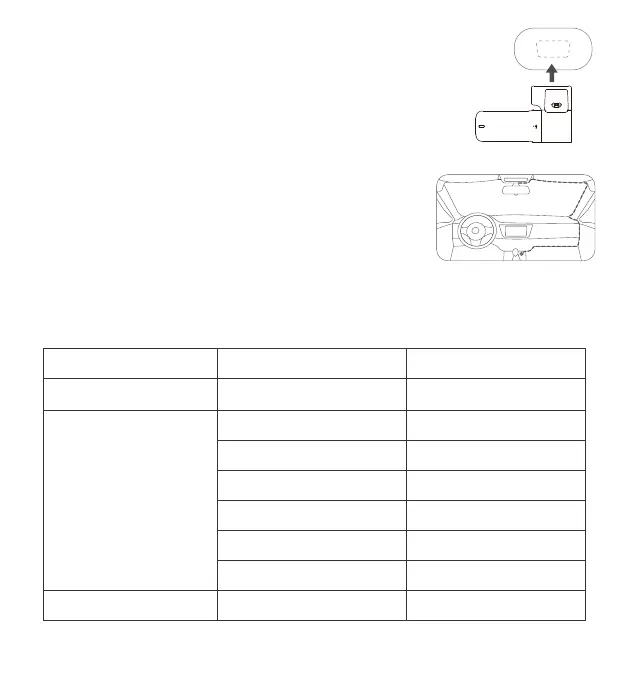
3. Attach the dash cam
Remove the protective film from the heat-resistant adhesive paper on the base
of the holder, and attach the dash cam to the dashed box of the anti-static film.
Please press the base of the holder by hand to ensure a tight fit between the
heat-resistant adhesive paper and anti-static film.
4. Route Cables and Connect to Power Outlets
As shown in the figure, route the power cords along the top of the windshield,
the A-pillar, and the storage box of the co-driver seat to the vicinity of the
cigarette lighter, connect to the car charger, and then insert the cigarette
lighter.
Note: the location of the cigarette lighter may vary from vehicle to vehicle, and the above figure is for reference only.
Power-on
When an authorization
request is received
Press and hold the power button for 3s
Click the power button
Double-click the power button
Click the power button 3 times
Click the power button 5 times
Press and hold the power button for 8s
Click the power button
To reset and restart the dash cam
To grant authorization
To reset to factory settings
To format the Micro SD card
To turn on/off Wi-Fi
To turn on/off audio recording
To turn off the dash cam
Operation
Function
State
Power-off
(the power supply is connected)
Press the power button for 1s To turn on the dash cam
You can press/click the power button for following times or durations to achieve different functions.