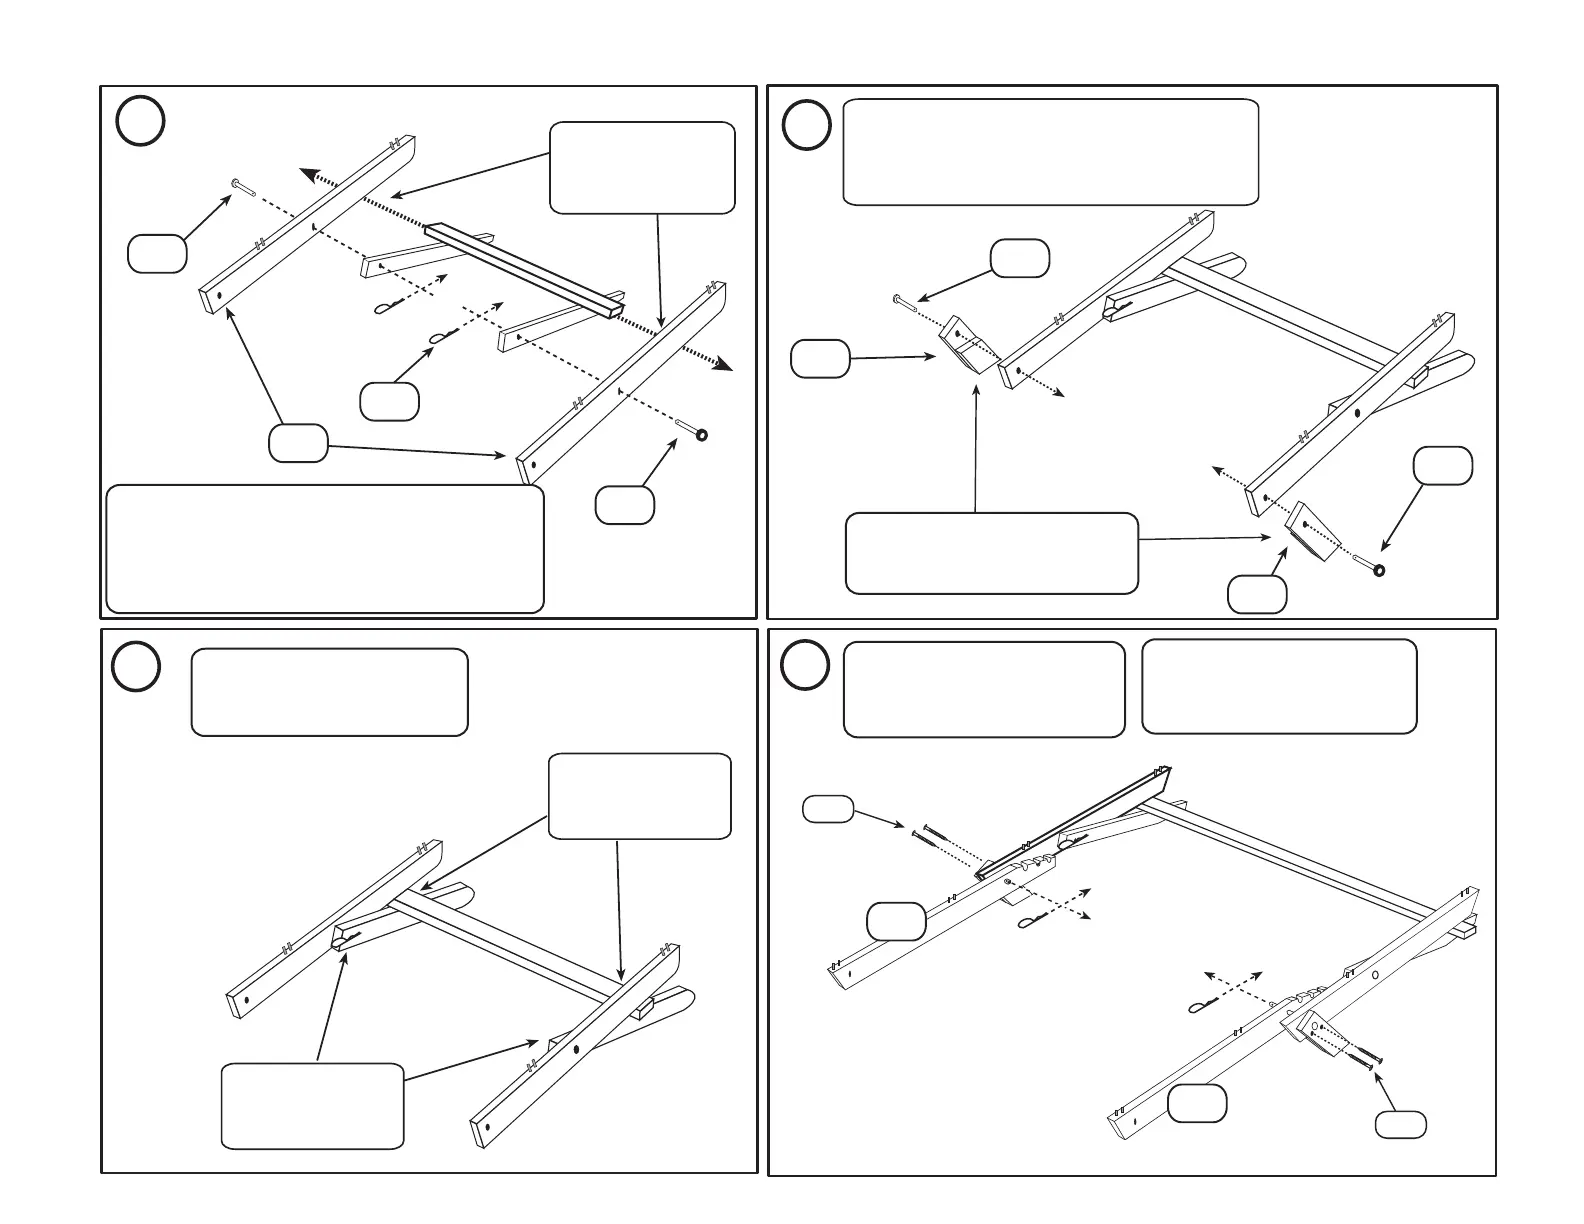
Be sure that the Props
are on the inside of the
Back Rails.
4
Be sure that the
Prop Connector
is below the
Back Rails.
Please double-check your work
at this time. Any error in this
assembly will cause serious
problems later.
H-8
Be sure that the
Prop Connector
goes below the Back
Rails.
3
K-1
H-5
H-8
K-6L
K-6R
H-12
H-12
Attach the Left and Right Back Legs (K-6) to the
outside of the BackRails using
the 3-1/4” Cevis Pins (H-12).
Do not put on the Hair Pins at this time.
5
Make sure that the cut-away part
of the Back Legs face in so that
they will support the Back Rails.
First, place the Seat Rails (K-2L)
onto the 3-1/4” Clevis Pins and
secure with Hair Pins (H-5).
6
K-2L
K-2L
Attach the Back Rails (K-1) to the outside of the
Prop Assembly using 2-1/4” Clevis Pins (H-8).
Let the Prop Assembly swing down so that the Prop
Connector can go below the Back Rails as shown.
Secure the Clevis Pins with Hair Pins (H-5).
Second, secure the Back Legs
with Wood Screws (H-19).
(These screws are self-tapping
and do not need pilot holes.)
H-19
H-19