22
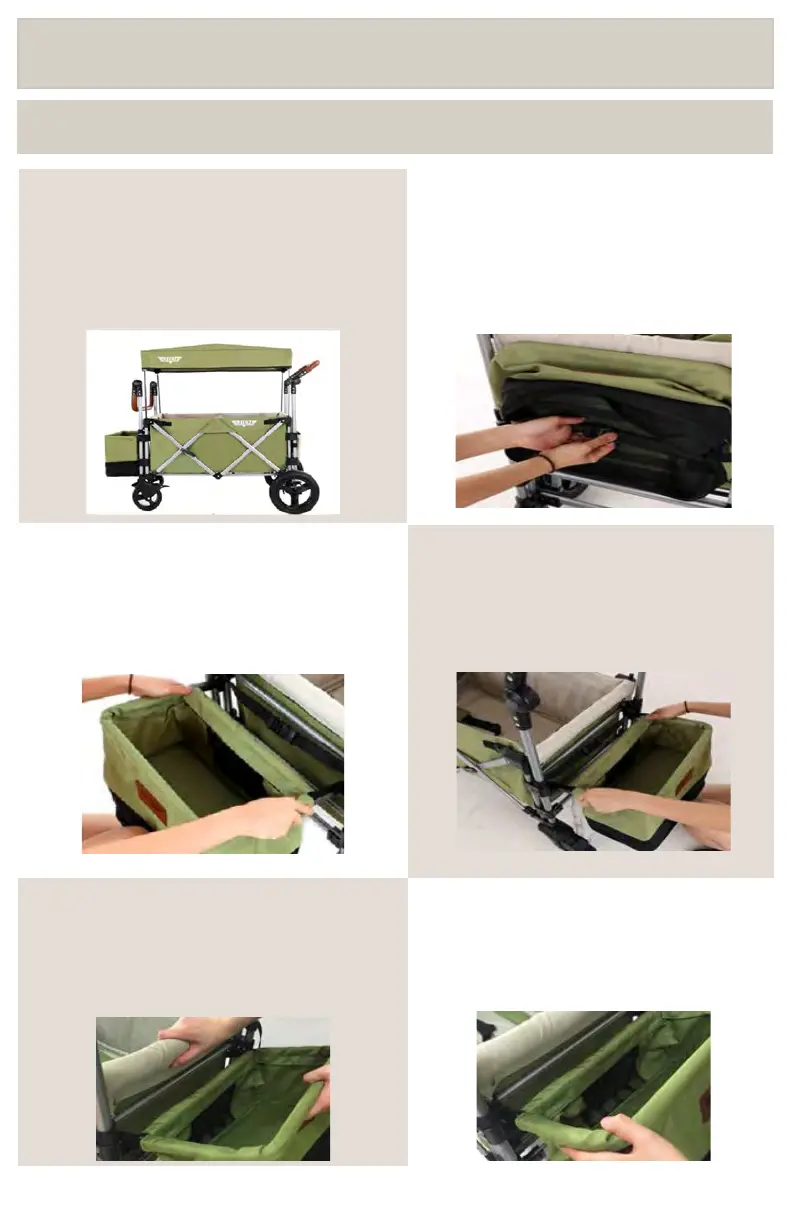
The photo above shows the parcel bag
mounted at the front of the wagon. It
can be moved to the rear or removed
completely from the wagon
STEP 1: If parcel bag is folded up, undo
buckle to expand parcel bag.
THE PARCEL BAG CAN BE MOVED TO THE OTHER SIDE OF WAGON
STEP 2: Make sure parcel bag is empty before
attempting to remove it from the wagon
STEP 3: Place one hand on bumper for
leverage and position parcel bag at an angle.
PULL OUT AT ANGLE to release parcel bag and
remove from wagon.
STEP 4: Go to front of wagon and locate
mounting points for parcel bag.
STEP 2: Position parcel bag at angle that
matches up with mounting points. Push parcel
bag into mounting points to secure to frame.
MAKE SURE THE MOUNTS LINE UP CORRECTLY!
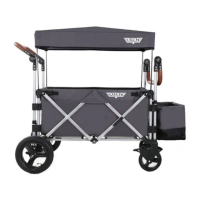
STORAGE BIN
THE STORAGE BIN CAN BE MOVED
TO THE OTHER SIDE OF THE STROLLER WAGON
MULTIPLE USES
The photo below shows the storage
bin mounted at the front of the Stroller
Wagon. It can be moved to the rear or
removed completely from the product.
OPENING STORAGE BIN
If storage bin is folded up, undo the
buckle to open it.
REMOVING STORAGE BIN
STEP 1: Make sure storage bin is empty before
attempting to remove it from the Stroller Wagon.
INSTALLING STORAGE BIN
STEP 1: Go to front of Stroller Wagon and
locate mounting points for storage bin.
STEP 2: Place one hand on bumper for leverage
and position storage bin at an angle. Pull out at
angle to release storage bin and remove from
Stroller Wagon.
STEP 2: Position storage bin at angle that
matches up with mounting points.
Push storage bin into mounting points to
secure to frame. Make sure the mounts line
up correctly.