MAINTENANCE MANUAL
Speedster page 40
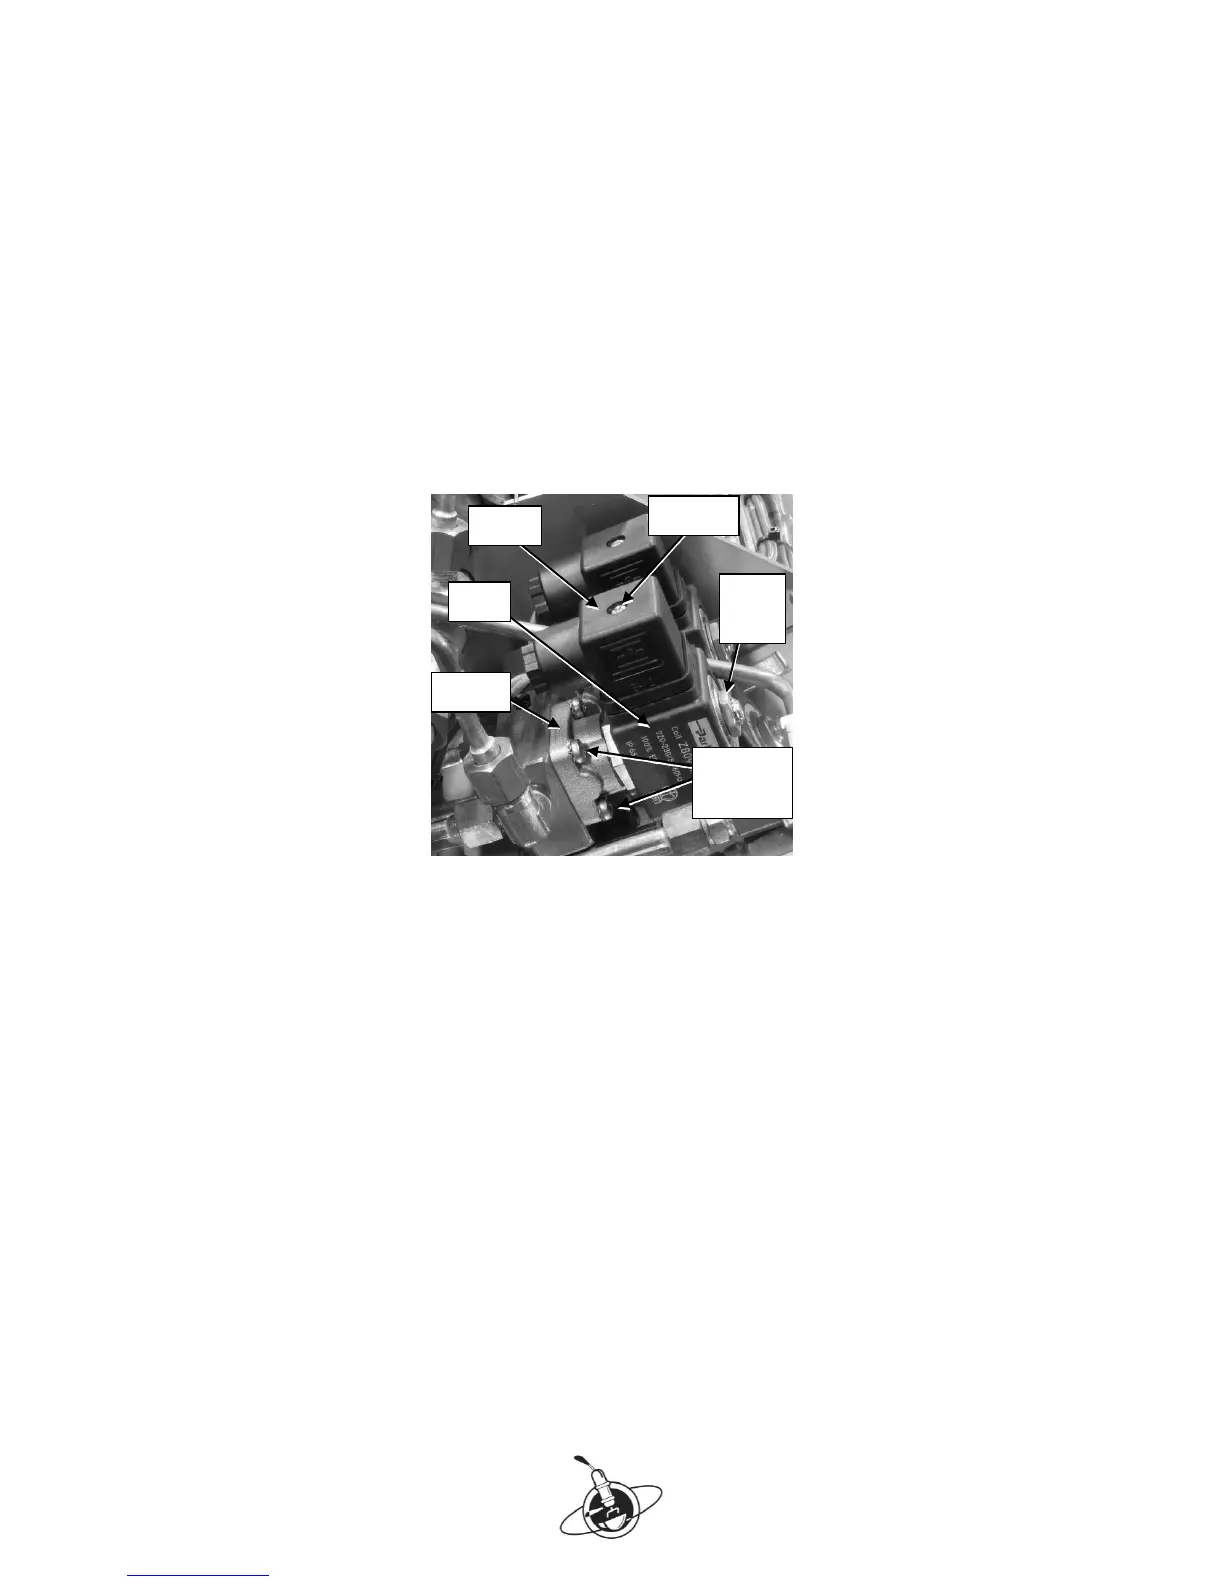
8. Remove flat nut retaining coil to valve with spanner 14 mm, remove coil.
9. Remove 4 screws that hold flange valve to base with Phillips screw driver no. 2.
10. Replace flange valve. When mounting, make sure that the new valve has both
rubber seals and that you position the openings in the flange over the openings in
the manifold. Use new locking washers on flange screws.
11. Replace coil with correct side up and electrical connectors in the proper position.
When mounting, tighten the flat nut on top just enough to hold the coil in
position. Too much strain on the coil-tube will separate it from the valve.
12. Remount electrical plug, note position of plug (see figure 26).
13. Open water mains.
14. Switch machine “on”.
15. Check for proper functioning.
16. Remount upper body and side panels.
Figure 27. Detail of (2-way) flange valves on hot water manifold.
Procedure for old model group valve (before serial number 148
****
)
1. Remove coil from group valve (see above: actions 1-8).
2. Unscrew valve from group with spanner 24 mm.
3. Make sure that the plunger and spring are removed as well.
4. Replace plunger, spring and valve. Put a little silicon grease on sealing ring
between valve and group.
5. Replace coil, do not over-tighten flat nut.
6. Remount plug.
7. Open water mains, switch machine “on”, check for proper functioning.
8. Remount body panels.