4
SNA-Series Tankless Heater Installation
10/17/2014 Keltech • 215-1815 Rev. B; ECN 130011
Mounting Heater
1
WARNING! HIGH VOLTAGE SHOCK. Disconnect power supply before performing any work inside
the heater enclosure.
CAUTION! If heater is installed where freezing can occur, specify Keltech's ENHT Freeze
Protection Option.
A
Drain water from heat exchanger through
2 drain plugs located at the bottom of the
heat exchanger. Power must be removed
from the heater and not restored until all
air has been bled off.
C
Set heater in a vertical, upright position
with the water outlet located at top.
D
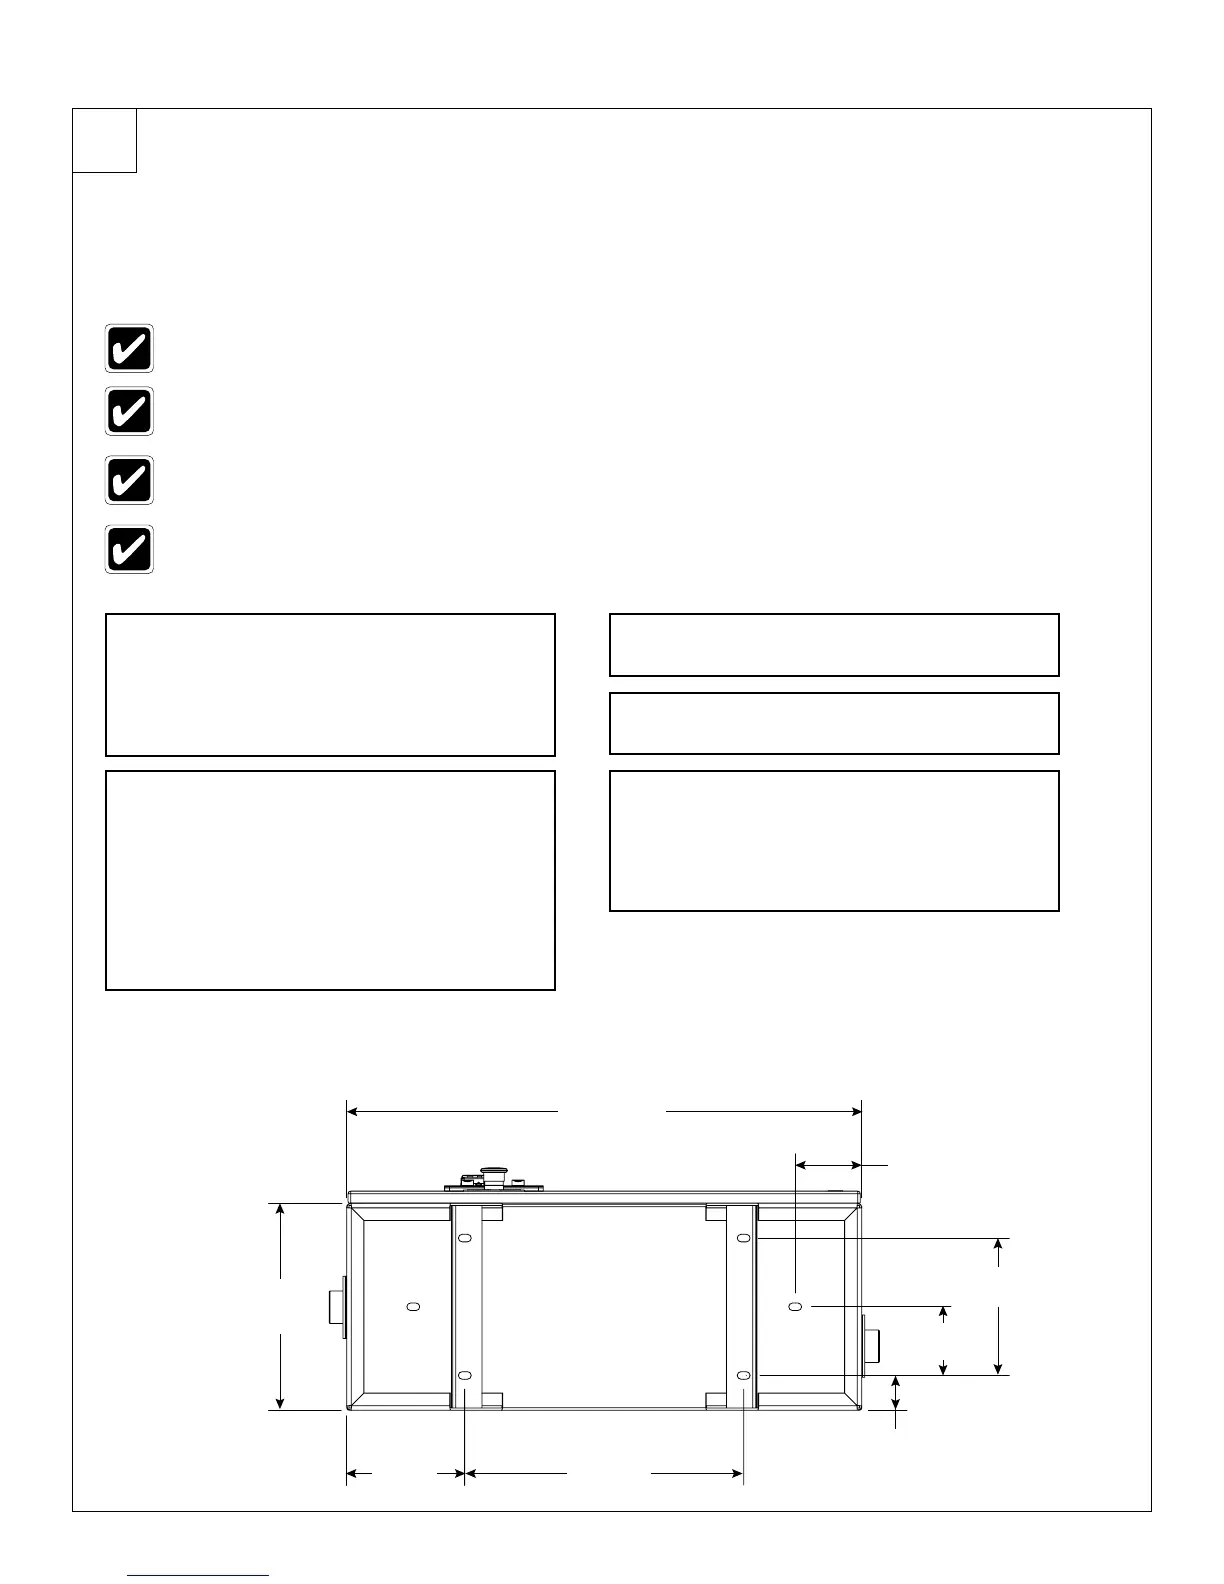
Secure heater by bolting each leg to the
floor using 3/8” anchor bolts (See Figure 1).
E
Install the pressure and temperature relief
valve on hot water outlet immediately
following the union.
NOTE: Valve must empty into a drain
(See Figure 2).
B
Remove air by re-installing drain plugs
and open inlet supply valve to apply
line pressure to heater. Open fixture
connected to the heater outlet for (5)
minutes or until all air has been removed
from the heater. Fixture can be closed
and power restored to the heater.
For best results, install heater as close as possible to the point of use.
Installation is to be performed by licensed trades people.
Long pipe runs are not recommended. A heat loss of 1°F for every 10ft (3 meters) of uninsulated
pipe can occur.
When determining a mounting location, ensure accessibility of the enclosure door and other
plumbing for service and maintenance.
FIGURE 1
Bottom View - Leg Mounting Holes
30" (762mm)
12"
(305mm)
2"
(51mm)
4"
(102mm)
8"
(204mm)
6-7/8"
(175mm)
16-1/4"
(413mm)
3-7/8"
(99mm)
3/4" x 7/16" Slot
(6) Places