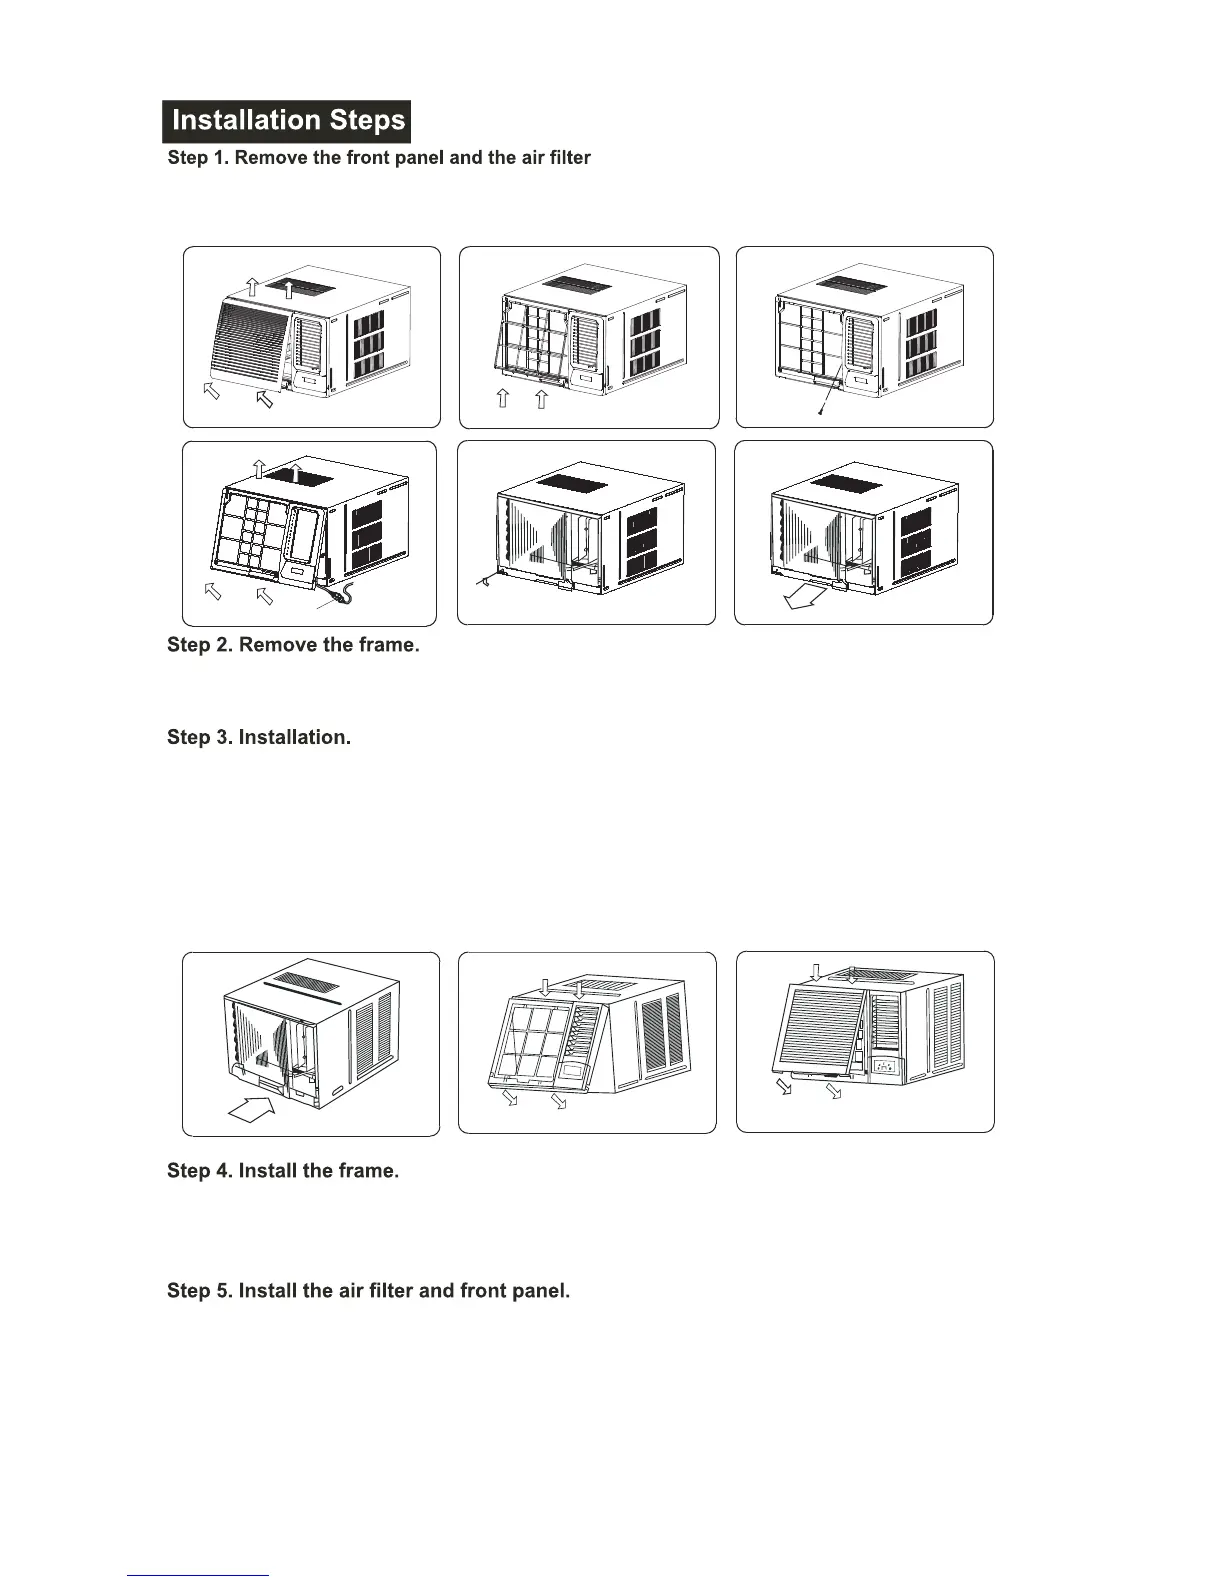
1. Remove the one fixing screws from the frame (See Fig.5).
2. Grasp the left corner of the frame's underside, then loosen the frame and carefully disconnect
the connecto
r (See Fig.6).
1. Hold the slot under the front panel, then uplift it outwards, and remove the front panel (See Fig.3).
2. Pinch the handle under the air filter and make the air filter arched, remove it fro
m the slot from
underside to upside (See Fig.4).
Fig. 3
Fig
.
4 Fig. 5
Fig
.
6
Fig
.
7
Fig
.
8
16
In-line Connector
1. Remove the fixing screws on the chassis fixing brackets and remove the two screws on the
back of cabinet (If fitted. These screws are not needed to install in later installation), then
remove the chassis fixing brackets (See Fig.7).
2. Grasp the handle on the chassis and carefully slide the air conditioner out of the cabinet
(See Fig.8).
3. Push the unit chassis into the cabinet (See Fig.9).
4. Fix the chassis with the screws previously removed as they were prior to removal.
1. Install the frame making sure not to interfere with the
temperature sensor (See Fig.10).
2. Fix the screws on the frame (See Fig.5). For ≥ 3.5kW/h
models, the screws are supplied with the unit.
1. Install the air filter into the frame's slot from upside to
underside (See Fig.4).
2. Hang the front panel on the frame's buckle, then press the
front panel into the frame's slot until you hear a click (See Fig11).
Fig. 9
Fig. 10
Fig.
11
 Loading...