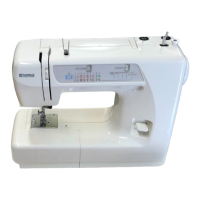
Do you have a question about the Kenmore 385.1883 and is the answer not in the manual?
A welcome message from the manufacturer to the new owner of the sewing machine.
Warnings related to electric shock hazards when operating the sewing machine.
Precautions concerning burns, fire, electric shock, and personal injury risks.
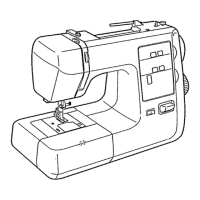
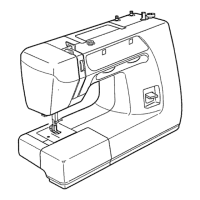
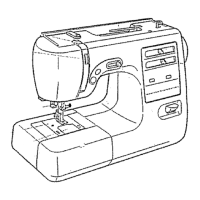
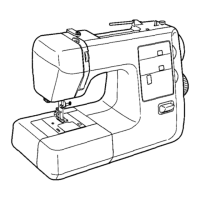
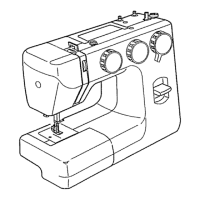
Locates and identifies all parts of the sewing machine using diagrams and numbered labels.
Lists and describes the various accessories included with the sewing machine and their functions.
Steps for connecting power, turning on the machine, and verifying the electrical outlet.
Instructions on operating the foot pedal to regulate sewing speed for precise control.
Adjusts the machine's speed settings between low for intricate work and high for general use.
Adjusts the presser foot pressure based on fabric type and thickness for optimal sewing.
Details on operating the presser foot lever to raise or lower the foot for fabric placement.
Information on using the integrated thread cutter to trim threads after sewing.
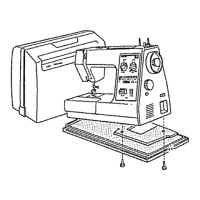
Instructions for using the free-arm sewing feature by removing the extension table for circular sewing.
Explains the function and importance of presser feet for different sewing operations.
Step-by-step guide on how to safely attach and remove different presser feet.
Catalog of various presser feet, detailing their specific applications and uses.
A chart correlating fabric types with appropriate needle sizes, thread types, and stitch length settings.
Guidance on inspecting the needle for sharpness, alignment, and potential damage before sewing.
Detailed instructions on how to safely remove the old needle and insert a new one.
Procedure for safely removing the bobbin from its case.
Step-by-step process for winding thread onto a bobbin using the machine's winder.
Instructions for inserting the bobbin into the bobbin case, ensuring correct thread feed.
Comprehensive guide on threading the needle with the top thread for sewing.
Steps to retrieve the bobbin thread and bring it up through the needle plate.
Instructions for adjusting the top thread tension to achieve balanced stitches.
Controls the length of each stitch and selects specific settings for stretch stitches.
Adjusts the width of the stitch, including settings for zigzag and twin needle stitches.
Fine-tunes the balance of stretch stitches for optimal appearance and performance.
Explains how to use the reverse stitch control to secure seams by sewing backward.
A detailed chart outlining various stitches, their settings, and practical applications.
Techniques for creating decorative topstitching along garment edges and seams.
Methods for stitching fabric layers with batting for quilting, including decorative variations.
Overview of the basic zigzag stitch and its versatile applications in sewing and decoration.
Instructions for using the overcasting stitch to finish raw edges neatly and prevent fraying.
Method for joining fabric edges decoratively with an open-work stitch.
How to create decorative shell tucks or scallops using a blind hem stitch variation.
Stitch designed for joining heavy interlining or creating reinforced box-like stitches.
Using zigzag stitches to create personalized decorative patterns on various fabrics.
A more robust zigzag stitch for mending, reinforcing, and decorative purposes.
A two-point decorative stitch that can also serve as a single overlock stitch.
A stitch specifically designed for joining elastic fabrics securely.
Using the overedge stitch to finish seams and prevent fabric from fraying.
A stretchable version of the straight stitch, ideal for knits and fabrics requiring elasticity.
A decorative stitch suitable for stretch fabrics, resembling rick-rack.
A stretch stitch used for finishing seams and constructing garments with stretch fabrics.
Stitch specifically designed for securely attaching elastic bands to garments.
A stretch stitch suitable for hemming and applying decorative finishes to fabrics.
Utilizing stretch stitches to create custom decorative patterns for a personalized look.
Guide to creating automatic buttonholes using the specialized presser foot and settings.
Instructions for setting up and using the buttonhole attachment system with templates.
Reference chart for selecting the appropriate buttonhole template based on button size and style.
Practical advice and tips to ensure successful and accurate buttonhole creation.
Procedure for creating buttonholes manually when the button size is too large for the automatic attachment.
Steps for cleaning the bobbin holder to ensure optimal machine performance.
Maintenance guide for cleaning the hook race and feed dogs for smooth operation.
Instructions on where and how to apply oil to the machine for proper lubrication.
Details the 25-year warranty coverage for the sewing machine head's mechanical components.
Outlines the two-year warranty for the sewing machine's electrical components, including motor and controls.
Specifies the 90-day warranty for all parts and mechanical adjustments, excluding normal maintenance.
Instructions on how to order necessary repair parts, including required information.
| Brand | Kenmore |
|---|---|
| Model | 385.1883 |
| Category | Sewing Machine |
| Language | English |