Do you have a question about the Kenmore 385.190011890 and is the answer not in the manual?
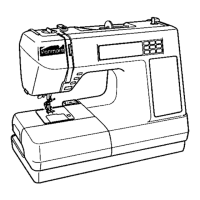
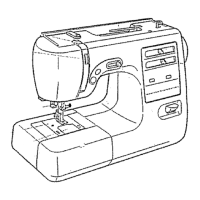
Details on machine type, convertibility, shuttle system, stitch package, and needle positions.
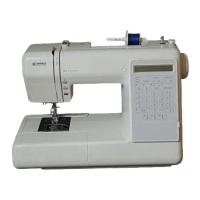
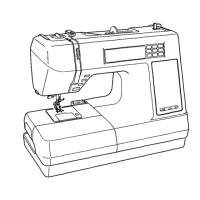
Specs for electronic buttonholer, touch panel, LCD, and control features.
Lists included accessories, optional memory cards, and handling features.
Specifications for CPU, RAM, VRAM, motor types, and control systems.
Lists and identifies electronic components and their connections in the wiring diagram.
Outlines the initial basic checks for troubleshooting, including needle, power supply, and threading.
Describes diagnostic steps for mechanical, electrical, or unjudgeable issues.
Lists causes and fixes for skipping stitches, including needle, threading, and presser foot issues.
Addresses problems with fabric not moving, including presser foot pressure and feed dog height.
Lists causes and fixes for upper thread breaking, such as incorrect threading or tension.
Solutions for bobbin thread breaking and needle breakage, including tension and mechanical alignment.
Addresses causes and fixes for noisy operation and pattern distortion, including gear backlash and synchronization.
Steps to check if the machine powers on, lights function, and LCD displays information.
Details checks for buzzer, UP/DOWN needle button, LCD unit, and bobbin winder switch.
Procedures to test presser foot sensor, buttonhole sensor, stepping motors, and machine motor.
Explains the function of Start/Stop, Reverse, Auto-Lock, and Up/Down Needle buttons.
Describes keys for memory, clear, menu, letter size, case selection, and pattern navigation.
Step-by-step guide on how to wind a bobbin, including passing thread and placing bobbin.
Instructions for inserting the bobbin into the holder and threading it through the tension blades.
Detailed instructions for threading the machine from the thread guide to the needle.
Explains messages like thread broken, bobbin winding, safety purposes, and system errors.
Instructions on how to attach the stabilizer to the fabric using heat.
Guide on marking fabric, placing template, and securing fabric in the embroidery hoop.
Instructions for removing and reattaching the face cover.
Instructions for removing and reattaching the top cover and carrying handle.
Instructions for removing and reattaching the belt cover.
Instructions for removing and reattaching the base cover and carriage window frame.
Instructions for removing and reattaching the bed cover, base lid, and window frame.
Instructions for removing and attaching the base unit, including motor connectors.
Instructions for removing and reattaching the front cover, including various internal components.
How to adjust needle position for straight and zigzag stitches relative to the needle plate.
Procedure for adjusting the needle bar height using specific gauges.
Steps to adjust the timing between the needle and the shuttle hook using test pins.
How to adjust the clearance between the needle and the hook point.
Procedure to check and adjust backlash in the lower shaft gear.
How to adjust the height of the feed dog using a gauge.
Adjusting the position of the upper shaft shield plate relative to the needle swing.
Procedure for checking and adjusting the solenoid function using a test gauge.
Adjusting the tension release mechanism for proper thread tension release.
How to adjust the feed balance for stretch stitch patterns.
Adjusting the height of the embroidery presser foot using a gauge.
Procedure for adjusting needle thread tension using a lead screw.
Adjusting the buttonhole lever and sensor plate for correct buttonhole sewing.
Adjusting the presser bar height and aligning the zigzag foot with the needle plate.
Troubleshooting and adjusting for overload conditions, checking belt tension and torque.
Further adjustments for overload conditions, including lower shaft and timing belt installation.
Procedure for adjusting the touch panel to ensure correct stitch selection.
How to adjust bobbin thread tension using a tension meter.
Method for adjusting bobbin thread tension without a meter.
Steps to remove and replace the needle thread tension unit.
Instructions for removing and reattaching the feed dog.
Procedures for changing or adjusting the threader plate and needle threader.
Steps to remove C-board unit and replace fuses.
Instructions for removing and replacing the transformer unit.
Steps to remove and replace the machine socket unit.
Instructions for removing and replacing the A-board unit, including connectors.
Steps to remove and replace the LCD unit and its frame.
Instructions for removing and replacing the F-board unit.
Steps to remove and replace the slide volume unit and snap rings.
Instructions for replacing the DC motor unit and adjusting belt tension.
Steps for removing and attaching the carriage plate cover unit.
Instructions for removing and replacing the buttonhole sensor.
Steps to remove and replace the upper shaft sensor unit.
Instructions for removing and replacing the zigzag stepping motor.
Steps to remove and replace the feed stepping motor.
Procedure to fix thread jamming on the thread take-up lever.
Procedures to check the primary and secondary machine sockets for voltage and resistance.
How to check the C-board by measuring DC voltage at the secondary connector.
Testing the F-board by checking continuity between pins for various button presses.
Checking DC motor resistance and foot control resistance at different positions.
Checking resistance values for zigzag, feed, X-axis, and Y-axis stepping motors.
Instructions for cleaning the bobbin holder, hook race, and feed dogs.
Guide for correctly inserting and replacing the bobbin holder.
Points indicated by arrows where sewing machine oil should be applied.
Lists specific tools like screwdrivers, gauges, and wrenches needed for service.
| Brand | Kenmore |
|---|---|
| Model | 385.190011890 |
| Category | Sewing Machine |
| Language | English |