Do you have a question about the Kenmore 385.1960180 and is the answer not in the manual?
| Model Number | 385.1960180 |
|---|---|
| Brand | Kenmore |
| Needle Type | Universal |
| Foot Control | Yes |
| Bobbin Type | Drop-in |
| Stitch Length | Adjustable |
| Stitch Width | Adjustable |
| Presser Feet | Buttonhole, Zipper |
| Included Accessories | Needles, bobbins, seam ripper, screwdriver, spool caps |
Warnings about electrical hazards and safe usage practices.
Warnings about potential physical harm, misuse, and general precautions.
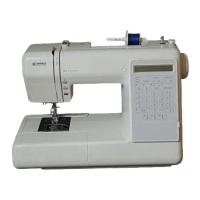
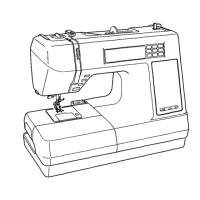
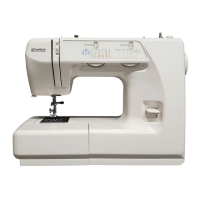
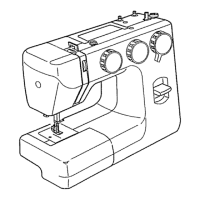
Diagram and labels for identifying machine components.
Illustration and identification of included sewing accessories.
Step-by-step guide for plugging in and powering on the sewing machine.
Instructions on positioning and using the foot control pedal.
Guidance on adjusting the presser foot pressure for different fabrics.
General introduction to presser feet and their importance.
Step-by-step guide on how to snap presser feet on and off.
Guidance on selecting the correct needle and thread for different fabrics.
Instructions on how to wind thread onto the bobbin.
Step-by-step guide for inserting the bobbin into the bobbin holder.
Detailed steps for threading the needle correctly.
Steps for picking up the bobbin thread to prepare for sewing.
Guidance on adjusting top thread tension for straight stitches.
Explanation and uses of the reverse stitch button.
How to use the button to control needle position (up/down).
Overview of the control panel sections and buttons.
How to use buttons to select stitch patterns.
Explanation of how to adjust stitch width and length.
Step-by-step guide for turning a square corner while sewing.
Detailed instructions on how to perform darning.
Step-by-step guide for sewing buttons onto fabric.
Initial steps for attaching a zipper to fabric.
An alphabetical list of sewing functions and corresponding stitch patterns/pages.
Chart detailing stitch numbers, feet, needle, thread, pressure, and uses.
Introduction to straight stitches and their common uses.
Using the lock-a-matic stitch for fast and secure seams.
How to use the automatic darning feature for rips and holes.
Introduction to sewing automatic buttonholes.
Instructions for creating manual buttonholes.
Introduction to hemming and edging stitches.
Guide to sewing parallel rows of stitches using a twin needle.
Instructions for sewing letters, numbers, and symbols for monogramming.
Troubleshooting guide for common sewing machine problems and their solutions.
Instructions for cleaning the bobbin holder and area.
Steps for cleaning the hook race and feed dogs.
Guidance on oiling the sewing machine's moving parts.
Instructions for safely replacing the sewing machine's light bulb.
Details on how to order repair parts, including necessary information.
Details of the 25-year warranty for the machine head.
Details of the 2-year warranty for electrical components.
Details of the 90-day warranty for parts and adjustments.
Information on how and where to obtain warranty service.
Information required when ordering repair parts.