Do you have a question about the Kenmore 385.19005 and is the answer not in the manual?
Essential safety precautions related to electrical hazards to prevent electric shock.
Crucial safety warnings to prevent burns, fire, electric shock, or injury to persons.
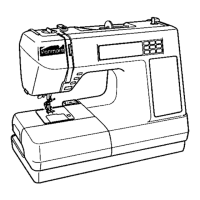
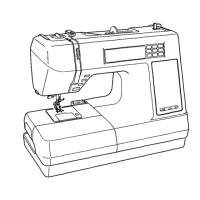
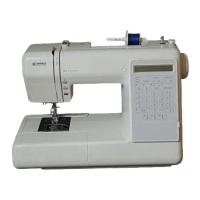
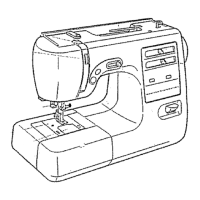
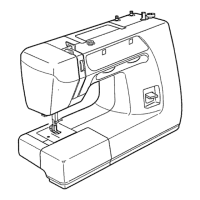
Identifies and labels all the external components of the sewing machine.
Lists and describes the various optional accessories and attachments for the machine.
Step-by-step guide on how to safely connect the sewing machine to its power source.
Initial setup and preparation steps before operating the sewing machine for the first time.
Important safety guidelines to follow while operating the sewing machine.
Explanation of the polarized plug and its safe use with electrical outlets.
Explains the function of Start/Stop, Reverse, Auto-lock, Up/Down Needle, and Speed Control buttons.
Steps for removing the extension table for free-arm sewing.
Instructions on how to securely attach the extension table to the machine.
Details on Zigzag, Straight Stitch, Buttonhole, Zipper, Overedge, Satin Stitch, and Blind Hem stitch feet.
Steps to remove the hook cover plate to access the bobbin.
Instructions on using the horizontal spool pin for thread placement.
Information on using the additional spool pin for bobbin winding or twin needle sewing.
Comprehensive guide on threading the upper thread through the machine.
Instructions on how to use the automatic built-in needle threader.
Overview of the sewing machine's touch screen interface and its functions.
Explains the different mode selection keys available on the touch screen.
Information on selecting and using the various utility stitches.
Details on selecting buttonhole variations and eyelets.
How to select satin stitches, elongation patterns, and stitch combinations.
Guide to selecting decorative stitches and programming stitch combinations.
Overview of the setting mode for customizing machine functions.
Function of the SET key to enter the setting mode.
Details on Language, Screen Contrast, Sound Control, Eco Mode, and Inch/Millimeter settings.
Adjusts key position, embroidery speed, sewing light, memory formatting, and language.
Step-by-step instructions for performing a straight stitch.
How to secure the beginning and end of seams using reverse stitching.
Guidance on pivoting the fabric to change the sewing direction.
Steps for attaching the walking foot to the machine.
Achieving balanced thread tension for straight stitches.
Identifying and correcting tight needle thread tension for straight stitches.
Identifying and correcting loose needle thread tension for straight stitches.
Using the lock-a-matic stitch for securing seams with backstitching.
Applying the triple stretch stitch for durable and elastic seams.
Using a narrow stretch stitch to prevent puckering on knit fabrics.
Attaching the zipper foot correctly for sewing zippers.
Steps to prepare fabric and mark for zipper insertion.
Detailed instructions for sewing zippers with the zipper foot.
Achieving balanced needle thread tension for zigzag stitches.
Identifying and correcting tight needle thread tension for zigzag.
Identifying and correcting loose needle thread tension for zigzag.
Covers Overedge, Overedge (zigzag), Multiple Zigzag stitches for seam finishing and mending.
Step-by-step guide for sewing a blind hem stitch.
Covers Square, Round End, Keyhole, Stretch, Knit BH, and Eyelets, detailing their uses.
Steps to prepare the machine and foot for sewing square buttonholes.
Detailed procedure for sewing square buttonholes automatically.
Instructions for sewing a buttonhole with a cord for added thickness.
Steps for sewing eyelets using the satin stitch foot.
Adjusting the shape of eyelets if they appear compressed or drawn out.
Covers Twin Needle, Program, Needle Up/Down, Adjust, Width/Length, Elongation, and Default keys.
Functionality of keys for navigating, editing, saving, and checking programmed patterns.
Demonstrates how to delete a pattern from a programmed sequence.
Illustrates how to insert a pattern into an existing programmed sequence.
Instructions for saving created or programmed stitch patterns.
Steps to name and save files for future access.
Initial steps and preparations for sewing embroidery designs.
Information about the standard embroidery hoop and its use.
Guidance on using the template for precise design placement.
Description of different types of stabilizers and their uses in embroidery.
Specific instructions for using adhesive (iron-on) stabilizer.
Guidance on achieving balanced tension and troubleshooting tight or loose issues.
Covers Built-in Designs, Monogramming, PC Card, Reader 19000, Edit Mode, Page Keys, and Hoop Size.
Covers Color/Part keys, skipping parts, navigation keys, jog keys, and centerlines for placement.
Details on Trace, Cancel, Jog/ST, Stitch Back/Forward, and Return Carriage keys, plus screen info.
Accessing monogram window, inputting letters/symbols, case, and accents.
Includes Magnifier, Delete, File Save, Horizontal/Vertical, Letter Size, OK, and Return keys.
Removing a specific letter from an existing monogram.
Adding a letter into an existing monogram at a specific position.
Instructions for inserting the ATA PC card into the machine.
Steps for safely removing the ATA PC card.
Browsing and selecting embroidery designs from an inserted card.
Steps to connect the Reader 19000 for design transfer.
Accessing the editing mode for embroidery designs.
The interface for manipulating and combining embroidery designs.
Tools for modifying selected embroidery patterns: resize, flip, delete, rotate, and magnify.
Accessing the on-screen help index for machine operations.
Detailed steps for cleaning the hook race and feed dogs.
Instructions for reassembling the hook race after cleaning.
| Brand | Kenmore |
|---|---|
| Model | 385.19005 |
| Category | Sewing Machine |
| Language | English |