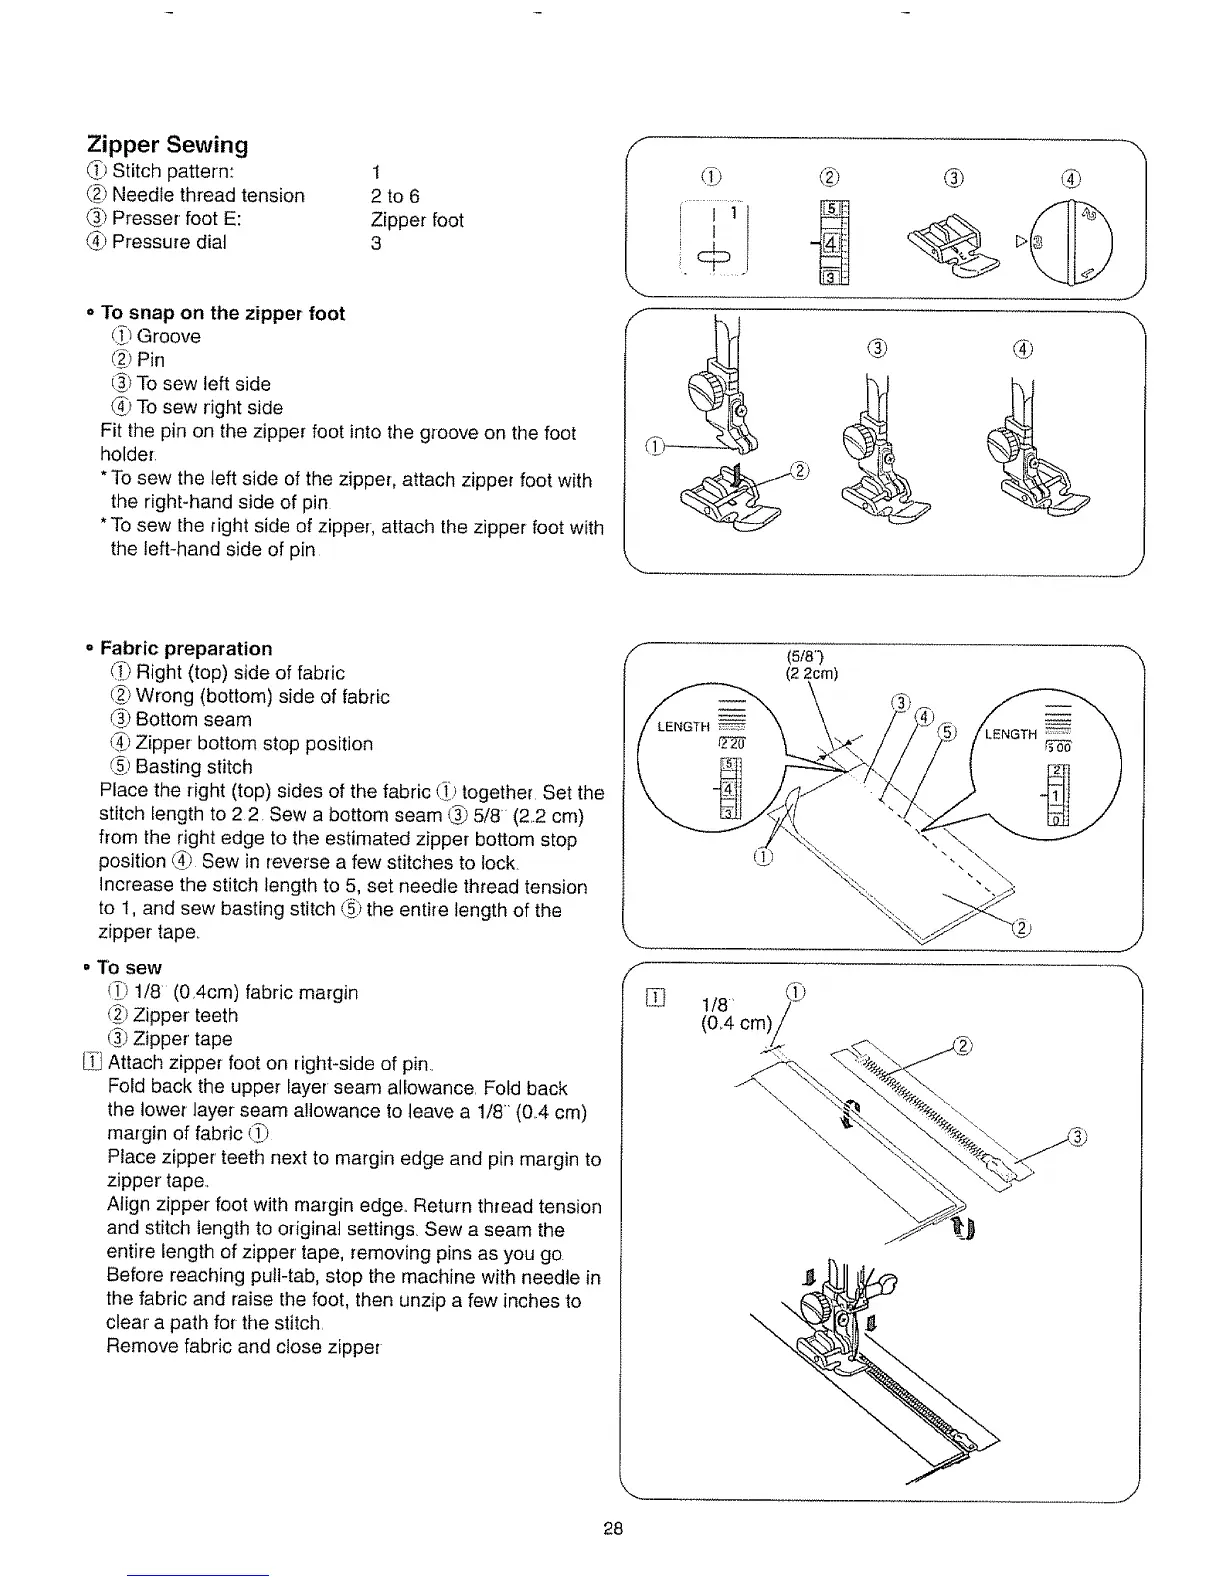
Zipper Sewing
_1 Stitch pattern: !
(_) Needle thread tension 2 to 6
(_) Presser foot E: Zipper foot
_] Pressure dial 3
. To snap on the zipper foot
_,TIGroove
(_>Pin
(_:_To sew left side
_? To sew right side
Fit the pin on the zipper foot into the groove on the foot
holder.
*To sew the teft side of the zipper, attach zipper foot with
the right-hand side of pin
*To sew the right side of zipper, attach the zipper foot with
the left-hand side of pin
®
® ®
J
° Fabric preparation
Right (top) side of fabric
ti_?Wrong (bottom) side of tabric
_ Bottom seam
(_} Zipper bottom stop position
_) Basting stitch
Place the right (top) sides of the fabric (._)together. Set the
stitch length to 2 2. Sew a bottom seam @_5/8" (2,.2crn)
from the right edge to the estimated zipper bottom stop
position _ Sew in reverse a few stitches to lock.
Increase the stitch length to 5, set needle thread tension
to 1, and sew basting stitch (_) the entire length of the
zipper tape..
= To sew
(i_}1/8 (0,4cm) fabric margin
(2_)Zipper teeth
(_) Zipper' tape
Attach zipper foot on fight*side of pin,,
Fold back the upper layer seam allowance, Fold back
the lower layer seam allowance to leave a 1/8 (0,,4 crn)
margin of fabric (_)
Place zipper' teeth next to margin edge and pin margin to
zipper tape.,
Align zipper foot with margin edge,, Return thread tension
and stitch length to original settings, Sew a seam the
entire length of zipper' tape, removing pins as you go.
Before reaching pull-tab, stop the machine with needle in
the fabric and raise the foot, then unzip a few inches to
clear a path for-the stitch,
Remove fabric and close zipper
J
28
 Loading...