For easierinstallation,some
refrigeratorsmay havebeen delivered
with the handlesofl P_easesee the
intedorof the fresh food sectionto
locate the handle assembly, Incase
futuretransport of the refrigeratoris
necessary,the removal instructionshave
been includedhere for your
convenience
Handledesignmay vary from
refrigeratorto refrigerator Please
referencethe instructionsfor the
appropriate handle design below
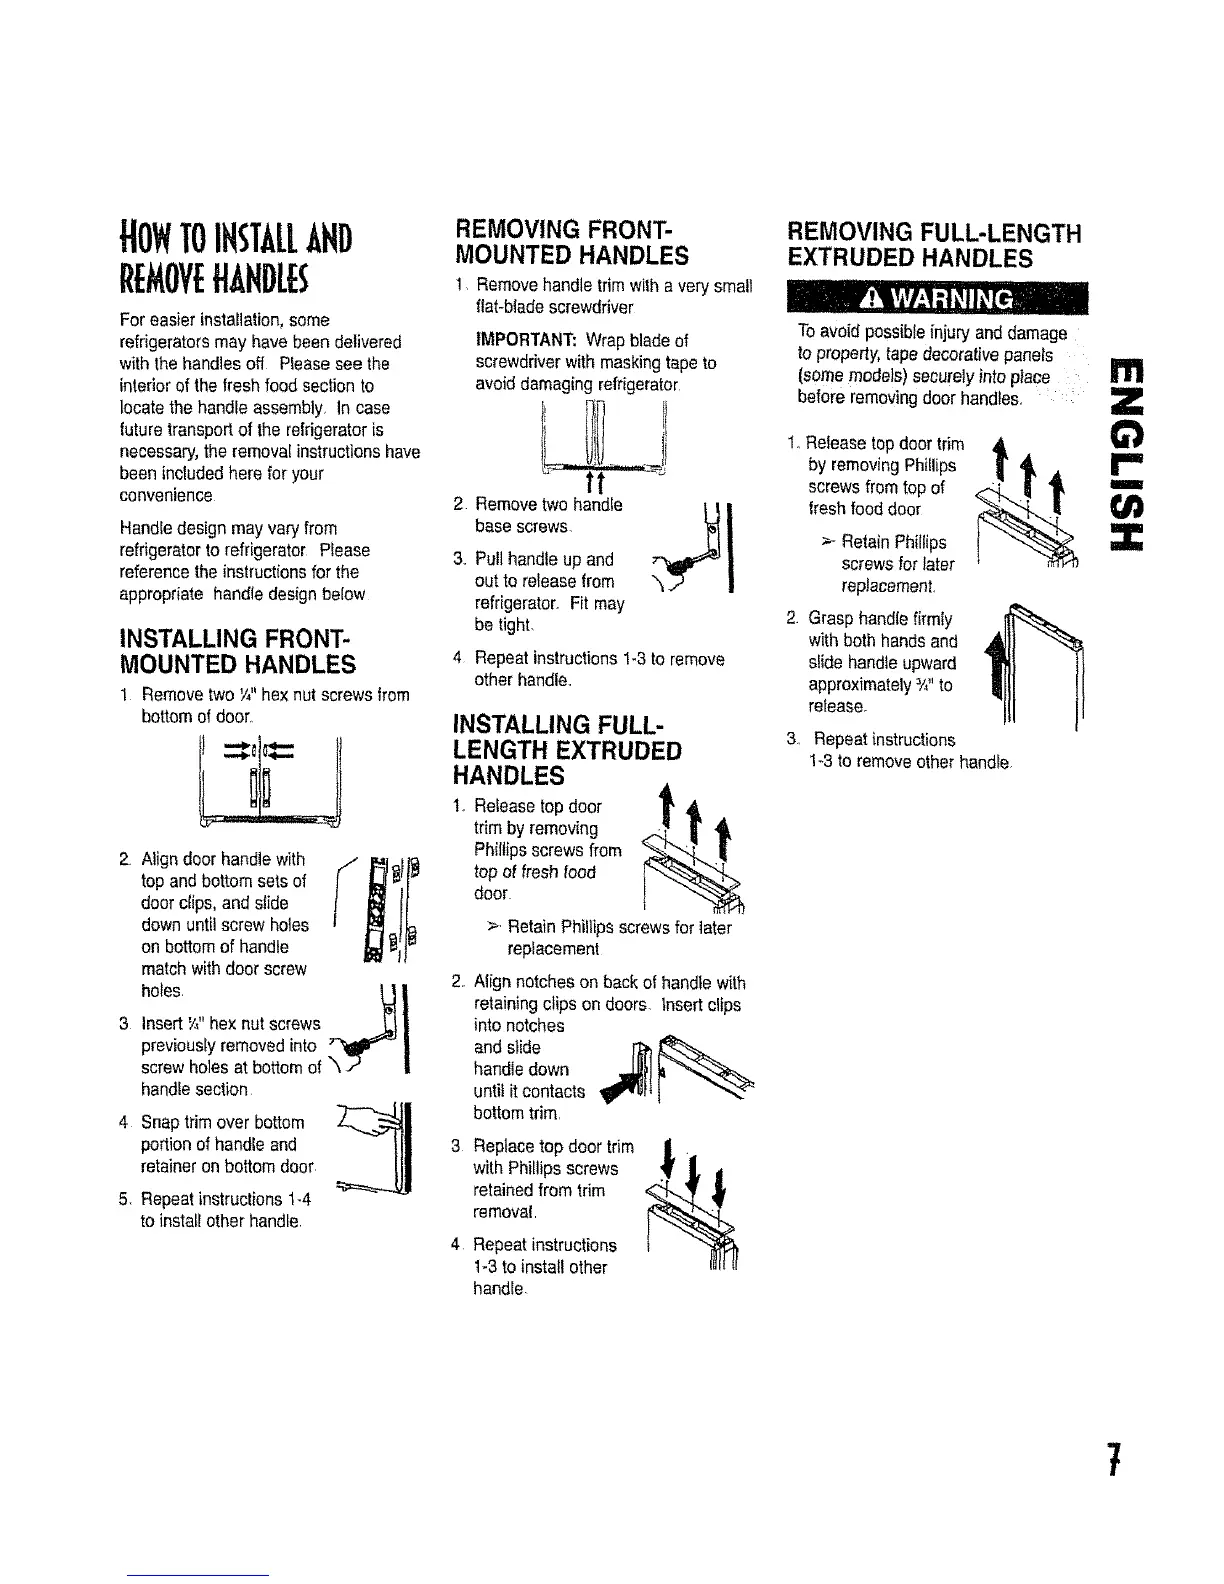
INSTALLING FRONT-
MOUNTED HANDLES
1 Removetwo V_"hexnut screwsfrom
bottomof door,,
2 Align doorhandle with j
top and bottomsetsof
l
doer clips, and siide
down untilscrewho_es
on bottomof handle
matchwith door screw
holes. _I
3 Insert W'hex nut screws _ _._ |
previouslyremovedinto "_ |
screwholesat bottomof _ .P |
handEesection
4 Snap trim overbottom
portionof handleand
retaineron bottomdoor
5 Repeatinstructions 1-4
to install otherhandle,
REMOVING FRONT-
MOUNTED HANDLES
1, Removehandle trim with a very small
f_at-bl_descrewdriver
2
3_
IMPORTANT:Wrapblade of
screwdriverwith maskingtapeto
avoiddamagingrefrigerator
base screws
Pull handleup and
out to releasefrom
refrigerator. Fit may
be tight.
Repeat instructions!-3 to remove
otherhandle.
INSTALLING FULL-
LENGTH EXTRUDED
HANDLES
1, Releasetop door
trim by removing
Phillipsscrews from
top of fresh food
door
>, Retain Phillipsscrewsfor later
replacement
Nigh notches on back of handlewith
retainingclips on doors, insert clips
into notches
and slide _
handle down
until itcontacts
bottomtrim,
Replacetop door trim
with Phillipsscrews
retainedfrom trim
removal,
Repeat instructions
1-3to install other
handle.
REMOVING FULL-LENGTH
EXTRUDED HANDLES
Toavoid possibleinjuryand damage
to property,tapedecorativepanels
(somemodels) securelyinto place :
beforeremovingdoor handles. :
1,,Release topdoor trim
by removingPhillips
! AI
screwsfrom top of "
flesh fooddoor
!
_--RetainPhillips
screwsfor later
replacement,
2. Grasphandlefirmly
with both handsand
slide handleupward
approximately3/,.to
release.
3, Repeat instructions
1-3 to remove other handle.
m
Z
¢1
m
Z
7