5
30" ELECTRIC SLIDE-IN RANGE INSTALLATION INSTRUCTIONS
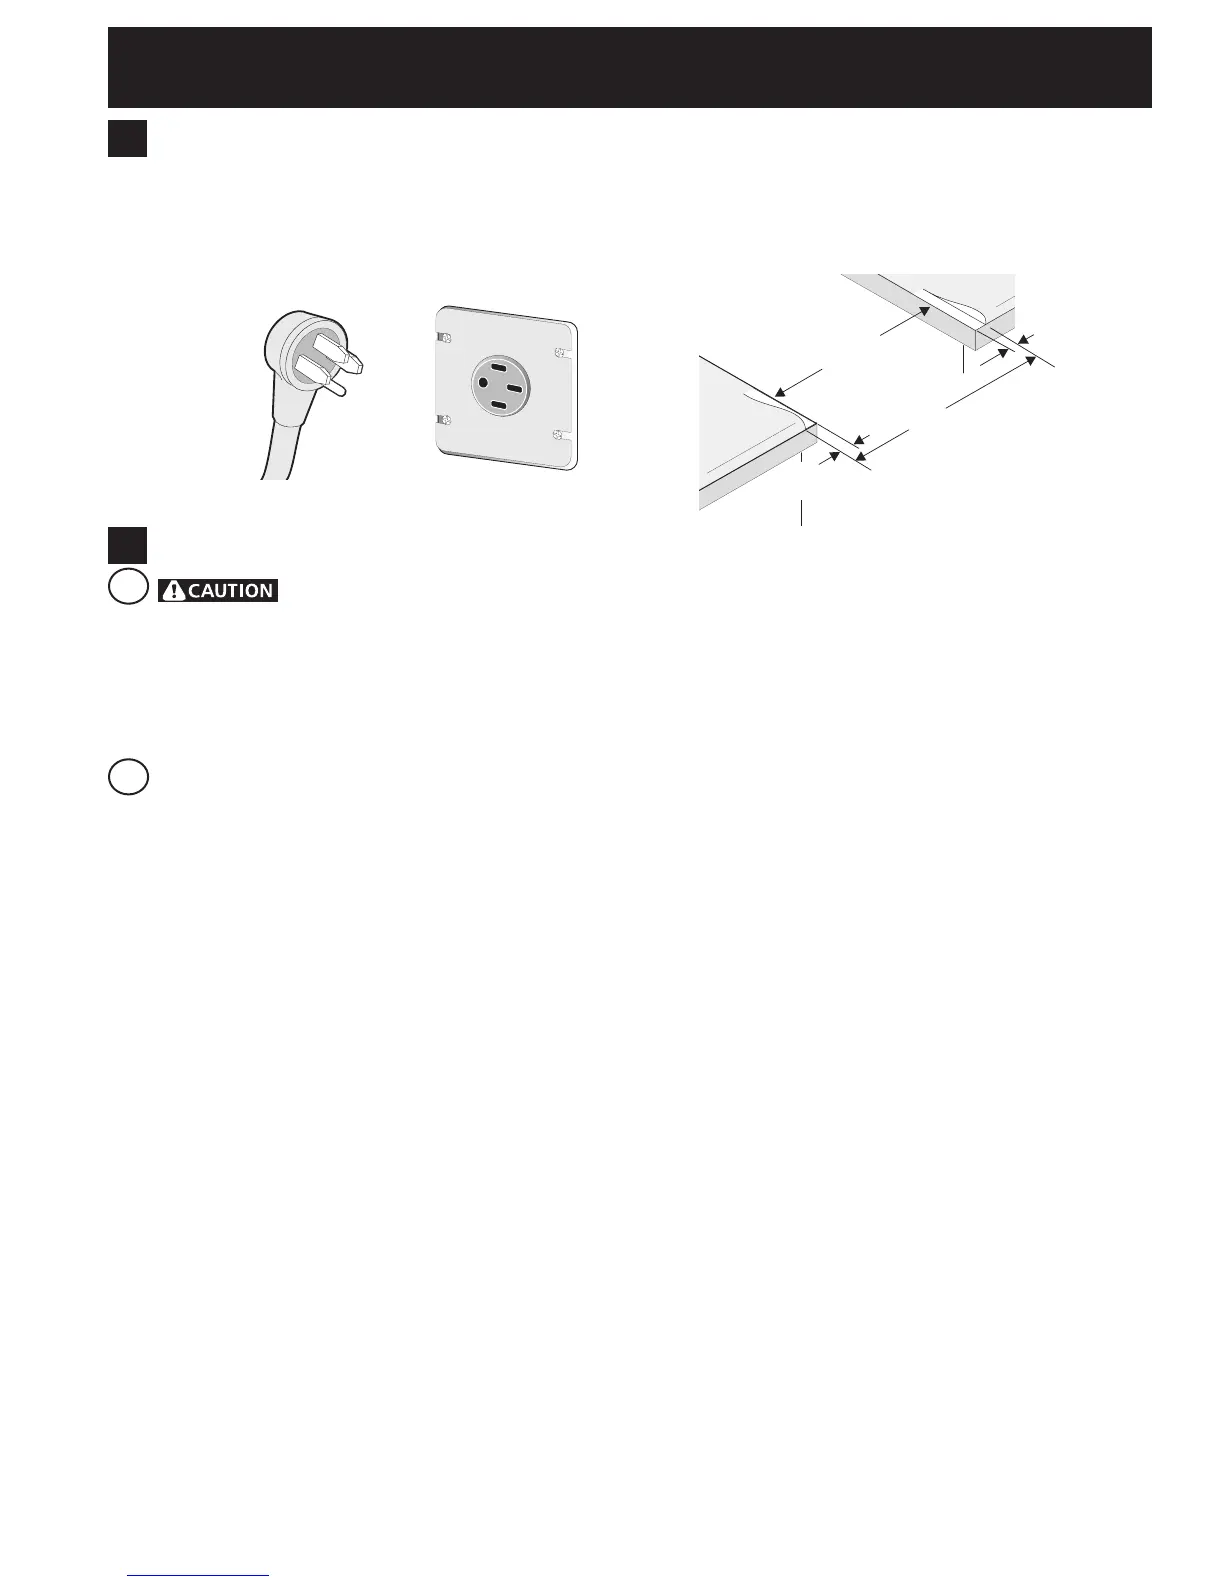
¾”
(1.9 cm)
¾”
(1.9 cm)
31½”
(81 cm)
Min.
Cutout
Width
Formed or tile countertop
trimmed ¾" (1.9 cm) back at
front corners of countertop
opening.
Figure 2
2.
Cabinet Construction
2.1
To eliminate the risk of burns or
fire by reaching over heated surface units, do not have
cabinet storage space above the range. If there is cabinet
storage space above range, reduce risk by installing a
rangehoodthatprojectshorizontallyaminimumof5"
(12.7 cm) beyond the bottom of the cabinet.
2.2
Countertop Preparation
•Thecooktopsidesoftherangetoverthecutout
edge of your countertop.
•Ifyouhaveasquare finish (flat) countertop, no
countertop preparation is required. Cooktop sides lay
directly on edge of countertop.
•Iftheexistingcutoutwidthisgreaterthan301/16"
(76,4 cm), reduce the ¾" (1.9 cm) dimension.
•Countertopmustbelevel. Place a level on the
countertop, first side to side, then front to back. If the
countertop is not level, the range will not be level.
The oven must be level for satisfactory baking results.
Cooktop sides of range fit over edges of countertop
opening
•Formedfront-edgedcountertopsmust have molded
edge shaved flat 3/4" (1.9 cm) from each front corner
of opening (Figure 2).
•Tilecountertops may need trim cut back 3/4"(1.9 cm)
from each front corner and/or rounded edge flattened
(Figure 2).
Figure 1
1.
Factory Connected Power Supply
Cord
This range is equipped with a factory-connected power
cord (see Figure 1). Cord must be connected to a
grounded 120/240 volt or 120/208 volt range outlet. If
not outlet is available, have one installed by a qualified
electrician.
 Loading...