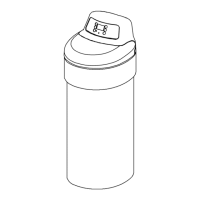
Do you have a question about the Kenmore IntelliSoft 350 Series and is the answer not in the manual?
Details the one-year limited warranty for material and workmanship defects.
Covers leaks in the water softener tank or salt storage drum for ten years.
Outlines limitations on implied warranties and remedies for product issues.
Guidance on inspecting the water softener shipment for any damage or missing items.
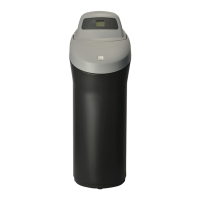
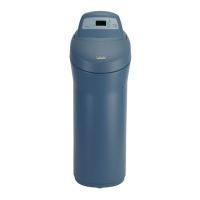
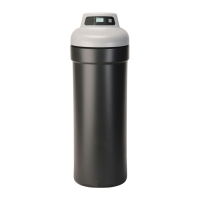
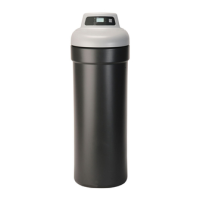
Recommends optimal placement locations for the water softener within the home.
Details installation considerations for units placed on a slab foundation.
Instructions for planning the water and drain pipe connections for the softener.
Lists all necessary pipes, fittings, and materials for connecting the water softener.
Outlines the initial checks and tests required before starting the water softener installation.
Advises on testing water for hardness, iron, and acidity to select proper equipment.
Explains how to check water pressure and requirements for installation.
Details the procedure for measuring water flow rate to ensure proper softener operation.
Instructions for assembling the bypass valve and connecting it to the softener.
Details the process of connecting pipes and valves for a three-valve bypass setup.
Steps for correctly placing the water softener unit before connecting pipes.
Instructions for connecting the water softener to the house plumbing system.
Details on attaching and routing the drain hose for the softener valve.
Instructions for connecting the overflow tubing for the salt tank.
Step-by-step guide to perform a leak test after installation.
How to install grounding clamps on the inlet and outlet pipes for electrical safety.
Specifies requirements for the electrical outlet used to power the softener's transformer.
Instructions for replacing the main and salt hole covers after installation.
Guidance on restoring power to the water heater after softener installation.
Initial steps for setting up the timer, including model code and present time.
How to set the current time on the softener's timer display.
Instructions for inputting the water hardness level for optimal softener performance.
How to set the preferred time for the automatic regeneration cycle.
Procedure for sanitizing the new water softener unit before use.
Step-by-step instructions for sanitizing the softener using bleach.
Proper steps and salt type recommendations for filling the salt tank.
Information on using specialized salt for water with high iron content.
A final review checklist to confirm all installation procedures are followed.
How to manually initiate an extra regeneration cycle when needed.
Details the low salt indicator system and how to set it.
Guidance on refilling the salt tank based on the monitor system's alerts.
Setting to optimize salt usage for higher efficiency or meet specific regional requirements.
Feature to provide extra backwash for water with iron or sediments.
Adjusting the duration of the extra backwash cycle for the Clean Feature.
Setting to control regeneration frequency based on a maximum number of days.
Feature that regenerates when 97% of softener capacity is used, saving salt and water.
Option to select between 12-hour or 24-hour display format for the timer.
Explains display indicators for recharge status and valve positions during operation.
Information on error codes displayed by the softener's electronics.
Feature designed to remove larger sediment particles from water.
Description of the normal operating mode where water is softened.
Overview of the regeneration process, consisting of five stages.
The first stage of regeneration where water is added to the salt tank.
Stage where brine cleans hardness minerals from the resin beads.
Stage after brining to flush brine and minerals from the resin tank.
Stage where water flows upward to flush debris from the resin bed.
Final stage to pack the resin bed and prepare for service.
How the softener bypasses water during certain regeneration cycles.
Explanation of the water meter and computer components in the softener.
How to identify and break up salt bridges in the storage tank.
How to clean the nozzle and venturi for proper brine flow.
Advice on managing iron in the water supply and cleaning the resin bed.
Steps to drain the softener to prevent damage from freezing temperatures.
Detailed instructions for completely draining the water softener.
Troubleshooting checklist for common water softener issues to save on service calls.
Specifications related to the bypass valve system for softener maintenance.
Technical limits for water supply parameters like flow, pressure, and temperature.
Specifications for the type of salt recommended for the softener.
Additional technical details including resin amount and flow rate performance.
Essential initial checks to perform before troubleshooting or diagnosing issues.
Explanation of error codes displayed by the softener's electronics.
Steps to clear error codes from the softener's display.
Procedure for entering diagnostic mode to check system operation.
General troubleshooting guide for identifying and resolving softener problems.
Explains the indicators shown on the display for different valve positions.
Instructions for replacing the timer's Printed Wiring Assembly (PWA).
Procedure to verify proper operation of the regeneration cycles.
Table listing flow rates for different regeneration cycles.
Detailed instructions for servicing the softener's rotary control valve.
Steps for reassembling the rotary valve after servicing or replacement.
Diagrams illustrating water flow during different valve cycles.
Water flow path during the normal service operation.
Water flow path during the fill stage of regeneration.
Water flow paths during the brining and brine rinse stages.
Water flow path during the backwash stage of regeneration.
Water flow path during the fast rinse stage of regeneration.
List of all available replacement parts for the main water softener assembly.
Parts list specifically for the brine valve assembly.
| Brand | Kenmore |
|---|---|
| Model | IntelliSoft 350 Series |
| Category | Water Dispenser |
| Language | English |