4 5
PARTS & ACCESSORIES BEFORE FIRST USE
1. Carefully unpack your Kenmore Electric Immersion Deep Fryer and check that all parts and
accessories are present. Remove any promotional labels or stickers and safely dispose of plastic
bags or small pieces that could present a suocation or choking hazard.
2. Wash all removable accessories (oil pot, base, lid, vent cover, fryer baskets & handles) by hand
with warm water and a mild dish detergent, rinse, and dry thoroughly. Do not use abrasive cleans-
ers, brushes, or scouring pads.
SETTING UP
1. Ensure that the deep fryer is unplugged. Place the base on a
stable, at surface and insert the oil pot into the base.
2. Align the heating element assembly with retaining slots on
the back of the base and lower it into place (Figure 2). Push
down on the heating element assembly to connect it to the
base.
3. Attach the handles to the fryer baskets (Figure 3): Squeeze
the handle prongs together, align the tips with the round
holes inside the basket, and release to lock them in place.
4. Fill the oil pot to between the MIN and MAX markings with
good quality vegetable oil such as peanut oil, sunower oil,
canola oil, or pure corn oil.
5. Wipe the underside of the viewing window on the lid with a
small amount of oil to prevent condensation.
3. Wipe the heating element assembly with a clean cloth to
remove any dirt or dust.
4. Install the lters (Figure 1): Unclip and remove vent cover
from lid. Insert the lters with the white oil vapor lter on the
bottom and black odor lter on top and replace the vent
cover.
WARNING - Never use metal scouring pads to clean any part of the deep fryer or
accessories as pieces could break o and contact electrical parts, causing electric shock.
WARNING - Do not ll above the MAX marking or below the MIN marking. Overlling
could result in hot oil bubbling over while underlling could cause a grease re.
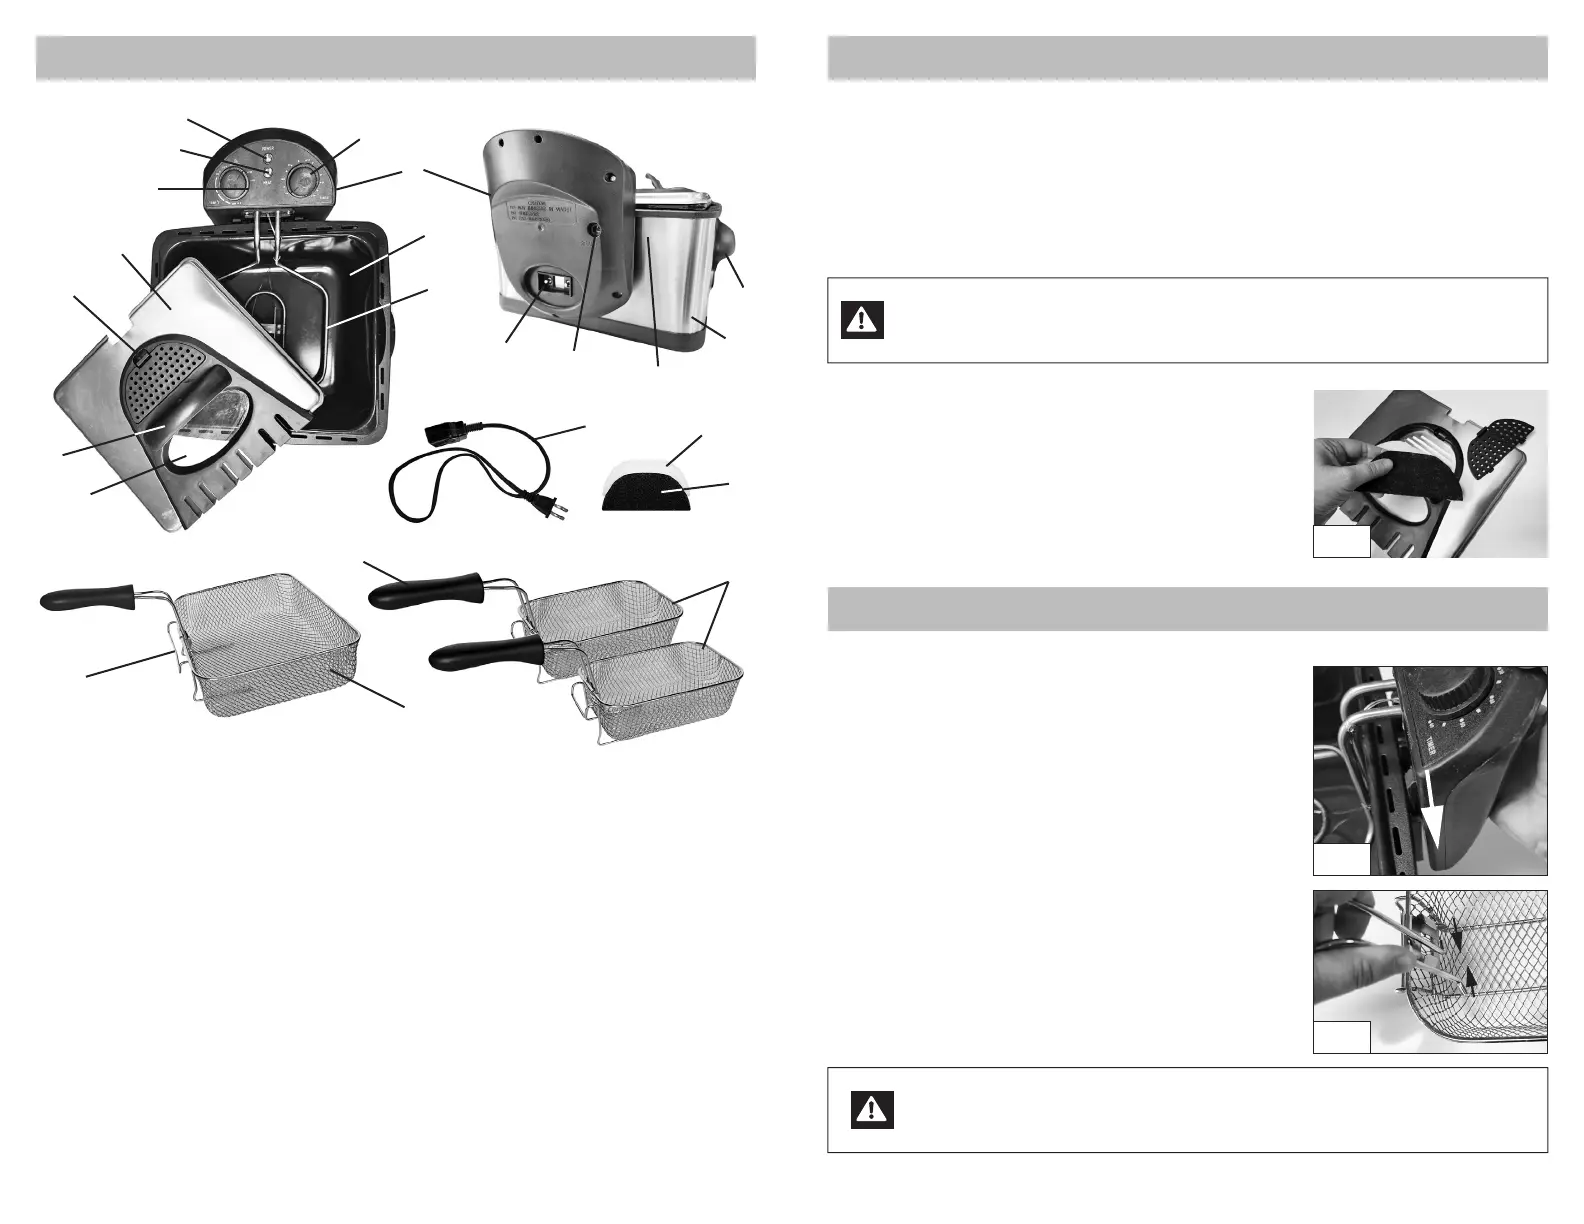
1. Viewing window
2. Lid handle
3. Vent cover
4. Lid
5. Temperature dial
6. Heat indicator
7. Power indicator
8. Timer dial
9. Heating element assembly
10. Removable oil pot
11. Immersible heating element
12. Cord socket
13. Reset button
14. Retaining bracket
15. Base
16. Carry handle
17. Power cord
18. Oil vapor lter
19. Odor lter
20. Fryer baskets (small)
21. Basket handle
22. Fryer basket (large)
23. Draining bracket
1
2
3
4
5
6
7
8
9
10
11
12
22
23
13
14
15
16
17
18
19
20
21
Fig. 3
Fig. 1
Fig. 2