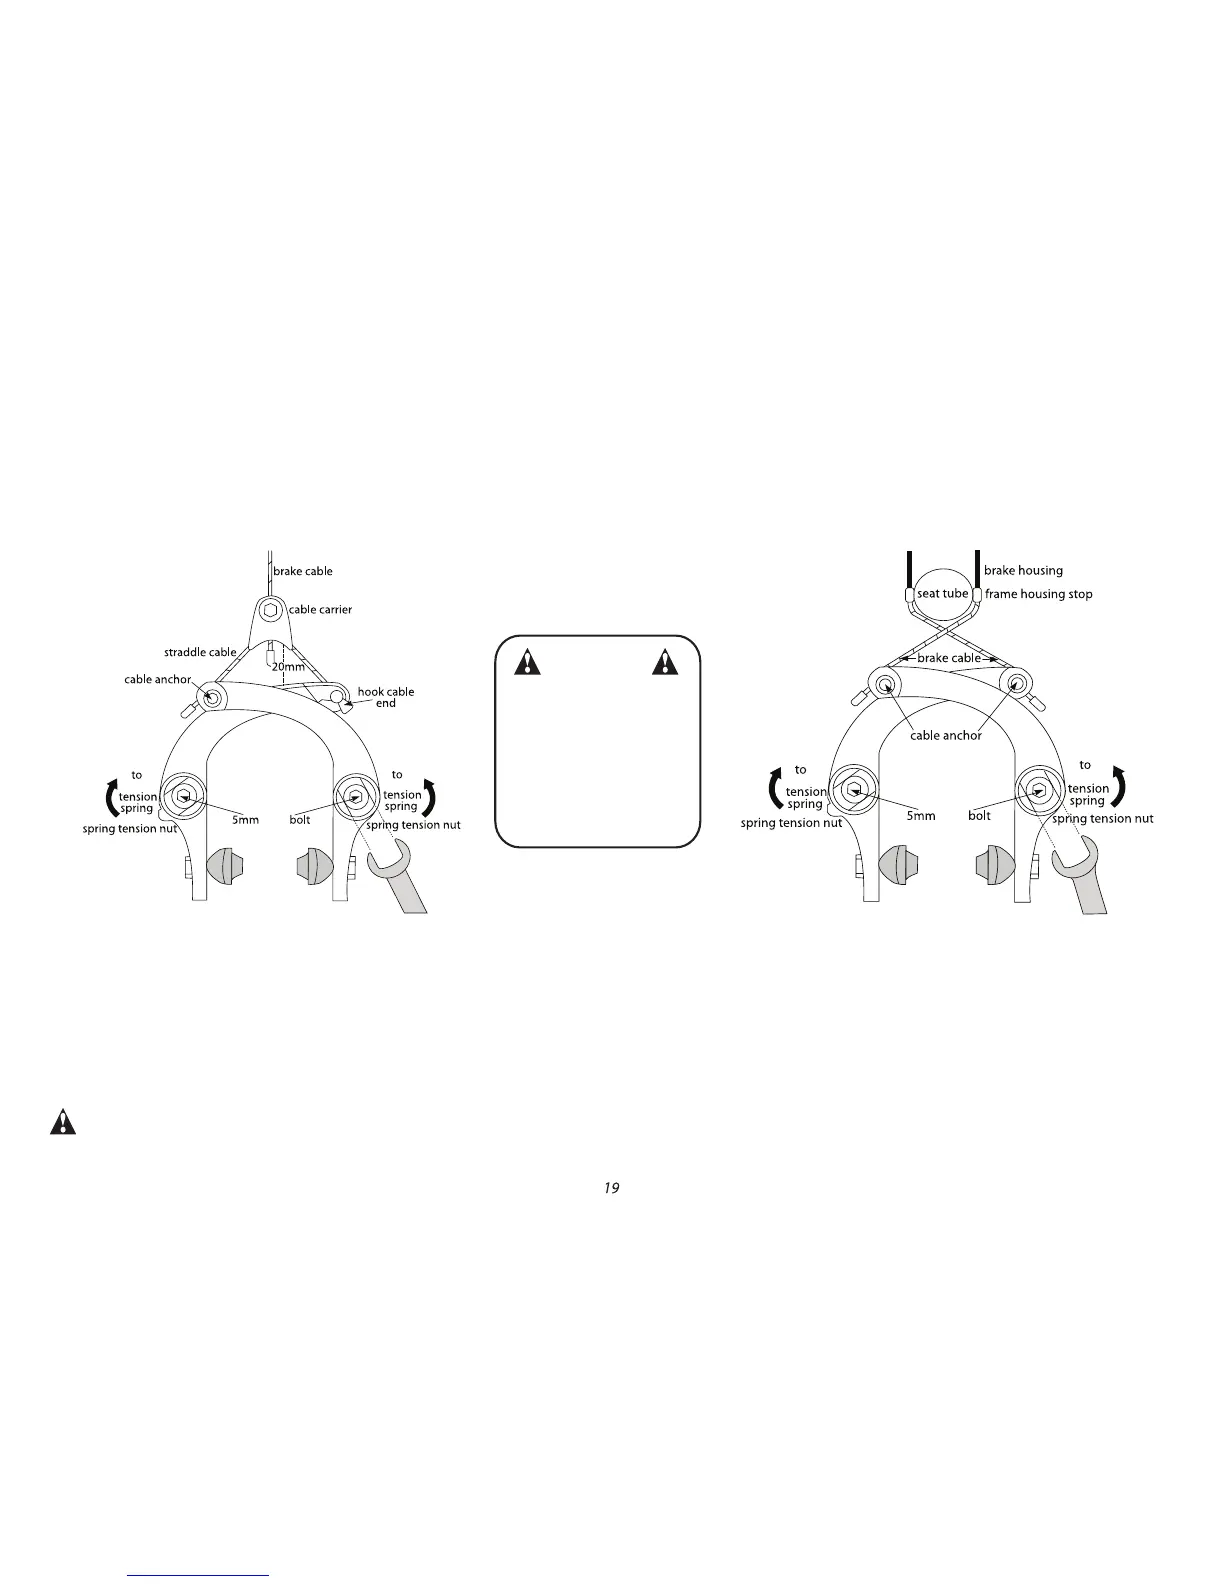
Rear U-Brake
Option 1
increase
increase
hex
increase
increase
hex
Rear U-Brake Option 1: Next, tighten the Cable Carrier to the
brake cable approximately 20mm from the brake arms when
they are closed against the rim. Attach the Straddle cable to
the carrier. Hook cable end into the brake slot, pull excess
straddle cable through the cable anchor and tighten the cable
anchor. Continue with “For Both Options” below.
Option 2: Place brake housing into the frame housing
stops. Pull brake cable tightly and thread across
through the opposite cable anchor bolt. Tighten cable.
Repeat for other side. Continue with “For Both
Options” below.
For Both Options: For brake adjustments, use a 13mm open end wrench and a 5mm hex wrench and loosen the 5mm hex bolt. For
the drive side (right) of the bike turn the spring tension nut with a 13mm open end wrench counter clockwise to increase tension on the
spring. For the non-drive side (left), turn the spring tension nut with a box end wrench clockwise to increase tension on the spring.
When the desired tension is achieved, hold the tension nut with the 13mm wrench and tighten the 5mm hex bolt. The tension on each
side
should be equal so that the brake arms move the same distance when the brake is activated. PLEASE NOTE: that some BMX
frames have the U-Brake flipped and mounted below the seatstays. The direction to tension the springs will still be oriented to how the
picture is oriented.
Rear U-Brake
Option 2
WARNING! Do NOT ride the bike until the brakes are working properly. To test, apply the brakes while trying to push the
bike forward to make sure they will stop the bike
WARNING!
These brakes offer
considerable braking
power with little
leverage force and
require practice at
low speeds before
normal use.