PEDAL INSTALLATION
1. Apply a small amount of grease to the threads of each pedal. look
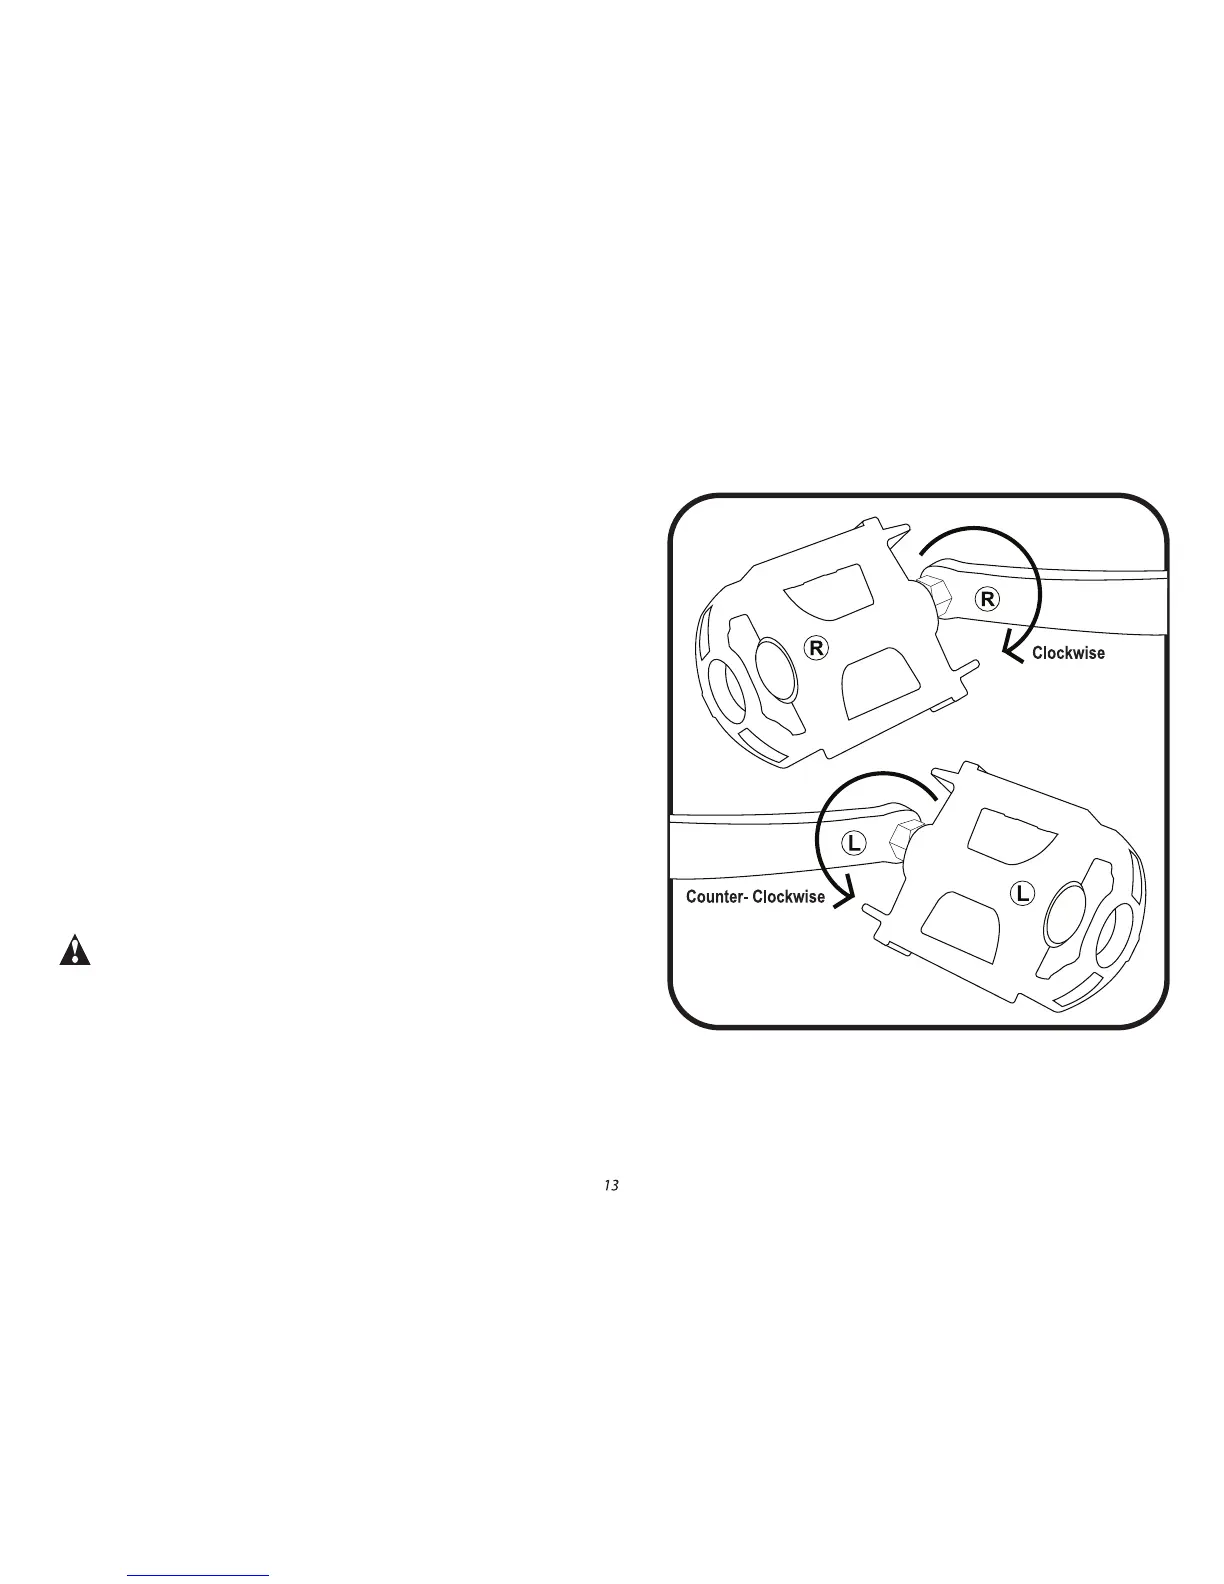
for the letter “L” or “R” on the side or end of each pedal spindle
(picture). Turning the spindle clockwise by hand (Picture), thread the
pedal marked “R” into the crank arm on the right (drive) side of the
bicycle. Make sure that you are not “cross-threading”. which can strip
the threads in the crank arm. If the threads do not turn easily, don’t
force them. Back the spindle out and start over. Once the pedal is
threaded into the crank arm, tighten the spindle securely to the crank
arm with a 15mm open end or an adjustable wrench.
2. Turning the spindle counterclockwise by hand, thread the pedal
marked “L” into the crank arm on the left side of the bike. Make sure
that you are not “cross-threading”. which can strip the threads in the
crank arm. If the threads do not turn easily, don’t force them. Back the
spindle out and start over. Once the pedal is threaded into the crank
arm, tighten the spindle securely to the crank arm with a 15mm open
end or an adjustable wrench.
WARNING! IMPROPERLY INSTALLED AND TIGHTENED PEDALS
CAN WORK LOOSE, DAMAGING THE BICYCLE AND CAUSING
POSSIBLE SERIOUS INJURY OR DEATH TO THE RIDER.
Torque Requirement 15-18 ft. lbs.