Do you have a question about the Kenwood DM-SG7 and is the answer not in the manual?
Specifics on the UK mains plug, fuse replacement, and wiring instructions.
Essential warnings regarding electric shock, moisture, and symbol explanations.
Guidelines on power sources, plug use, and preventing electrical hazards.
Ensuring proper ventilation and protecting the unit from environmental factors.
Advice on avoiding magnetic fields and proper cleaning procedures.
Safety tips on appliance placement, protection from lightning, and handling abnormal smells.
Guidance on servicing, preventing electrical hazards from outlets, and using attachments.
Instructions for unpacking the unit and checking for shipping damage.
List of included accessories to verify upon unpacking.
Specific compliance information for the USA regarding laser product safety.
Ability to search for music tracks on a Mini Disc by their registered titles.
Details on the unit's 1-bit DAC and optical input for high-fidelity audio.
Functionality for recording CD tracks with one-touch operation when linked with a CD player.
Overview of editing capabilities like reordering, dividing, combining, and erasing tracks.
Displaying text information from CDs, such as disc and track titles.
Guidance on unit placement to minimize vibration and prevent dust ingress.
Information on memory retention, copyright warnings, and condensation precautions.
Explanation of the CD-TEXT standard and its use with the MD unit.
Proper methods for handling, cleaning, and storing Mini Discs to prevent damage.
How to prevent dust from entering the disc cartridge during operation.
Steps to take before transporting or moving the unit to prevent damage.
Instructions for cleaning the unit's exterior and avoiding contact cleaners.
Overview of the Mini Disc system's capabilities, including random access and recording time.
Description of MDs used solely for playback, similar to CDs.
Explanation of how recordable MDs use magneto-optical technology for recording.
Explanation of ATRAC technology for compressing audio data and enabling longer recording times.
How audio frequencies are perceived by the human ear and the masking effect.
How the unit uses memory to prevent audio interruptions during playback, even with vibration.
Visual guide showing how to connect the MD unit to other components like CD players.
Information on using the DIGITAL IN (OPTICAL) jacks for audio input.
Key considerations for connecting cords firmly and safely, including unplugging the power cord.
Specific instructions for connecting and handling the optical fiber cable for digital audio transmission.
Procedure for plugging and unplugging the system control cord for integrated operation.
How connecting via system control cord enables easy operation and timer functions.
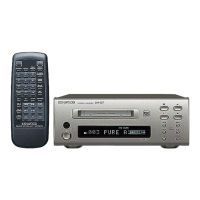
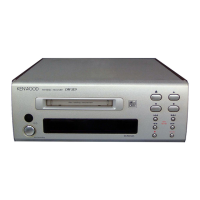
Identification and explanation of indicators, displays, and buttons on the main unit.
Location of the sensor for receiving signals from the remote control.
Detailed explanation of each button's function on the main unit (e.g., Record, Play, Stop).
Explanation of the standby mode and its implications for unit operation and memory backup.
Diagram and overview of the remote control unit's buttons and their functions.
Functions of keys related to programming tracks, character input, and checking contents.
Explanation of keys for basic playback, recording, and advanced editing operations.
Keys for controlling display modes and initiating recording functions.
Usage of numeric keys for track selection and title input operations.
Step-by-step guide for inserting batteries into the remote control unit.
How to turn the unit on/off and operate it using the remote control.
Diagram illustrating the optimal angle and distance for remote control operation.
Important notes regarding battery life, remote range, and potential interference.
Procedure for playing tracks sequentially from track number 1.
Steps for correctly inserting a Mini Disc into the unit for playback.
How to initiate playback and what the display indicates during the process.
Instructions for selecting and playing specific tracks by number or intermediate position.
How to enable and use random playback mode for varied listening.
Information on playing discs recorded in monaural mode and its impact on playback time.
Methods for skipping tracks forward or backward during playback.
Using the cursor keys to search for specific points within a track.
How to temporarily pause and completely stop the disc playback.
Procedure for safely removing the Mini Disc from the unit.
Steps to find and play tracks using their assigned titles.
How the search function displays titles and track numbers.
Step-by-step guide to creating a custom playback sequence of tracks.
How to input desired track numbers for programming using numeric keys.
Finalizing the input of a track number into the program sequence.
Initiating playback of the programmed track order.
Procedure for adding more tracks to an existing program sequence.
How to review the sequence of tracks in the current program.
Methods for deleting specific tracks or the entire program from memory.
How to set the unit to repeat only the programmed tracks.
Instructions for setting the unit to repeat the entire Mini Disc.
How to disable the repeat playback function.
Steps before analog recording, including disc preparation and time checks.
Selecting analog stereo or mono modes for recording.
Choosing between automatic (AUTO) or manual (MANUAL) track numbering.
How to set and adjust the input recording level for optimal sound quality.
Initiating the recording process and using the pause function.
Procedure for safely ejecting the disc after recording is complete.
Detailed explanation of the AUTO/MANUAL key for track numbering during recording.
Steps for preparing digital recording, including CD input selection and disc setup.
Choosing between DIGITAL 1 or DIGITAL 2 inputs for digital sources.
Selecting AUTO or MANUAL mode for track numbering during digital recording.
Initiating the digital recording process and understanding potential display messages.
Ensuring the source CD player is ready for recording.
Procedure for ejecting the Mini Disc after digital recording is complete.
How to pause and resume recording, or stop it entirely.
How to monitor the sound from connected digital equipment or the REC INPUT source.
Conditions where digital recording is not possible, such as SCMS or UNLOCK.
Details on common digital sampling frequencies and the unit's conversion capabilities.
Explanation of the Serial Copy Management System for copyright protection.
Steps to connect a CD player and prepare the Mini Disc for synchronized recording.
How to record a single track from a CD using the One Touch Edit function.
Procedure to record all tracks from a CD using the One Touch Edit function.
Simultaneous recording and playback between MD and CD player for uninterrupted transfer.
How to switch between different time display modes (elapsed, remaining, etc.).
How to display CD-TEXT information (disc/track titles) from a connected CD player.
Overview of available editing operations for Mini Discs.
How to change the order of tracks on the disc.
Functions for splitting a track or merging two tracks into one.
Methods for erasing single tracks, multiple tracks, or the entire disc.
How to scroll text on the display for easier viewing during input operations.
Detailed steps for moving a track to a desired position and renumbering surrounding tracks.
How to choose the new track number for the item being moved.
Finalizing the track movement operation and understanding execution results.
Procedure for ejecting the Mini Disc after editing operations are complete.
How to revert edited changes before the disc is removed.
Visual representation of how tracks are moved and re-arranged.
Procedure for moving multiple tracks simultaneously to a new sequence.
How to select the specific tracks to be moved as a group.
Finalizing the movement of multiple selected tracks and understanding the results.
Visual illustration of tracks being moved together.
How to split a single track into two at a specific point.
Choosing the exact position within a track to perform the division.
Using the preview function for fine-tuning the track division point.
Finalizing the track division operation and understanding the outcome.
Visual representation of a track being divided into two parts.
Visuals showing the preview function for track division adjustment.
How to merge two tracks into a single track.
Choosing the tracks to be combined and setting the operation.
Finalizing the track combining process and understanding the results.
Visual representation of tracks being combined into one.
How to erase multiple tracks at once from the Mini Disc.
Choosing specific tracks to be erased using the QUICK ERASE function.
Procedure to erase all titles and tracks on the disc.
Finalizing the erasure of selected tracks and understanding the outcomes.
Visuals illustrating the process of erasing tracks, either individually or multiple at once.
How to erase one specific track during playback.
Steps to confirm and execute the erasure of a single track.
Using TRACK DIVIDE and TRACK ERASE to remove a segment from a track.
Visuals showing how to divide a track and then erase the unwanted segment.
Entering the mode for editing disc, track, or preset titles.
Choosing whether to edit the disc title, track titles, or preset titles.
Information on the total number of characters allowed for titles and inputting them.
Navigating through character groups (A-Z, a-z, 0-9, symbols) for title input.
Choosing individual characters and entering them to form titles.
Saving the entered title into memory and completing the assignment.
Procedures for modifying or removing existing titles character by character.
Moving the cursor to the character that needs to be edited or deleted.
Choosing between replacing characters or inserting new ones.
Finalizing title edits and saving the changes.
Information on using and modifying preset titles for efficiency.
Examples of changing preset titles and adding titles to tracks.
Steps to copy text information from a CD-TEXT disc to the MD.
Procedure for recording while simultaneously copying text data.
How to reset the microprocessor to resolve malfunctions or erroneous displays.
Troubleshooting common issues arising from MD standard limitations.
Explanation of common error messages and the corresponding corrective actions.
Troubleshooting for other issues like no sound output, recording problems, or distorted sound.
Technical details on the MD system format, laser, recording method, and playback rotation.
Specifications for D/A conversion, A/D conversion, and digital audio performance.
Details on power consumption, dimensions, and weight of the unit.
Information regarding compliance with Canadian Interference-Causing Equipment Regulations.
| system | Minidisc digital audio system |
|---|---|
| laser | Semiconductor laser |
| recording method | Field modulation overwrite method |
| audio compression | ATRAC (Adaptive TRansform Acoustic Coding) |
| playing rotation | Approx. 400 rpm ~ 900 rpm (CLV) |
| D/A conversion | 1 Bit |
| oversampling | 128 fs (5644.8 kHz) |
| A/D conversion method | Sigma-delta method |
| sampling frequency | 44.1 kHz |
| frequency response (playback mode) | 8 Hz ~ 20 kHz, ± 1 dB |
|---|---|
| signal to noise ratio (playback mode) | More than 92 dB |
| dynamic range (playback mode) | More than 90 dB |
| total harmonic distortion (1 kHz, playback mode) | Less than 0.007 % |
| channel separation (1 kHz, playback mode) | More than 85 dB |
| wow & flutter | Less than unmeasurable limit |
| analog input sensitivity / input impedance | 300 mV / 70 kΩ |
|---|---|
| analog output level / load impedance | 1.2 V / 3.2 kΩ |
| digital input, optical (wave length 660 nm) | - 15 dBm ~ - 21 dBm |
| power consumption | 14 W |
|---|---|
| dimensions (width) | 200 mm (7 - 7 / 8") |
| dimensions (height) | 77 mm (3 - 1 / 16") |
| dimensions (depth) | 247 mm (9 - 3 / 4") |
| weight (net) | 2.1 kg (4.6 lb) |