8 440…N-SH-e-0840
7 To Replace PCB
1. Disassemble top housing of scale.
2. Disconnect PL1, PL2, PL3, JP1 and BZ1 from the PCB. Disassemble the ground wire
screw.
Replace a new PCB. Connect PL1, PL2, PL3, JP1 and BZ1 again.
Assemble the ground wire with screw.
3. Assemble the top housing.
4. Perform internal calibration as described in section 3.
5. Check accuracy of scale at different weight.
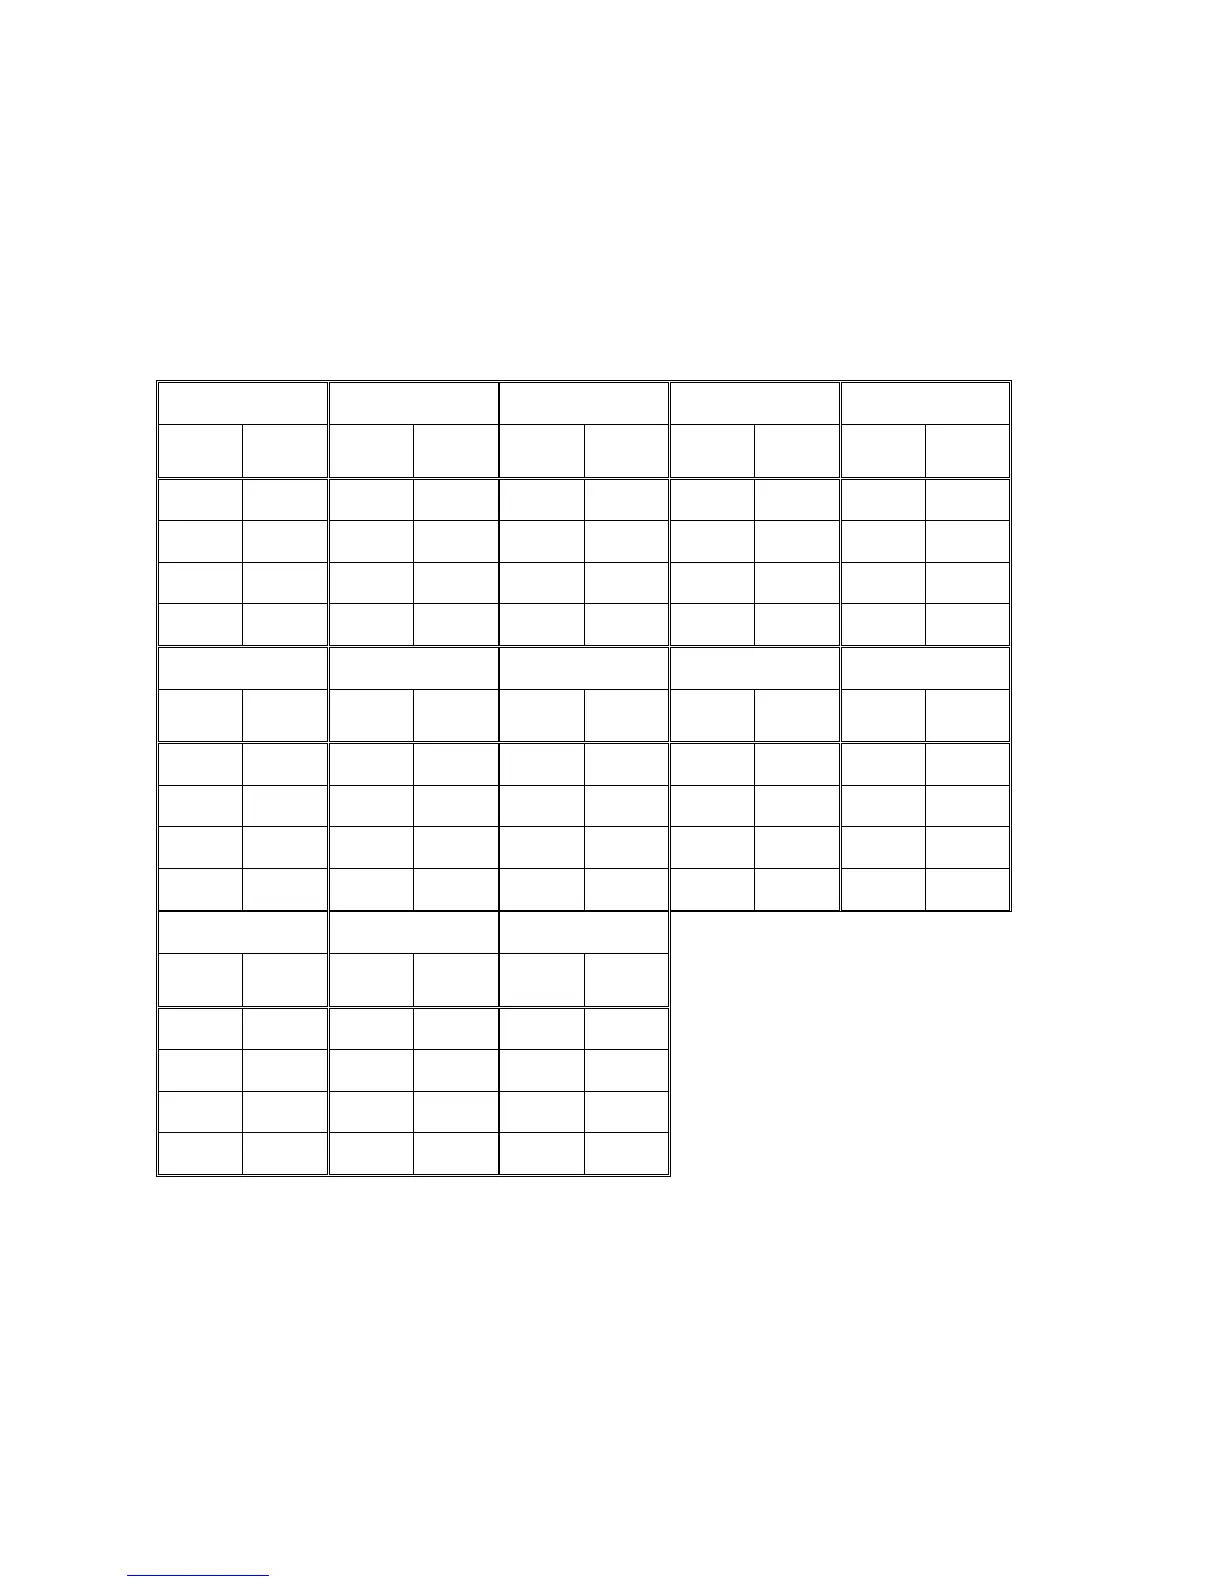
440-21N 440-33N 440-35N 440-43N 440-45N
weight
(g)
tol.
(g)
weight
(g)
tol.
(g)
weight
(g)
tol.
(g)
weight
(g)
tol.
(g)
weight
(g)
tol.
(g)
10.000 0.003 50.00 0.02 100.00 0.03 100.0 0.2 200.0 0.2
20.000 0.003 100.00 0.02 200.00 0.03 200.0 0.2 500.0 0.2
30.000 0.003 150.00 0.02 300.00 0.03 300.0 0.2 700.0 0.2
40.000 0.004 200.00 0.02 400.00 0.04 400.0 0.2 1000.0 0.2
440-47N 440-49N 440-51N 440-53N 440-55N
weight
(g)
tol.
(g)
weight
(g)
tol.
(g)
weight
(g)
tol.
(g)
weight
(g)
tol.
(g)
weight
(g)
tol.
(g)
500.0 0.2 1000.0 0.3 1000 2 1000 2 1000.0 0.6
1000.0 0.2 2000.0 0.3 2000 2 2000 2 2000.0 0.6
1500.0 0.2 3000.0 0.3 3000 2 4000 2 4000.0 0.6
2000.0 0.2 4000.0 0.4 4000 2 6000 2 6000.0 0.6
440-35A 440-21A 440-49A
weight
(g)
tol.
(g)
weight
(g)
tol.
(g)
weight
(g)
tol.
(g)
100.00 0.03 10.000 0.003 1000.0 0.3
200.00 0.03 20.000 0.003 2000.0 0.3
400.00 0.04 40.000 0.004 4000.0 0.4
600.00 0.04 60.000 0.004 6000.0 0.4
6. Check other functions, such as Tare, Menory, Print, Mode and Auto-Off.