Do you have a question about the Keter MONTFORT 757 and is the answer not in the manual?
Instructions to activate product warranty by visiting the website and filling a form.
Instructions for leveling the ground surface, including recommendations for foundation construction.
Advice on ensuring sufficient external space around the shed for assembly access.
Specifies the external floor dimensions of the shed in inches and centimeters.
Key steps before starting assembly, including reading safety, checking parts, and reviewing instructions.
Lists necessary tools and specifies that assembly requires two people.
Identifies and lists the parts for the shed floor, including codes and quantities.
Identifies and lists the various wall panel parts with their respective codes and quantities.
Identifies and lists the components that make up the shed roof, including codes and quantities.
Lists and illustrates the individual parts that constitute the shed doors, with codes.
Identifies and lists the metal components used in the shed construction, including codes.
Details different types of screws, fasteners, and small miscellaneous parts, including their codes and sizes.
Notes on potential variations in assembled size and availability of spare parts.
Instructions for assembling the floor base using MOFFL parts.
Instructions for securing the floor panels using sc15 screws.
Instructions for installing a corner post (MOC) as part of the wall assembly.
Instructions for attaching the first wall panel (MOSBP) to the base.
Instructions for attaching another wall panel (MOSBP) to the structure.
Instructions for attaching a third wall panel (MOSBP) to the shed structure.
Instructions for attaching the last wall panels (MOSBP) to complete the walls.
Instructions for securing the assembled wall structure, likely by tapping or pushing panels.
Instructions for fastening the wall panels together using s13b screws.
Instructions for installing an additional support piece (MOC) into the wall structure.
Instructions for attaching an internal panel (MOSBP) to the wall assembly.
Instructions for attaching the last wall panels (MOSBP) to complete the walls.
Instructions for making final adjustments and securing the wall panels.
Instructions for reinforcing the corners of the shed walls using s13b screws.
Instructions for installing a door frame support piece (MOC) into the wall structure.
Instructions for attaching the side elements of the door frame (MOCPL).
Instructions for installing the top part of the door frame (MODPL) into the structure.
Instructions for installing the bottom part of the door frame (MOCPL).
Instructions for securing the complete door frame assembly using s13b screws.
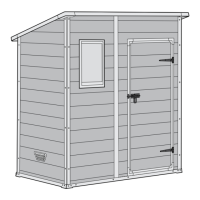
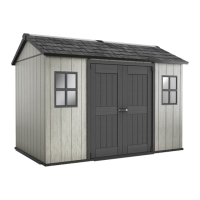
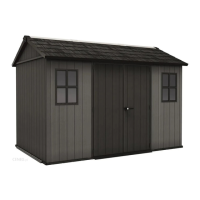
| Material | Resin |
|---|---|
| Color | Grey |
| Internal dimensions | 201 x 201 x 246 cm |
| Floor included | Yes |
| Ventilation | Yes |
| Lockable | Yes |
| Assembly Required | Yes |
| Weather Resistant | Yes |
| UV Protected | Yes |
| Door opening | 131 x 181 cm |