Do you have a question about the Keter MANOR 6x5SD and is the answer not in the manual?
Ensure the ground surface is level before assembly begins.
Construct a stable base using wood or concrete for optimal shed foundation.
Use the included spatula for easier panel insertion into profiles.
Assembly of the shed is designed for and requires the assistance of two people.
Read all assembly instructions and safety guidelines before starting to ensure correct assembly.
Verify that all parts are present and undamaged before beginning assembly.
Unpack and spread out all parts, using imprinted codes for easy identification.
Identification of all components belonging to the shed's floor structure.
Identification of all components related to the shed doors.
Identification of all components for the shed's walls.
Identification of all components that form the shed's roof.
Identification of all components related to the shed windows.
Identification of standard screw types used in assembly with their quantities and sizes.
Identification of self-drilling screw types used for assembly.
Recommendation for using a powerful electric screwdriver for efficient assembly.
Note that extra small parts may be included for use as spares.
Disclaimer regarding potential slight variations in assembled size due to production differences.
Attaching specific components (d1b, msl, msr) to form part of the floor structure.
Correct orientation of the floor panel, indicated by "This side up".
Instructions for turning over and handling the floor panel, requiring two people.
Securing floor panels into profiles using screws along marked lines.
Securing wall panels into profiles using screws as per instructions.
Preparing a floor panel by turning it over for subsequent wall attachment.
Attaching side wall panels (c1b, w1a) into the profiles correctly.
Attaching the back wall panel (bd1a) into the profiles, noting orientation.
Continuing to secure wall panels by fitting them into profiles and screwing.
Attaching a specific wall component (h1b) where parts meet tangentially.
Installing corner or edge panels (c1b, bula) into the structure.
Final step of securing wall panels by fitting and screwing them into profiles.
Installing a vertical wall panel (h1a) by fitting it into the profile.
Attaching front or side wall sections (w1a, c1b) into the profiles.
Reinforcing the structure by fitting panels and securing them with screws (s13b, s26b).
Securing front or side panels (w1a) by fitting them into profiles and screwing.
Attaching front wall panels (h1a, w1a) by fitting them into the profiles.
Securing front door frame elements (fd2b) with screws (s26b).
Assembling door panels (c1b) using screws (s13b, s26b).
Attaching left (lm) and right (rm) door components.
Attaching the primary roof support structure (fu2a) using screws (s26b).
Installing a roof edge component (mdfl) with a self-drilling screw (ds2b).
Installing the opposite roof edge component (mdfr) with a self-drilling screw (ds2b).
Installing the roof ridge component (mtm).
Securing internal structural supports (mdt) using self-drilling screws (ds2b).
Installing long screws (s50b) at specific points in the structure.
Adding reinforcing screws (s10b) to key structural points.
Final securing of the shed structure using a high quantity of screws (s26b).
Securing roof panels by fitting them into profiles and screwing.
Attaching main roof panels (rla, e1b, ela) and edge pieces (rc), noting orientation.
Final step of securing roof panels by fitting them into profiles and screwing.
Instructions for turning over the roof panel to its final position.
Extensive securing of the roof structure using a large number of screws (s26b).
Visual confirmation of the roof installation being completed.
Final adjustment of the roof to ensure it's fully down, using the spatula.
Securing the roof edges by screwing onto the marked lines.
Assembling the left and right door frames using specific components (smdw, dc).
Attaching door panels (mfr, mdr, mdl, mfl) to the frames, aligning profiles.
Installing door panel sections (ldd, rdd) into the door frame.
Instructions for turning over the door panel for correct positioning.
Securing the door panels using self-drilling screws (ds2b).
Attaching door hardware components (mpn, mtl, mbl) using screws (s10b).
Installing window frames (smdh) using screws (s13b).
Connecting specific window mechanism parts (smdl, smdp) in sequence.
Securing the assembled window mechanism using screws (s13b) and part (smdb).
Attaching window latches or stops (V) with a click mechanism.
Installing window hinges or fasteners (kc) using screws (s26b).
Assembling the window panes (smwf) into their frames.
Installing the window frames (smwg).
Securing the assembled windows using screws (sc15).
Affix the shed to the foundation by drilling holes and screwing it in using appropriate screws.
The shed is designed solely for storage purposes, not for habitation.
Strongly recommended to secure the shed to an immovable object or anchor to the ground.
Avoid attempting assembly during windy or cold weather conditions.
Periodically check the shed for stability and ensure the site remains level.
Exercise caution when handling shed parts that have steel edges.
Use only the tools specified in the user manual for assembly and handling.
Always wear work gloves, safety goggles, and long sleeves during assembly or maintenance.
Avoid using lawnmowers or mechanical scythes in close proximity to the shed.
Wear safety goggles and follow manufacturer instructions when using power tools.
Clean the shed with a hose or mild detergent; avoid abrasive cleaners.
Do not store hot items, volatile chemicals, or recently used grills in the shed.
Avoid placing heavy items against the walls to prevent distortion.
Keep the roof clear of snow and leaves to prevent structural damage.
Consider wind direction when locating the shed; keep doors closed when not in use.
Do not stand on the roof of the shed.
Consult local authorities regarding any required permits for erecting the shed.
Warranty covers manufacturing/material defects for 10 years from original purchase.
Excludes normal wear and tear, misuse, accidents, and natural disasters.
Improper assembly, handling, or commercial use voids the warranty.
Keter is not liable for third-party damage or loss of items inside/near the shed.
Process for making a warranty claim, including proof of purchase and defect evidence.
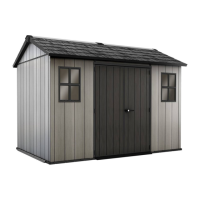
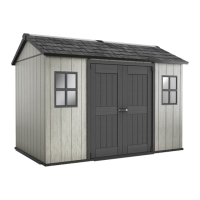
| Roof Type | Sloped |
|---|---|
| Ventilation | Yes |
| Floor included | Yes |
| Lockable | Yes |
| Assembly Required | Yes |
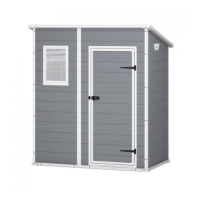
| Color | Grey |
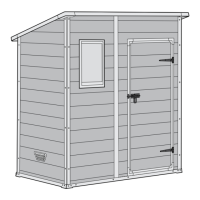
| Doors | Double |
| Material | Polypropylene resin plastic |