MIG WELDING SET-UP AND OPERATION
SET UP FOR MIG WELDING
Installing the MIG Welding Gun
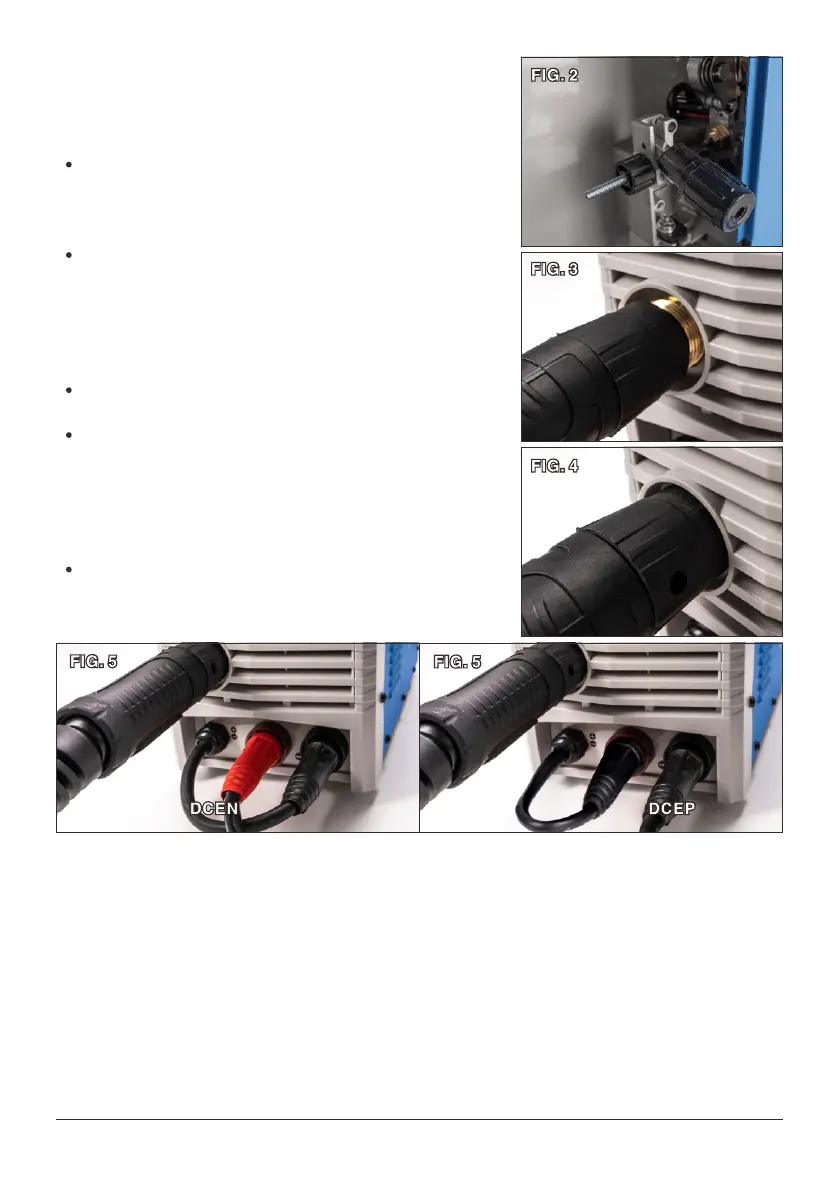
Open the side door of the Welder and loosen the Torch
Tensioner Wing Screw located on the side of the brass,
hex shaped member of the Drive Motor Assembly (FIG 2).
Plug the Brass Body End of the Welding Gun line into the
designated socket (FIG 3).
IMPORTANT NOTE: The Brass Body End must be fully
seated against the base of the drive assembly socket or
gas may either leak or not be able to pass through the
connections to the end of the Welding Gun (FIG 4).
Tighten the Torch Tensioner Wing Screw finger tight (FIG
3).
Connect the Male Metal Plug to the Female Cannon Plug
connection on the front of the Welder (FIG 5).
FLUX(DCEN)
CO2 100%(DCEP)
Ar/CO2 Mix(DCEP)
AL(DCEN)
Set the MODE button located on the Front Panel to the
MIG(Flux, CO2 100% or Ar/CO2 Mix/AL Position (FIG 1).
Install torch and liner for Aluminum welding
Remove the spring on the plastic parts of wire feeder (FIG.5-1), keep it in safe place, need to
install it back when we use ss or carbon steel weld. Remove the holding ring on steel liner of wire
feeder, press steel liner (FIG.5-2)and let it move out of the torch sockets on front panel, keep it in
safe place, need install it back when we weld with ss and carbon steel. use torch kid remove the tip
(FIG.5-4) on the torch, remove the screw (FIG.5-5) on torch liner back.
Page 08



 To Next Page