KL/RX2
Master Control Panel
KL/RX2-2012G
THE INSTALLATION OF THIS SYSTEM MUST BE CARRIED OUT BY A QUALIFIED ELECTRICIAN
THE GUARANTEE WILL BE VOIDED IF THIS IS NOT FOLLOWED
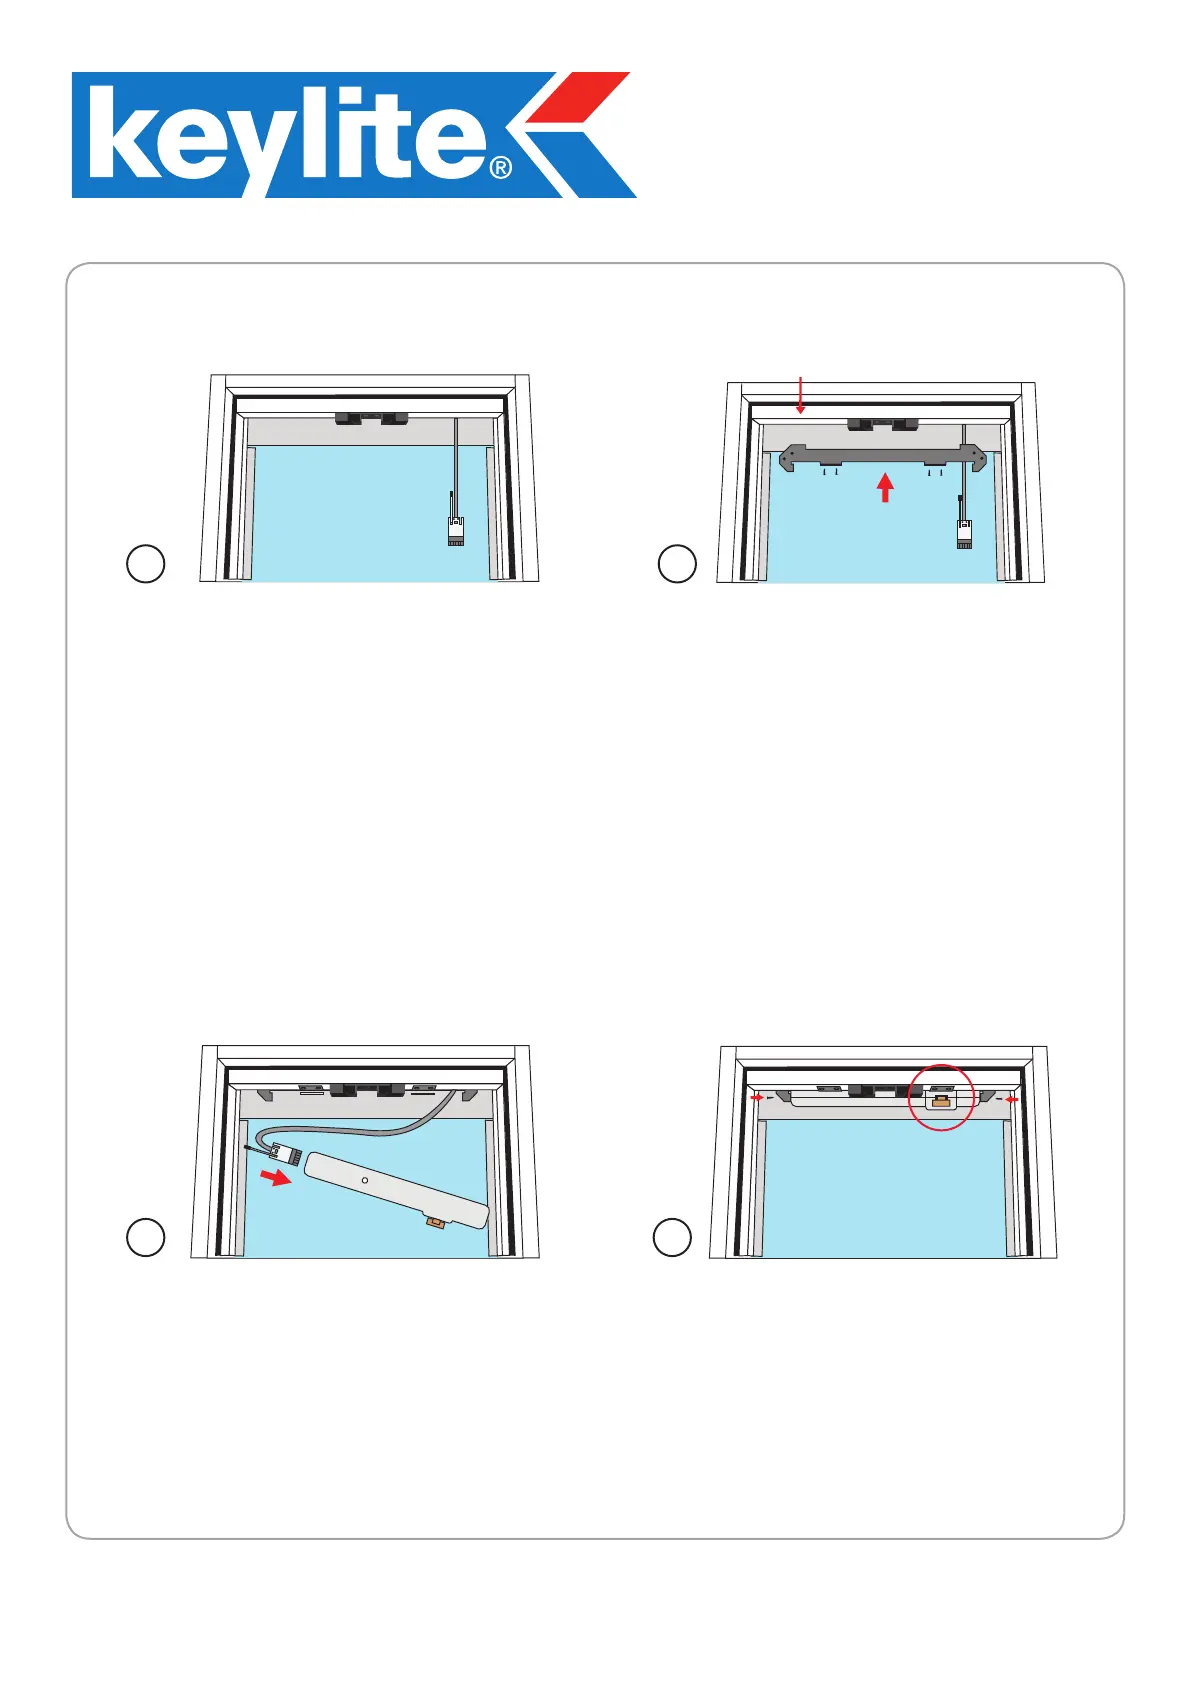
Please make sure there is approximately 500mm of
cable remaining in the room (fig 3).
NB. If your kit contains a rain sensor it should be
connected and fitted at this stage.
Now ensure all components are correctly wired up
as per wiring diagram supplied with your kit.
NB. If your kit contains a wall mounted switch it should be
connected and fitted at this stage. (Please follow wiring
diagram supplied with your kit.)
3
Attach the motor mounting bracket to the latch
keep timber using 4 No. 25mm screws (fig 4).
Centre the bracket on either side of the latch keep.
4
Latch Keep Timber
Plug the cable into the motor, ensuring that it is fully
connected (fig 5).
NB. If your kit contains a remote control it should be
programmed at this stage. (Please follow programming
instructions as per wiring detail.)
5
Fix the motor using 2 No. shoulder bolts. Ensure
that the chain connector is facing inwards to the
right of the latch keep (circled in fig 6). Once
the motor is securely in position, feed the excess
cable back up through the top of the frame.
6