KL/RX2
Master Control Panel
KL/RX2-2012G
THE INSTALLATION OF THIS SYSTEM MUST BE CARRIED OUT BY A QUALIFIED ELECTRICIAN
THE GUARANTEE WILL BE VOIDED IF THIS IS NOT FOLLOWED
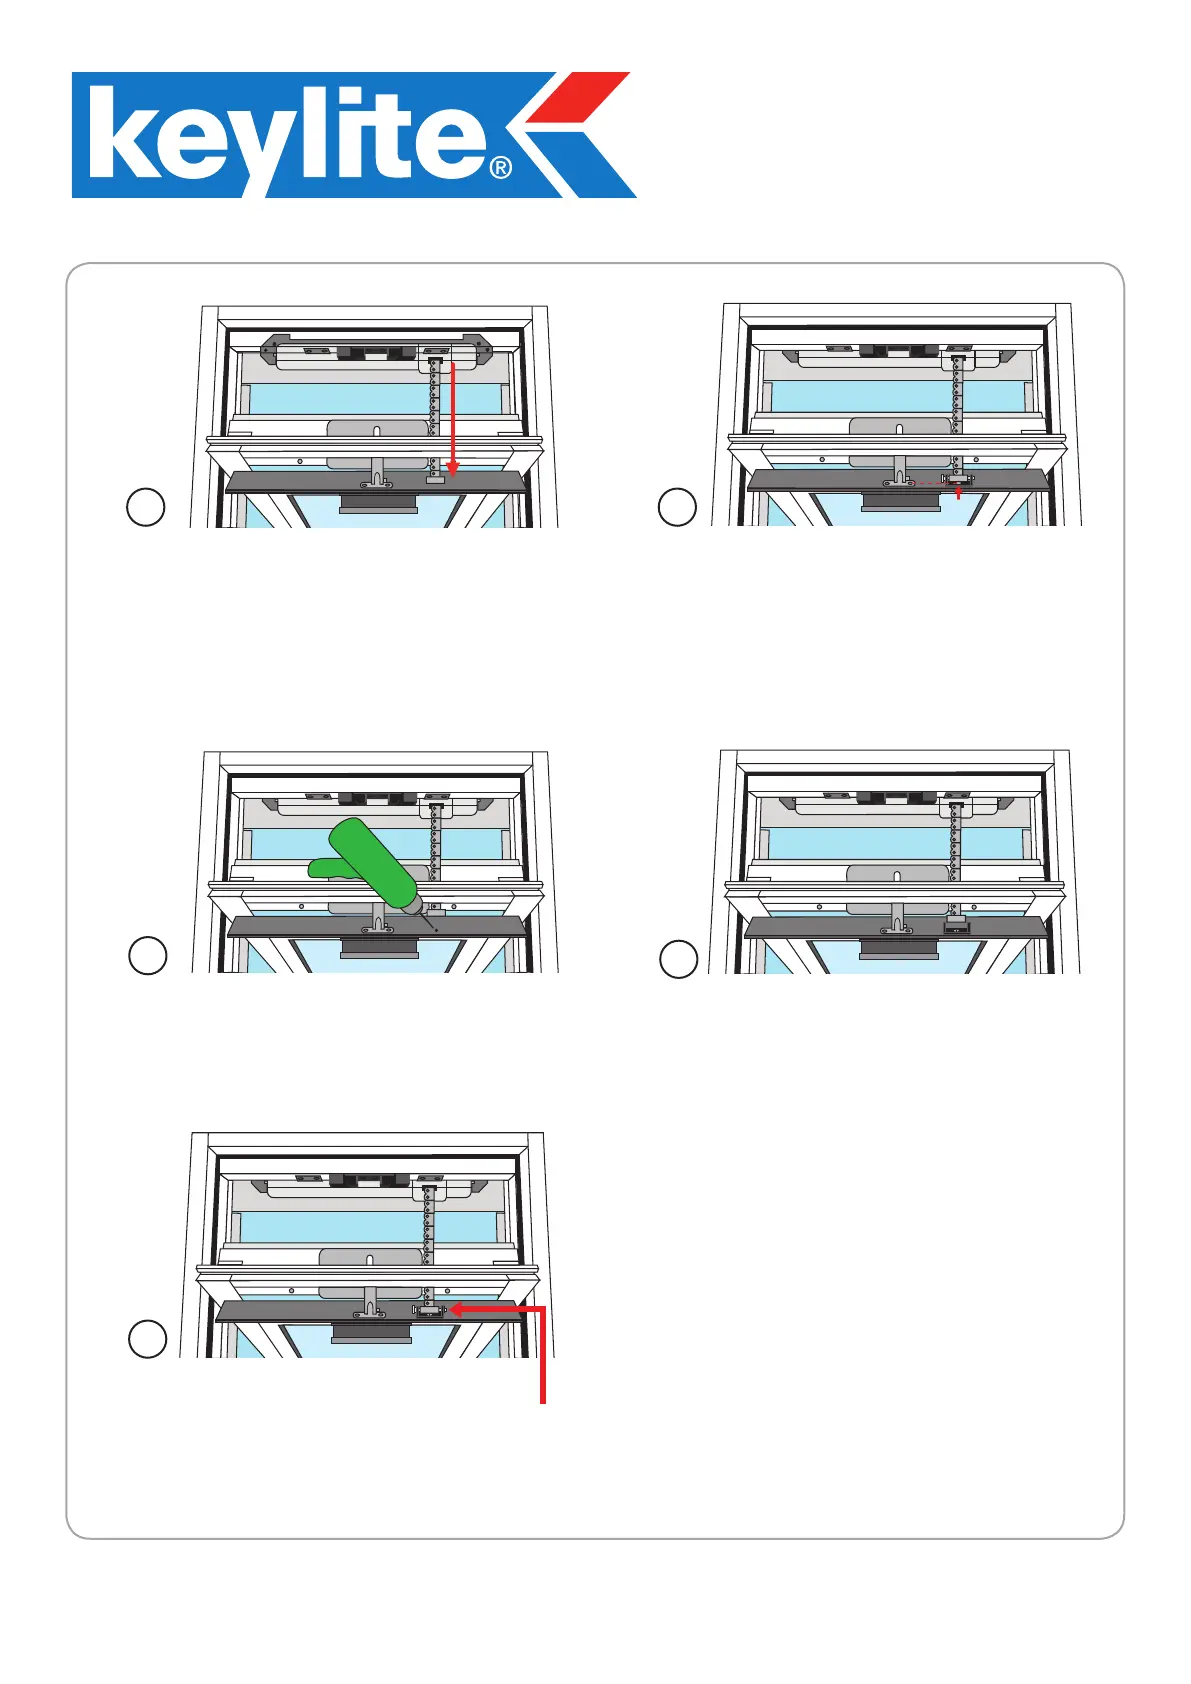
In order to attach the sash to the motor, fully
extend the chain connector by pressing the
down-arrow button on the wall mounted switch
(fig 7). If you have opted not to fit a wall mounted
switch you will then have to activate it using your
remote control.
7
Once the chain is fully extended, use the
connector bar to attach the chain to the vent
flap bracket. Ensuring that you keep the chain
straight, line up the vent flap bracket as shown
(fig 8) and mark.
8
Drill a 5mm hole through the vent flap (fig 9).
9
Attach the vent flap bracket using 1 No. 16mm
bolt and dome head nut (fig 10).
10
Feed the connector bar through the vent flap
bracket and the chain connector. Secure with the
cotter pin (fig 11).
11