Installation Note N9030-90058 23
Option EXM, External Mixing Upgrade Kit
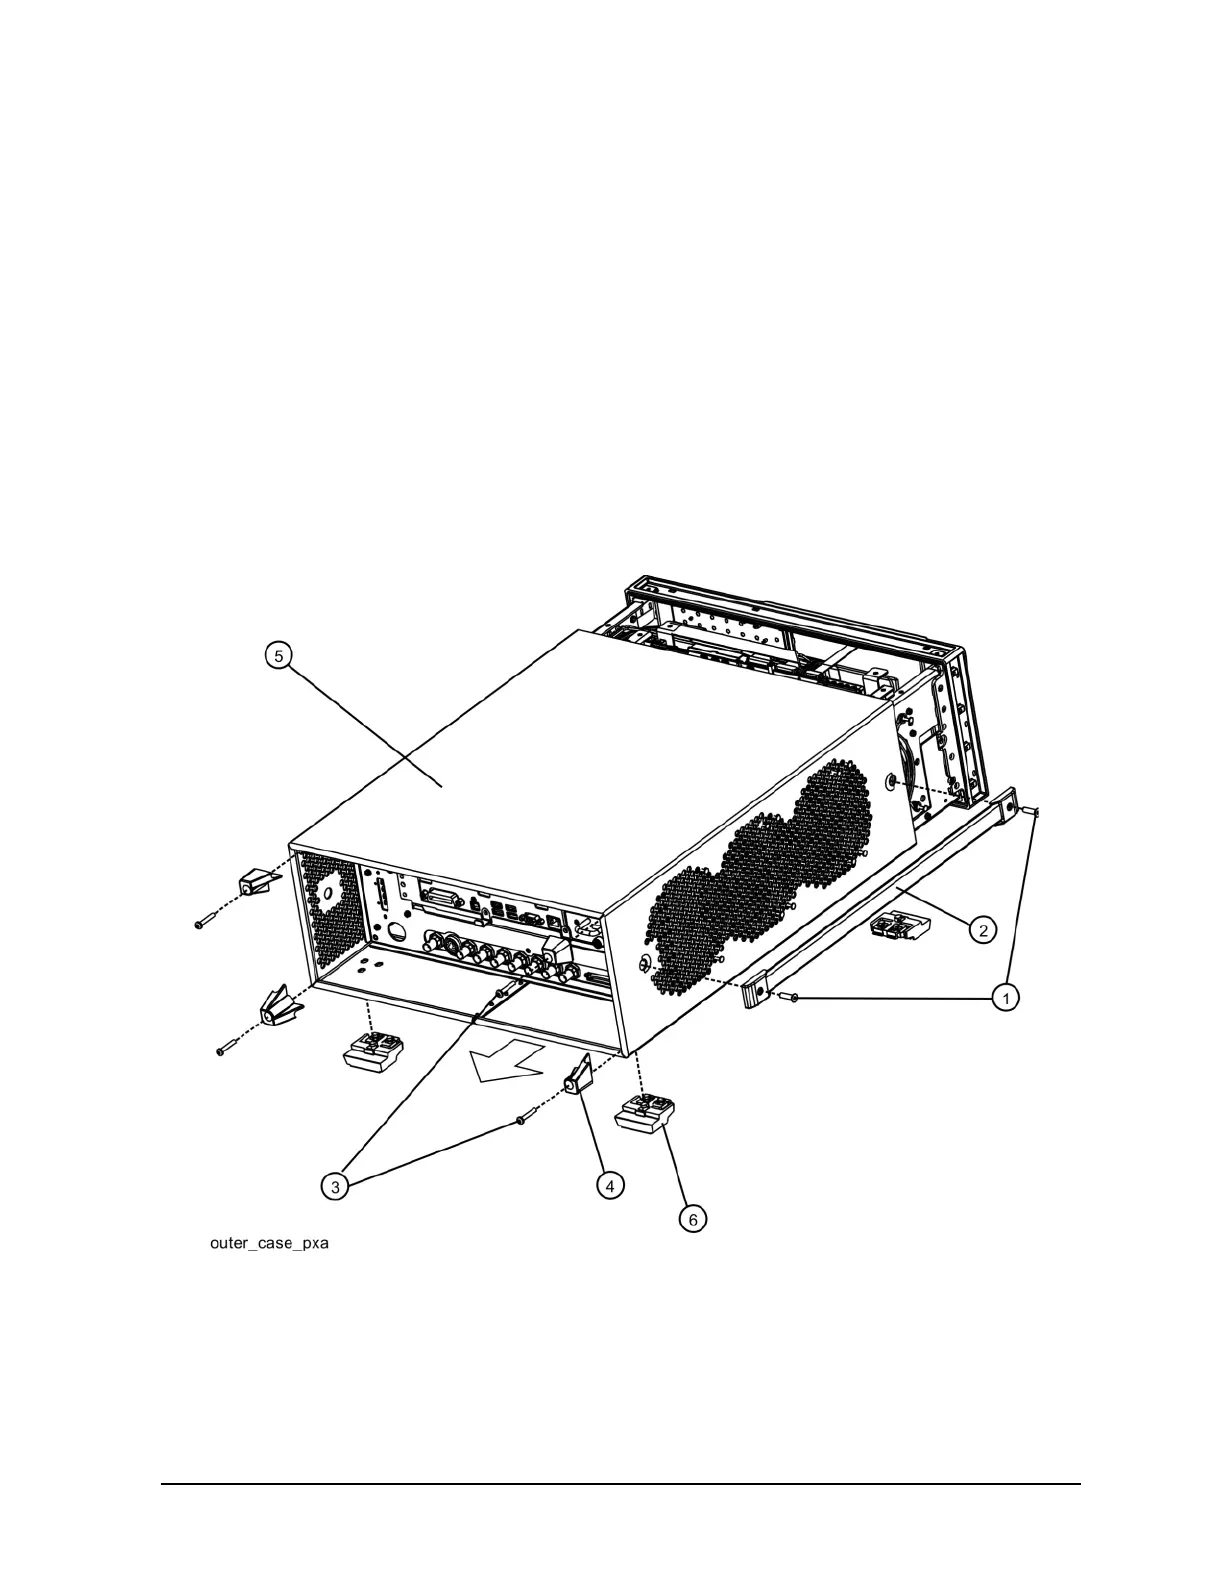
Final Assembly
1. Refer to Figure 19. Slide the instrument cover back onto the deck from the rear. The seam on the
cover should be on the bottom. Be sure the cover seats into the gasket groove in the Front Frame
Assembly.
2. Replace the four rear feet to the rear of the instrument. Torque the rear feet screws (0515-1619 and
3050-0893 washers) to 21 inch pounds.
3. Replace the bottom feet by sliding into place until they snap in. Install the locks by pressing in flat.
4. Replace the handle straps on both sides of the instrument. Torque the handle strap screws to 21
inch pounds.
5. Locate the 50 ohm SMA termination in the kit, part number 1810-0118. Attach the SMA
termination to the front panel EXT MIXER connector.
Figure 19 Instrument Outer Cover Replacement
 Loading...