Page 4
Installation Instructions
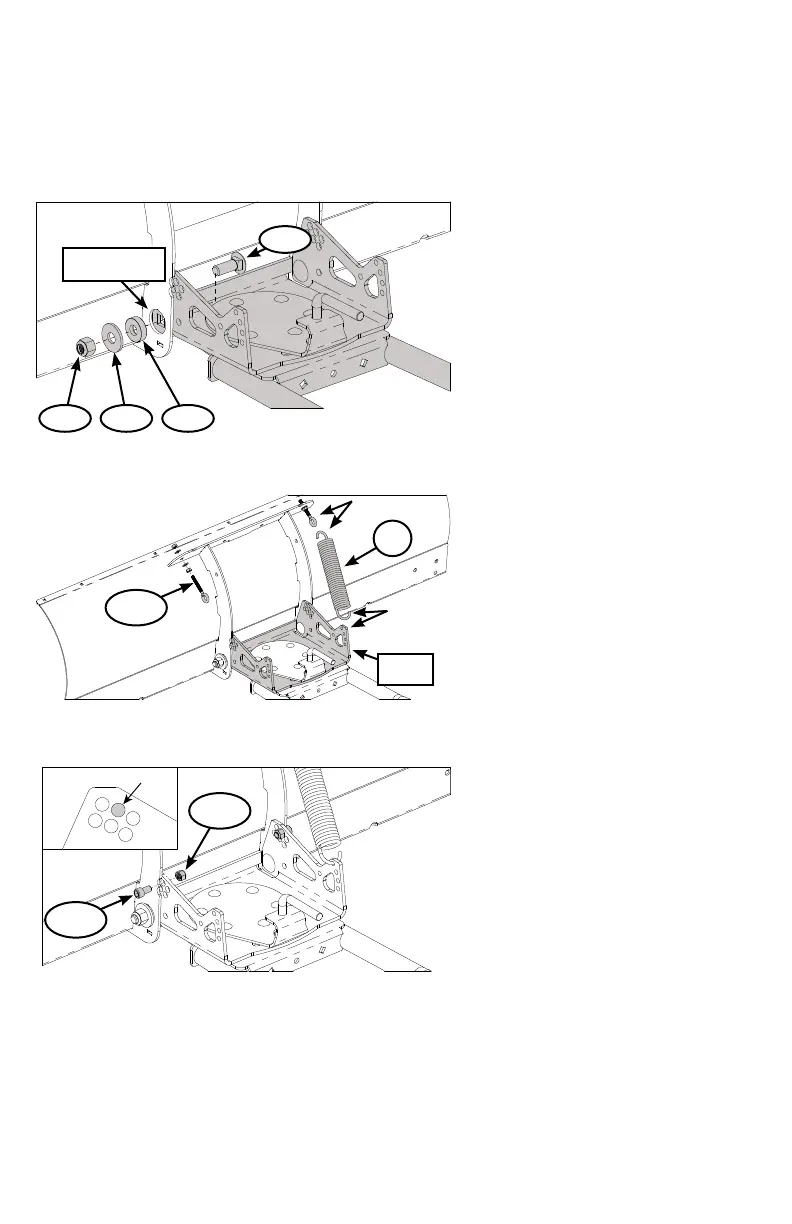
1. To secure the blade to the tube system,
place the pitch bushing (Item 7.3.1) into
the hole in the blade gusset. Secure the
tube system and the blade together with
carriage bolt (7.1.4), washer (7.1.3) and
lock nut (7.1.2), as shown in Figure 1.
Repeat on other side.
2. Insert the plow springs (Item 7.4) into the
top smaller rear holes in the ATV cradle,
as shown in Figure 2. Place the eyebolts
(Item 7.1.8) onto the end of the plow
springs and secure the eyebolts onto the
plow blade gusset, as shown in Figure 2.
Leave spring tension loose as you will
decide tension in Step 5.
3. Assemble on machine and decide desired
pitch of blade. (Blade pitch controls the
angle of which the blade contacts the
ground.) Each hole is 5 degrees of blade
pitch adjustment.
Note: Figure 3 shows the default position.
Recommened for propper blade level.
4. With springs installed pitch blade under
tension and install socket head cap screw
(7.1.5) and lock nut (7.1.1) into desired
pitch position hole.
5. Tighten nuts down on eye bolt until
desired spring tension is reached.
Note: For each 1/4” that the nut is
tightened it will add 12 lbs of spring
tension.
ATV
CRADLE
7.4
7.1.8
“Figure 2” Spring Assembly
“Figure 1” Pivot Bolt Assembly
BLADE GUSSET
HOLE
7.1.4
7.3.17.1.37.1.2
“Figure 3” Pitch Adjustment Bolt
(Spring not shown for clarity.)
DEFAULT LOCATION
7.1.1
7.1.5